Growing mums in pots is genuinely one of the more rewarding things you can do in a container garden, but it only works well when you get a few specific things right: the pot size, the watering rhythm, the pinching timing, and knowing what type of mum you actually bought. If you want to take what you learn from growing mums in pots a step further, see how to grow garden mums for the related planting and seasonal care differences. Nail those, and you get reliably full, colorful blooms every fall. Skip them, and you end up with a leggy, bud-dropping plant that looks half-dead by October. This guide walks you through every step, from picking the right plant at the garden center to keeping it alive through winter for a shot at rebloom.
How to Grow Potted Mums: Step-by-Step Care and Fixes

Harriet Whitmore
28 Apr 2026
Picking the right mum and buying it at the right time
Almost every mum you'll find at a nursery or garden center is Chrysanthemum x morifolium, which covers florist mums, pot mums, and what's often labeled as 'hardy garden mums.' The species name alone doesn't tell you much. What actually matters is the specific cultivar and whether the plant tag says it's hardy in your USDA zone. Zones 5 through 9 cover most of the hardy garden mum cultivars, but florist-type pot mums are often bred for bloom appearance rather than cold hardiness. When you're at the store, flip the tag and look for that hardiness information before assuming your new plant will overwinter. If the tag is missing or vague, treat it as a tender annual unless you can confirm otherwise.
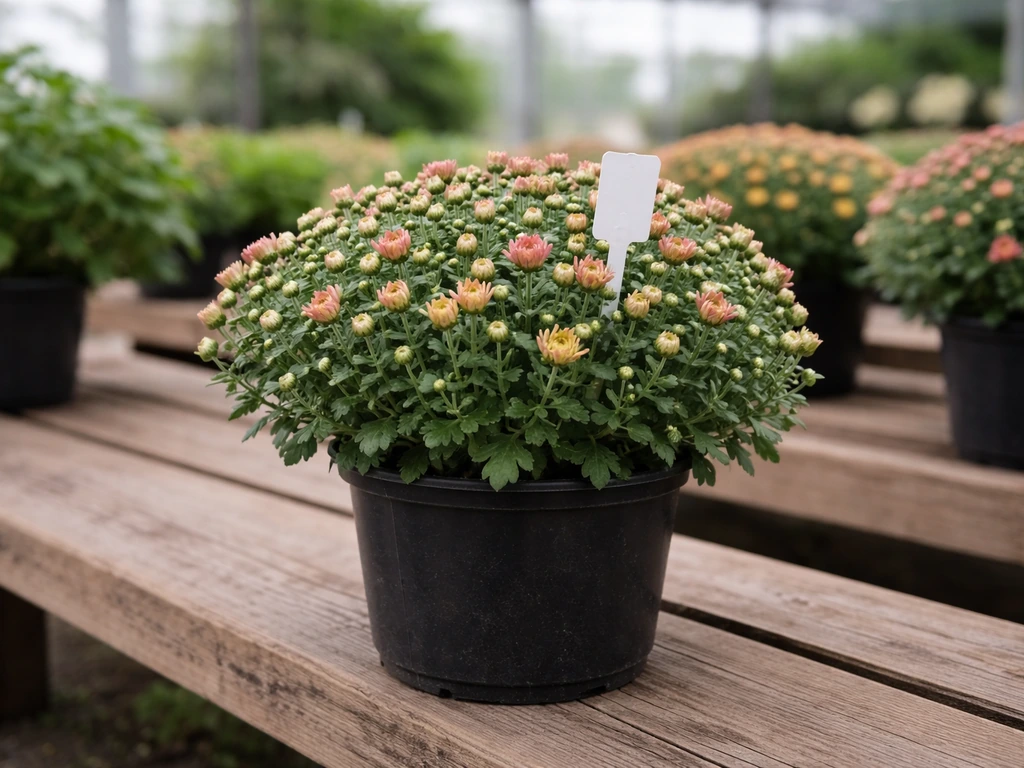
For container growing, the best time to buy is late August through mid-October. You want plants that are showing lots of tight, barely-open buds rather than plants already in full bloom. Full-bloom plants look great on the shelf but have less display time left. Buying in that late-August-to-mid-October window also gives the plant enough time to settle into its pot before your first frost, which matters a lot if you're hoping to overwinter it. A good rule of thumb: aim to have your mum potted up at least six to eight weeks before your expected first frost date. That gives the roots time to grow before cold weather shuts things down.
Also check the plant itself before buying. Look for compact, bushy growth with lots of buds, no yellowing leaves, and healthy green stems. Avoid anything with brown or mushy stems at the base, visible pests on the undersides of leaves, or a pot that's obviously bone dry or soaking wet. A healthy start makes everything that follows easier.
The right pot, soil, and drainage setup
Pot size matters more than most people think. Go with at least an 8- to 10-inch diameter container for a single mum plant. Anything smaller restricts root development, which means the plant stresses out faster, dries out quicker, and produces fewer blooms. If you want a really full, impressive container display, a 12-inch or larger pot gives the roots room to breathe and holds moisture more consistently.
Drainage is the single most important feature your pot needs. Mums sitting in waterlogged soil will develop root rot fast, especially in the cool, wet conditions of fall. Make sure your container has drainage holes. If you're using a decorative pot that doesn't have them, use the double-potting method: put a plain nursery pot with drainage holes inside the decorative one, setting the inner pot on a layer of gravel. This way water can escape freely while the outer pot still looks good. If your pot has a saucer, empty it after every watering. Water that pools in a saucer will wick back up into the soil and keep roots wetter than they should be.
For soil, use a high-quality potting mix, not garden soil. Garden soil compacts in containers and blocks drainage. A good potting mix stays loose, drains freely, and holds just enough moisture between waterings. You can mix in a small amount of perlite if you want extra drainage insurance, especially if you tend to overwater.
Sunlight and watering: the daily routine that makes or breaks things
Mums want full sun, which means at least five to six hours of direct sunlight per day. Morning sun with some afternoon shade is ideal, especially in warmer climates where intense afternoon heat can stress the plant and speed up bloom fade. If your mum is in a spot that gets less than five hours of direct sun, you'll likely end up with weak, stretched stems, fewer blooms, and a generally disappointing plant. The good news with containers is that you can move them, so spend a day or two observing your potential spots before committing.
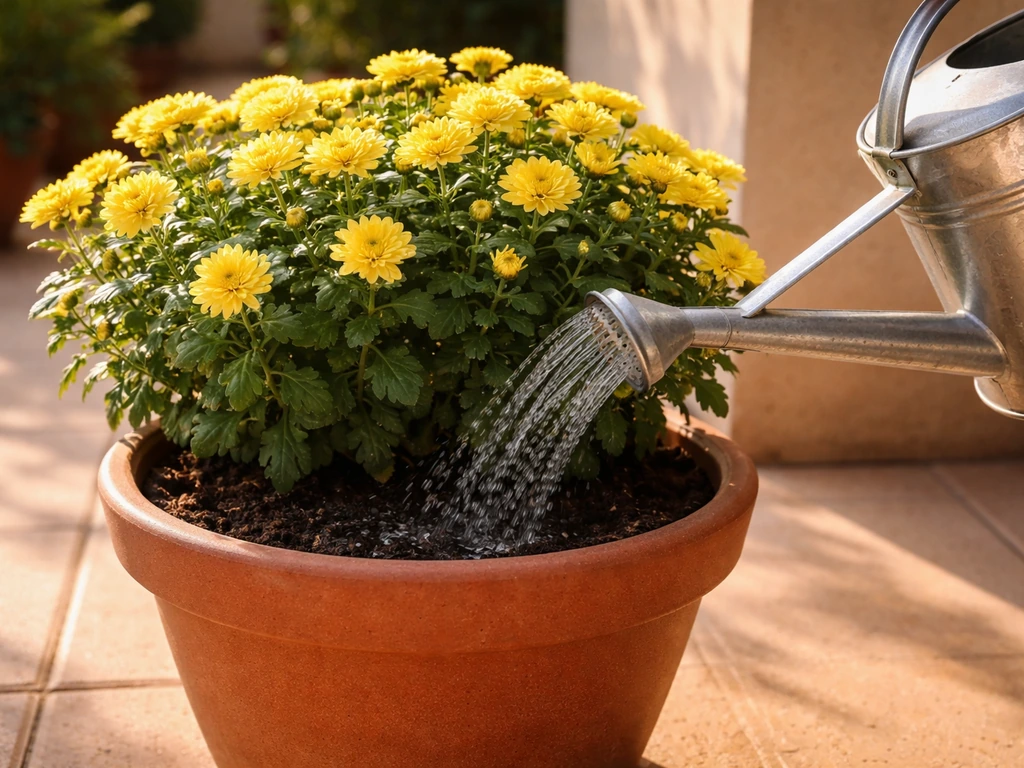
Watering is where a lot of people go wrong, in both directions. Container mums dry out much faster than in-ground plants, so you need to check them daily rather than watering on a fixed schedule. When you water, do it thoroughly: soak the entire root ball until water runs freely out of the drainage holes. Then let the top inch or so of soil dry out before watering again. In hot, dry weather, you may need to water more than once a day for a smaller pot. The easiest way to judge is to pick up the pot. A light pot means it's dry and needs water. A heavy pot means there's still plenty of moisture. If you're unsure whether to water, wait another few hours and check again rather than watering by default.
One thing to watch: never let the pot sit in standing water. Wet roots without oxygen is one of the fastest ways to kill a mum. Empty saucers promptly and make sure excess water actually drains rather than pooling at the bottom of the pot.
Feeding your mums without overdoing it
Mums in containers are heavy feeders during their vegetative growth phase, but the timing of when you feed matters a lot. The goal is to push leafy, bushy growth in spring and early summer, then ease off as buds form in late summer. Start a regular fertilizer routine about two to six weeks after potting up, depending on how active the growth looks. A complete, balanced water-soluble fertilizer (something like a 20-10-20 blend) works well during the growth phase. Apply it according to the label directions, roughly every one to two weeks.
Once you start seeing flower buds forming (typically in late August or September for fall-blooming types), cut back on nitrogen-heavy fertilizers. High nitrogen at that stage pushes leafy growth at the expense of blooms and can make an already-budded plant go soft and floppy. You can switch to a lower-nitrogen or bloom-boosting formula at that point, or just stop feeding altogether and let the plant finish flowering on its own. Overfeeding late in the season is a common mistake that leads to leggy, lush-looking plants with disappointing bloom counts.
Pinching for shape and timing your blooms right
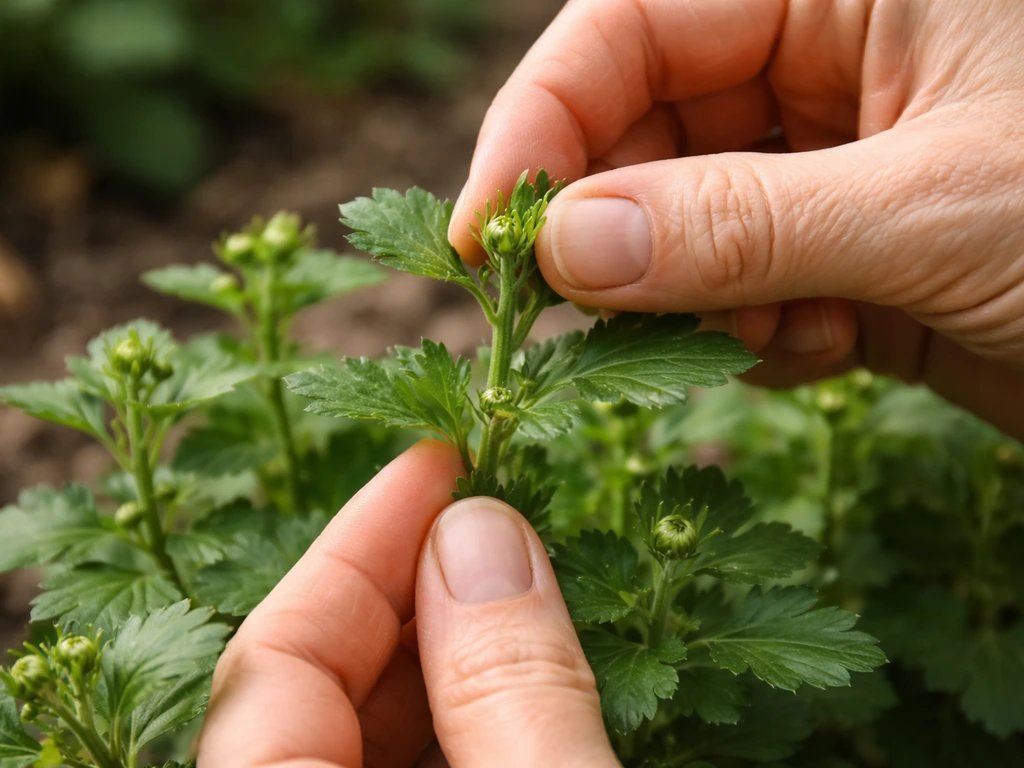
Pinching is the practice of snipping off the growing tip of each stem to force the plant to branch out. If you are learning how to grow mums overall, pinching is one of the easiest ways to control height and encourage fuller blooms Pinching is the practice of snipping off the growing tip of each stem. It's what separates a full, dome-shaped mum from a tall, spindly one. The technique is simple: once a shoot reaches about five to six inches tall, pinch off the top inch or so with your fingers or clean snips. New side shoots will develop, and you pinch those when they hit six to eight inches. Keep repeating this every two to three weeks throughout the season.
The critical deadline is early to mid-July. Stop all pinching by July 4th at the latest (July 1st for late-season varieties is the absolute cutoff). Mums set flower buds in response to shortening days, which happens naturally in late summer. If you pinch after that point, you're removing the very buds that are beginning to form, and you'll push the bloom date so late that frost kills it before it opens. Early varieties should stop being pinched by June 10, mid-season types by June 20, and late varieties no later than July 1. Mark it on your calendar because it's easy to forget.
If you're buying a mum in September that's already budded up and nearly in bloom, skip pinching entirely. Those plants have already done their bud development work. Your job at that point is just to keep them healthy and enjoy the display.
Where to put them: indoors, outdoors, heat, and cold
Potted mums are outdoor plants. They want direct sun and fresh air, and they actually need the natural shortening of days to trigger blooming. In Animal Crossing: New Horizons, green mums grow best when you focus on consistent breeding and care routines to build up the right flower stock. If you want to grow green mums specifically, follow the same container steps while matching the variety’s sun, pinching, and hardiness needs how to grow green mums. Keeping them indoors indefinitely under artificial light interrupts that process. That said, there are plenty of good reasons to move a container mum indoors temporarily, and doing it right is straightforward.
Mums are more cold-tolerant than people expect. They can handle light frosts (down to around 28 to 32 degrees Fahrenheit for short periods) without major damage, especially once buds are open and not tender new growth. If a frost is forecast, move the pot under an overhang, onto a covered porch, or into an unheated garage for the night. Bring it back out the next morning when temps rise. For a hard freeze below 25 degrees, a frost cloth or old bedsheet draped over the plant provides meaningful protection.
Heat is actually more of a problem for fall-blooming mums than cold. Temperatures consistently above 90 degrees Fahrenheit can cause bud drop and stress the plant. If you're in a warm climate and fall arrives slowly, move your potted mum to a spot with afternoon shade during heatwaves. Morning sun and afternoon shelter in September and early October keeps the plant cooler and extends the bloom.
If you're bringing a potted mum indoors purely as a temporary display, place it in the brightest spot you have, like a south-facing windowsill, and keep it away from heating vents. Indoor air is dry and warm, which shortens bloom time considerably. Think of indoor placement as a temporary move for protection or display, not a permanent home.
Troubleshooting common container mum problems
Buds dropping before opening
Bud drop is usually caused by one of three things: inconsistent watering (letting the pot dry out completely between waterings), heat stress, or moving the plant suddenly from one light environment to a much dimmer one. Check your watering consistency first, make sure the pot is draining but not drying out, and if you moved the plant recently, give it a week to adjust.
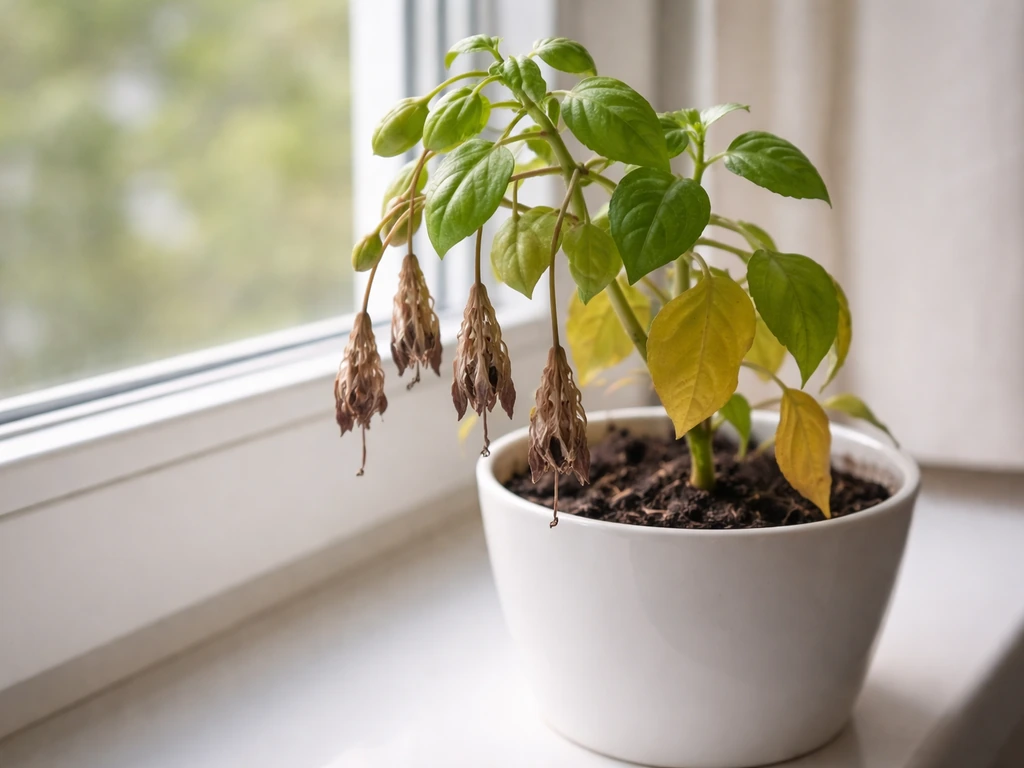
Yellow leaves
Yellow leaves on lower stems are often just normal aging, especially on a plant that's been growing vigorously all season. But if yellowing is widespread or spreading upward, check for overwatering first (soggy soil, poor drainage), then consider whether the plant has been getting enough fertilizer. Root rot from wet soil blocks nutrient uptake, so a plant can look starved even if you've been feeding it, because the roots can't absorb anything. Fix the drainage issue first, then reassess.
Leggy, weak growth
Leggy growth almost always means insufficient light. A mum reaching and stretching toward a light source, or growing tall with wide spacing between leaves, needs more direct sun. Move it to a sunnier spot. If you've been consistent with pinching and the growth is still leggy, low light is almost certainly the culprit. Pinching helps maintain shape, but it can't compensate for inadequate sun.
Spider mites and aphids
Both pests are common on mums, especially in warm, dry conditions (spider mites) or during active new growth (aphids). If you are growing spider mums, keep an eye out for spider mites and treat early to protect your plants. Check the undersides of leaves regularly. For either pest, start with a strong spray of water to knock them off, then follow up with insecticidal soap or horticultural oil applied to the undersides of leaves. Test any new product on one or two leaves first and wait 48 hours before treating the whole plant to confirm there's no burning. Repeat every five to seven days until the problem clears.
Powdery mildew
That white powdery coating on leaves is powdery mildew, a fungal issue that thrives in poor air circulation and high humidity. Container mums are vulnerable, especially if they're crowded. Improve airflow by moving the pot to a more open spot and removing heavily affected leaves. Horticultural oil or a sulfur-based fungicide labeled for ornamentals can control it. Keeping foliage dry by watering at the soil level rather than overhead also helps prevent new infections.
Getting your mums to rebloom: after-bloom care and overwintering
Here's the honest reality: most fall-purchased pot mums sold at garden centers are bred primarily for retail display, not perennial longevity. Getting one to rebloom the following year in a container is possible, but it takes some deliberate effort and the odds are better in zones 5 through 7 than in the extremes. It's worth trying, though, especially if you have a cultivar you love.
After blooming finishes, cut the plant back by about one-third but leave some foliage intact. Don't fertilize anymore this season. If you're in zone 5 through 7 and want to try overwintering in the ground, plant the mum out of its container and into a garden bed as soon as possible after bloom. The earlier the roots get established before the ground freezes, the better the survival chances. Plants put in the ground in late August or early September have the best odds.
For overwintering in the container itself, move the pot to a sheltered spot like an unheated garage or basement where temperatures stay around 35 to 45 degrees Fahrenheit. Cold enough to keep the plant dormant, but not so cold it freezes the root ball solid. Water it lightly every few weeks, just enough to keep the roots from desiccating completely. The single biggest overwintering killer is wet soil in a cold, unventilated space, so keep it on the dry side. In spring, once nighttime temperatures stay reliably above freezing, bring the pot back outside and start watering and feeding again.
When new growth appears in spring, you're back at the beginning of the pinching cycle. Start pinching when shoots reach five to six inches and keep going until your early July deadline. With consistent care from spring through fall, a well-chosen cultivar in a good container can give you a second (and third) year of blooms. It's genuinely satisfying when it works, and even if a plant doesn't make it through a tough winter, you'll have learned a lot that makes the next one easier.
If you're interested in growing mums beyond pots, the same core principles apply outdoors in beds, though the drainage and watering dynamics shift when the roots have more soil volume to work with. The pinching timing and sunlight requirements stay exactly the same no matter where the plant is growing.
FAQ
Do I need to repot my mum when I buy it, or can I keep it in the nursery pot?
Most retail mums are sold in a pot that is already close to the root-bound stage, so after purchase you should either keep the plant in its current pot if you have the 8- to 10-inch size, or up-pot it promptly into a larger container rather than waiting weeks. If you up-pot, use fresh potting mix and water thoroughly until it drains, then hold feeding for about 1 week to let root damage settle.
What should I do if my mum is already in bloom or heavily budded when I bring it home in September?
No. If the mum is blooming now (or is covered in tight but ready-to-open buds), pinching will generally reduce flower sites and can delay the show. The safer approach is to skip pinching for already-budded plants in early fall and focus on consistent sun, drainage, and watering until blooms finish.
My potted mum looks droopy, how can I tell if it needs more water or less?
If your plant wilts, don’t assume it is underwatering only. Check by feel, if the pot is light and soil is dry, water deeply until it drains. If the pot is heavy and soil feels wet, the issue is often overwatering and low oxygen, in which case empty saucers and move it to better airflow and sun rather than watering again.
How do I know if my container drainage is good enough to prevent root rot?
Start by measuring how fast the pot drains. After watering, the soil should be evenly moist but the pot should not stay soggy for long, and the saucer should not refill. A practical test is to tilt the pot gently, if you see water pooling at the bottom for extended periods, improve drainage with a larger pot or add the double-pot method.
What is the best watering method and timing for potted mums?
Use soil-level watering and stop once water runs freely from the drainage holes, then wait until the top inch dries. Overwatering late in the day is a common mistake because the pot stays cool and wet overnight, which increases mildew and rot risk.
Can I keep my potted mum indoors overnight or as a longer display?
Yes, but only temporarily and with adjustments. Indoors typically shortens bloom life because light is weaker and air is dry, so keep indoor time minimal, place the pot in the brightest spot you have (often a south-facing window), and water based on the pot weight rather than an indoor calendar schedule.
My mum has lots of leaves but fewer blooms, should I add more fertilizer?
Fertilize only during active growth and ease off as buds form, otherwise you risk soft, leafy growth and fewer flowers. If leaves are pale or yellowing, first confirm drainage is not causing root stress, then resume feeding at a balanced rate rather than adding extra nitrogen immediately.
When should I change my fertilizer once buds begin forming?
Switch the feeding approach when buds start forming: reduce nitrogen-heavy feed or stop entirely, and avoid “boosting” right before bloom. A good decision rule is to stop any pinching schedule after the early July cutoff and stop high-nitrogen feeding once you see consistent bud development.
What should I do if my mum gets powdery mildew in a container?
Powdery mildew control works best when you act early. Remove the most affected leaves, increase spacing and airflow, and avoid wetting foliage, if you use a product, test on a small section first and repeat on schedule because mildew often returns if conditions stay humid and stagnant.
How should I protect my potted mum during a hard freeze without making it worse?
If temperatures drop below freezing, use protection, but don’t overdo it. For hard freezes, a frost cloth or sheet can help for a single night, but indoors or under a cover you need ventilation to reduce humidity. Also avoid leaving it in a cold, sealed area with wet soil.
How wet should the soil be when I overwinter a potted mum indoors or in a garage?
When overwintering in the container, the goal is a cool, lightly moist but not wet root ball. In a garage or basement, check the pot every few weeks, water lightly only if the mix is drying out, and ensure the area is not humid or stagnant because wet cold conditions are the fastest route to rot.
When do I restart pinching after winter, and what’s the typical timeline?
Look for the shoots first, as soon as new growth appears in spring, pinch when shoots reach 5 to 6 inches and keep pinching until your early July deadline. If you try to pinch too late, you can miss bud initiation timing and end up with a delayed bloom or fewer flowers.
What are my chances of getting a second year of blooms, and how can I improve the odds?
Avoid full re-bloom expectations if you bought a florist-type pot mum without a clear hardy rating. Even with good care, rebloom odds vary by zone and cultivar, so your best success plan is to target varieties labeled hardy for your zone and to overwinter with careful drainage and cool-dormant conditions.
Next Article
How to Grow Mums: Step-by-Step Guide for Beautiful Blooms
Step-by-step guide to grow flowering mums at home, from choosing plants to planting, care, and fixing bloom problems.