
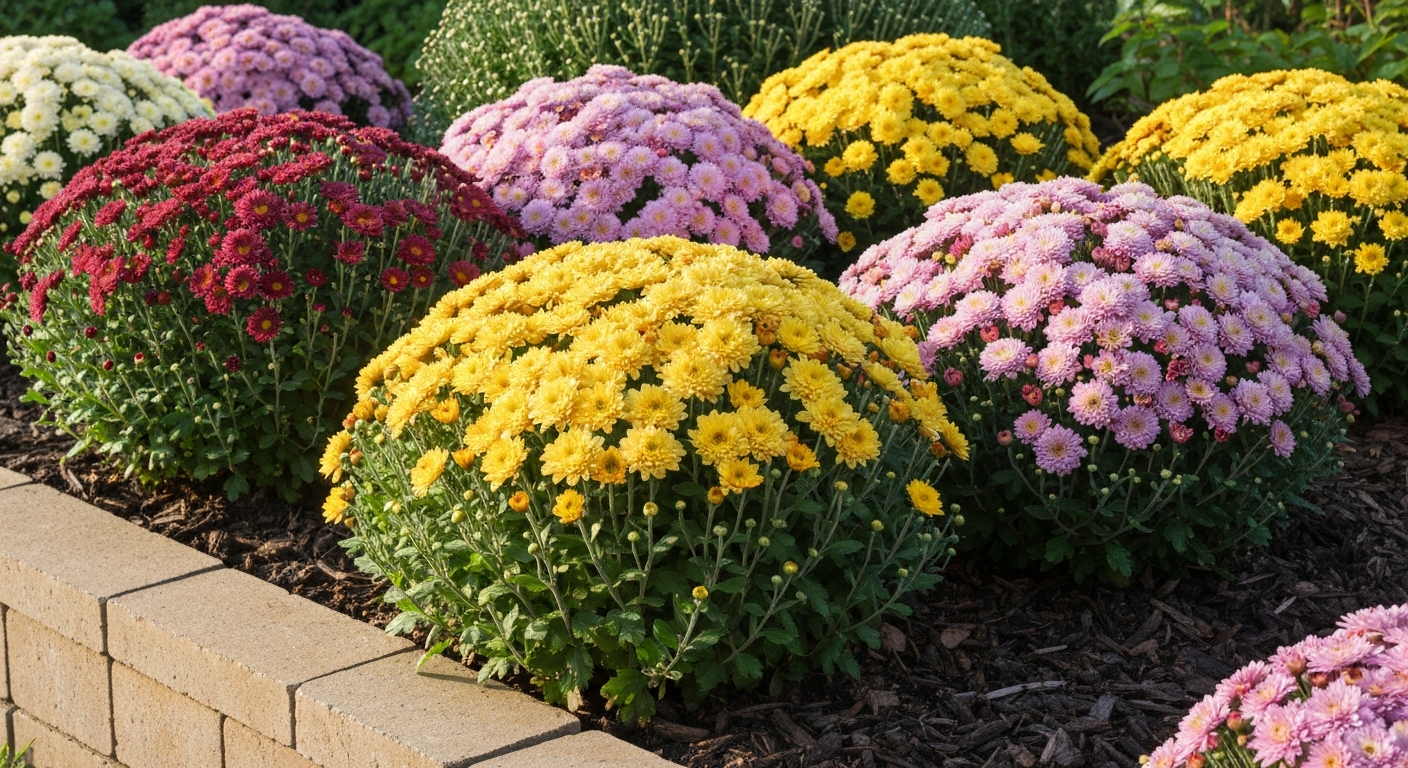
Growing mums from plugs is the fastest, most reliable way to get full, bushy plants loaded with fall blooms. You buy rooted plugs in spring or early summer, pot them up or plant them in the ground, pinch them a couple of times before mid-July, and by September or October you have exactly the kind of display that makes neighbors stop and stare. The whole process takes about 12–16 weeks from transplanting a plug to open flowers, and once you understand the handful of decisions that actually matter, plug size, soil mix, pinching timing, and fertilizer program, it becomes very repeatable.
How to Grow Mums from Plugs: Step-by-Step Fall Bloom Guide

Harriet Whitmore
21 Jul 2026
Why plugs beat seeds and bare-root divisions
Mums (Chrysanthemum × morifolium) are short-day plants: they flower when the uninterrupted dark period each night gets long enough, which in most of North America means buds naturally initiate in late summer and flowers open in September through November. Growing from seed is slow and variety results are unpredictable. Dividing existing clumps works fine but you are limited to whatever varieties you already have. Plugs, rooted young plants grown in small cells, usually 72- to 288-cell trays, give you a specific named variety, a healthy root system that is ready to grow, and a predictable timeline. I have tried all three methods over the years, and plugs consistently give me the biggest, best-shaped plants with the least guesswork.
What to expect honestly: plugs do need a bit more attention in the first two weeks after transplanting than an established plant does. They are small, their root ball is compact, and they can wilt quickly in hot weather if you are not watching. But once they settle in, usually within 10–14 days, they grow fast and reward you with almost no drama if you follow the pinching and fertilizing schedule covered below.
Picking the right mums and plug size
Not all chrysanthemum plugs are the same, and the two biggest mistakes I see beginners make are buying florist mums (bred for greenhouse finishing, not outdoor hardiness) and buying plugs that are too root-bound to transplant well. Here is how to navigate both.
Garden mums vs florist mums
Garden mums are cultivars bred for outdoor performance, bushier habits, and winter hardiness. Florist or pot mums are greenhouse-finished cultivars optimized for a single display season in containers, they are often not reliably hardy below USDA Zone 7 and may never perform as perennials. University of Illinois Extension puts it plainly: if you want mums to come back year after year, you need to buy plugs explicitly labeled as garden-type or hardy mums, and ideally plant them in spring so roots establish before winter. If you are growing for a single season of fall display only, florist types are fine, just treat them as annuals.
Bloom types and growth habits
Chrysanthemum bloom forms range from single daisy types and decorative (fully double, rounded) to pompon, cushion, and spoon types. For home garden use, cushion and decorative types are the most forgiving: they branch naturally, hold their shape without staking, and cover themselves in blooms. Single daisy types have a lighter, more naturalistic look and tend to be earlier flowering. Spoon and spider types are showier but need more space and careful pinching to perform well.
Plug cell size recommendations
Plugs sold to home gardeners typically come from 72-, 128-, or 288-cell trays. The smaller the cell number, the bigger each individual plug cell. Ball Seed's GrowerFacts notes that larger-cell plugs (72 or 128 cell) add roughly one additional week to the sow-to-transplant timeline versus a 288-cell plug but arrive with more developed root systems. For home gardeners buying ready-to-transplant plugs, a 72- or 128-cell plug is ideal: the root system is established enough to handle transplanting without falling apart, but the plant is young enough that it has not become root-bound. If you receive plugs that are very small (288-cell or smaller), pot them into 2.5-inch nursery pots for two to three weeks before moving to their final container or garden bed.
Recommended varieties by climate and use
Variety choice matters more than most gardeners realize, because chrysanthemum cultivars differ significantly in their critical daylength requirements (the night length that triggers budding), the number of weeks from bud induction to open flower (roughly 42–77 days across cultivars in published research), and their cold hardiness. Here are practical picks organized by how you intend to grow them.
| Variety / Series | Type | Best Use | Hardiness | Notes |
|---|---|---|---|---|
| Mammoth series (U of M) | Garden/Hardy | In-ground, borders, Zones 4–9 | USDA Zones 4–9 | University of Minnesota breeding; excellent winter hardiness; cushion habit |
| Belgian Mum series | Garden | Containers, borders, Zones 5–9 | USDA Zones 5–9 | Dense, mounded; good branching from plugs |
| Igloo series | Garden/Hardy | In-ground, cold climates (Zones 4–7) | USDA Zones 4–7 | Early to mid-season; reliable perennial behavior when spring-planted |
| Cheryl series (Proven Winners) | Garden | Containers and borders, Zones 5–9 | USDA Zones 5–9 | Strong branching; available as rooted plugs from specialist suppliers |
| Spooky / Hillside Sheffield Pink | Garden/Species-type | Naturalized borders, Zones 4–9 | USDA Zones 4–9 | Late-blooming single type; very cold-hardy; best in-ground use |
| Florist/Pot mums (generic) | Florist | Containers, greenhouse, single season | Zone 7+ only | Not reliably perennial; ideal for greenhouse finishing or fall pots |
For greenhouse growers wanting to schedule specific bloom dates, choose cultivars with published response times (weeks from short-day initiation to flower) from your supplier's technical sheet. A cultivar with a 7-week response time initiated in early August will flower in late September; a 9-week cultivar initiated on the same date blooms in mid-October. Getting that data from your supplier before ordering plugs saves a lot of guessing.
Where to buy plugs and how to read the label
Plugs and liners are sold by specialty online nurseries, wholesale floriculture suppliers (Ball, Dümmen Orange, Ellegaard), and a growing number of garden center chains that offer spring plug packs. When buying online, plugs typically ship in late spring (April–June depending on your zone) and arrive in small cells embedded in foam or plastic trays.
Rooted plugs vs liners: what is the difference?
A rooted plug is a cutting or seedling that has been rooted in a propagation cell and is ready to transplant. A liner is a slightly more developed plug that has been grown on in a larger cell or small pot, essentially a plug that has had one extra potting step. Liners are typically more expensive but arrive with a bigger root system and can go straight into a 4-inch or larger container. For home gardeners, rooted plugs are perfectly fine if you have a few weeks to pot them up and grow them on before final planting.
Plug condition checklist
When your plugs arrive or when you pick them up at a nursery, run through these checks before buying or planting:
- Roots are white or cream-colored, not brown or mushy — brown mushy roots indicate rot from overwatering or disease
- Root tips are visible at the bottom of the cell or just beginning to emerge, not densely circling the base (severely root-bound plugs take longer to establish)
- Stems are sturdy and green, not etiolated (pale and stretched), which indicates the plugs were grown in low light
- Foliage is compact with short internodes; yellowing lower leaves can indicate nitrogen deficiency or disease
- No visible signs of aphids, fungus gnats, or powdery mildew on leaves or stems
- Media in the cell is moist but not waterlogged — plugs that have been sitting in standing water are prone to root rot
- Label is intact and matches the variety you ordered
Your supply checklist before you start
This is the printable list I keep near my potting bench at the start of every mum season. Getting everything together before the plugs arrive means you can transplant within 24 hours of delivery, which matters a lot for plug survival.
- Plugs or liners (ordered in advance for your desired varieties)
- Pots: 2.5-inch nursery pots for staging very small plugs; 4–6-inch pots for individual plants; 10–12-inch containers for display groupings
- High-quality soilless potting mix (peat-perlite or peat-bark blend, pH 5.8–6.2 — more on this below)
- Perlite (for amending drainage if your base mix is heavy)
- Water-soluble fertilizer: a balanced starter such as 20-10-20 for early growth and a low-phosphorus finisher such as 15-0-15 for bud stage
- Controlled-release fertilizer granules (optional, e.g., Osmocote 14-14-14) at 10–14 lb per cubic yard of media if you prefer a set-and-forget approach
- Dibbler or pencil for making transplant holes
- Plant labels and permanent marker
- Spray bottle or gentle-flow watering wand
- Sharp, clean pruning snips or scissors for pinching
- Trowel and garden fork for in-ground planting
- Soil pH test kit or digital pH meter
- Slow-release lime (if adjusting pH upward) or elemental sulfur (if adjusting downward)
Potting mixes and soil amendments: recipes for containers and in-ground
Container mix recipe
For plugs and container-grown mums, you want a soilless mix that drains freely but holds enough moisture to avoid constant irrigation. Ball Seed's propagation guidelines recommend a media pH of 5.4–5.8 for plug establishment, moving toward 5.8–6.2 for the growing-on phase. Most commercial peat-based mixes arrive near this range, but check with a pH meter if you are mixing your own. A reliable DIY container mix is three parts peat moss or coir, one part perlite, and one part pine bark fines. This drains well, has enough organic matter for healthy roots, and stays workable even when slightly dry. Add a small amount of dolomitic lime if you are using peat (about 5–6 oz per cubic foot) to buffer pH, since pure peat can drop below 5.0 which locks out key nutrients.
In-ground soil amendment
Mums prefer well-drained, fertile loam with a pH of 6.0–6.5. Before planting in the ground, work 2–3 inches of compost into the top 8–10 inches of soil. If your soil is heavy clay, add coarse perlite or grit at about one part per five parts soil to improve drainage, waterlogged soil is the single most common reason mums rot over winter. Do a basic soil test before amending; many cooperative extension labs will test for pH and major nutrients for a small fee, and the results will tell you whether you need lime, sulfur, or additional phosphorus.
Container vs in-ground: which is right for you?
Both approaches work well, but they have genuinely different strengths and requirements. I grow mums both ways depending on how I want to use them.
| Factor | Containers | In-Ground |
|---|---|---|
| Overwintering | Challenging — roots are exposed to freeze/thaw; bring inside or bury pots | Better survival if plants are spring-planted and soil drains well |
| Flexibility | Move plants for display or to protect from early frost | Fixed location; harder to adjust |
| Watering | Needs more frequent irrigation (can dry out in days) | More forgiving; soil buffer holds moisture longer |
| Soil control | Full control over mix, pH, and drainage | Must amend existing soil |
| Plant size | Limited by container volume; roots constrain growth | Unrestricted root run produces larger plants |
| Pest/disease | Easier to isolate infected plants | Disease can spread through soil |
| Best for | Patios, decks, temporary fall displays, greenhouse finishing | Perennial borders, mass plantings, overwintering hardy varieties |
My recommendation: if you are in USDA Zones 5 or colder and want mums to return each year, plant in the ground in spring and let roots fully establish before frost. If you are growing for a single-season display or in a climate with unpredictable winters, containers give you the control you need. Growing mums in the ground deserves its own detailed treatment, for a deeper look at soil preparation and in-ground spacing by zone, the dedicated guide on growing mums in the ground covers all of that in full.
How to transplant plugs: step by step
The transplanting window matters. Plugs should ideally go into their pots or beds within 24–48 hours of arriving at your door, or as soon as they clear a hardening-off period if they came from a heated greenhouse. Here is the exact process I use.
Hardening off greenhouse-grown plugs
If your plugs were grown in a heated greenhouse (as most commercially produced plugs are), they need 4–7 days of gradual outdoor exposure before they can handle full sun and outdoor temperatures. Place them in a shaded, sheltered spot for the first two days, then move to morning sun with afternoon shade for two more days, then full outdoor conditions. Skip this step and you risk sunscald, wilting, and significant transplant shock.
Planting depth, spacing, and timing
| Setting | Planting Depth | Spacing | Best Timing |
|---|---|---|---|
| 2.5-inch staging pot | Crown at soil level, roots fully covered | One plug per pot | Immediately upon receipt if plugs are very small |
| 4–6-inch container | Crown at or just below soil surface (no deeper than plug was growing) | One plug per 4-in pot; one per 6-in pot | Late April–June depending on zone |
| 10–12-inch display container | Crown at soil level | 3 plugs per 10-in; 4–5 per 12-in container | May–early June for full display by September |
| In-ground border | Crown at soil level, no deeper | 18–24 inches between plants (cushion types); 24–36 in for taller decorative types | Spring (April–May) for perennial overwintering; up to early June for annual display |
The transplanting procedure
- Water plugs thoroughly 30–60 minutes before transplanting so the root ball is moist and cohesive, not crumbly
- Fill your container or prepared bed hole with moistened potting mix to the correct depth — use a dibbler or your finger to make a hole sized to match the plug cell (not oversized; a hole much larger than the root ball leaves air pockets that dry out roots)
- Gently squeeze the cell tray from the bottom to pop the plug out — never pull the stem, which tears roots and can snap the cutting point at the base
- Hold the plug by the root ball, not the stem; inspect roots briefly and if any are circling tightly at the base, gently tease them loose with a finger
- Set the plug so the crown (where stem meets roots) sits at or just at the soil surface — burying the crown too deep invites crown rot, especially in humid climates
- Firm the surrounding mix or soil gently with your fingers to eliminate air pockets, then water in immediately with a dilute fertilizer solution (about 200–300 ppm nitrogen — one teaspoon of 20-10-20 per gallon of water is a reasonable approximation)
- Label each pot or row with the variety name and transplant date
- Move plants into bright indirect light or morning sun for the first 5–7 days post-transplant, then transition to full sun
One thing I always remind myself at this stage: do not let newly transplanted plugs wilt in the first four to five weeks. UMass Extension notes this specifically, repeated wilting during establishment stunts plants noticeably and can trigger premature budding. Check soil moisture daily in hot weather. Containers dry out faster than you expect when plants are young and the root-to-media ratio is still small.
Light, watering, and temperature: the basics that most guides rush past
Mums need a minimum of six hours of direct sun daily for compact, well-branched plants and good flowering. Less than that and plants get leggy, flower later, and produce fewer blooms. Full sun (8+ hours) is ideal in most climates. In USDA Zones 8 and warmer, afternoon shade helps prevent heat stress and reduces the risk of heat-delayed flowering.
For watering, the goal during plug establishment and vegetative growth is consistent moisture, not soggy, not bone-dry. A useful rule from extension irrigation guidance is to water when the top inch of container mix feels dry but before the plant shows any stress. Extension guides recommend monitoring media moisture with tensiometers or sensors (low-tension tensiometers range 0–40 centibars for organic substrates), keeping plugs consistently moist (avoid wilting), and irrigating around ~50% of field capacity to avoid stress, see Total Plant Management of Herbaceous Perennials, irrigation, tensiometer and substrate moisture guidance (extension/industry compilation) Total Plant Management of Herbaceous Perennials — irrigation, tensiometer and substrate moisture guidance (extension/industry compilation). For in-ground plants, water deeply once or twice a week rather than shallow daily irrigation, which encourages shallow roots. Ball's propagation notes and production guidance suggest daytime temperatures of 65–72°F (18–22°C) and cooler nights of 60–64°F (15–18°C) are ideal for plug establishment. Outdoors you cannot control this, but knowing these targets helps you understand why plugs planted in May often establish faster than those planted in July heat.
Fertilizing from plug to bloom
Mums are hungry plants, and getting the fertilizer program right makes a noticeable difference in plant quality. The approach I follow is based on Cornell greenhouse floriculture guidance from Neil Mattson's program, adapted for home garden use.
- Transplant water-in: 200–300 ppm nitrogen using a balanced soluble fertilizer (e.g., 20-10-20) — this is roughly 1 teaspoon per gallon for most products
- Weeks 1–4 (vegetative establishment): feed at 150–200 ppm nitrogen at every other watering using a balanced fertilizer; avoid high phosphorus at this stage as it can encourage root-bound behavior in containers
- Weeks 4–10 (active vegetative growth and branching): continue 150–200 ppm nitrogen; switch to a calcium-magnesium-containing formula if your water is soft (low mineral content) to prevent tip burn
- Weeks 10 through bud initiation: transition to a low-nitrogen, high-potassium finisher such as 15-0-15 to harden stems and support bud development
- Once buds reach pea-sized: switch to clear water only; feeding at this stage can cause bud blast or distorted flowers
If you prefer a simpler approach, incorporate a controlled-release fertilizer (such as Osmocote 14-14-14) into your potting mix at 10–14 lb per cubic yard (about 1 teaspoon per 6-inch pot) before transplanting. Cornell guidance notes that CRF works but gives you less flexibility to adjust the program as plants develop, and release rates increase in hot weather, which can cause over-feeding in August just when you want plants to harden off. I use CRF as a base and supplement with liquid feed as needed.
Pinching: the step that makes or breaks a mum plant
Pinching is removing the growing tip of each stem to force the plant to branch, which multiplies the number of flower-bearing shoots and produces the full, rounded shape associated with good garden mums. Without pinching, plugs grow into tall, sparsely branched plants with a handful of flowers. With a correct pinching schedule, the same plant becomes a dense mound covered in blooms.
When and how to pinch
UMass Extension advises starting to pinch when plants have 4–6 leaves or reach about 6–8 inches tall. A hard pinch removes about half an inch to one inch of new growth at the tip, just pinch above a leaf node with clean scissors or your thumbnail. Each pinched stem produces two to four new shoots, and you pinch those again when they reach the same height. The critical rule is to stop pinching by mid-July in most of North America (many growers use July 4 as a rule of thumb), because each pinch delays flowering by about two weeks and you need to leave enough time for buds to initiate before the season ends. In colder zones (Zone 5 and north), some growers stop pinching by late June to ensure bloom before first frost.
- First pinch: when transplanted plugs reach 6 inches tall (usually 3–4 weeks after transplanting)
- Second pinch: when new shoots from the first pinch reach 4–6 inches (about 3–4 weeks after the first pinch)
- Optional third pinch: in warmer zones only, 3–4 weeks after the second pinch, if plants are still compact and it is before July 4
- Stop all pinching by July 4 to mid-July maximum (earlier in Zone 5 and north)
Understanding mum flowering: the photoperiod secret
This is the biology that explains why mums always bloom in fall regardless of when you plant them. Chrysanthemums are short-day plants, which actually means they are long-night plants: flowering is triggered when the uninterrupted dark period each night exceeds a critical length. Research published in Japanese horticultural science journals reports bud initiation thresholds near 14.5 hours of daylength (or roughly 9.5 hours of darkness) for many cultivars, with visible bud development when daylength drops to about 13.5 hours or less. In most of the continental US, this occurs naturally in late July through August. The number of weeks from that first short-day induction to open flowers varies by cultivar, published floriculture research reports a range of roughly 42 to 77 days across chrysanthemum varieties.
For outdoor home gardeners, this mostly means: stop pinching by mid-July and let nature handle the rest. For greenhouse growers who want to schedule specific bloom dates, blackout curtains draped over plants to artificially extend the dark period (or supplemental lighting to interrupt long nights and delay flowering) are the standard commercial tools. If you are growing mums in a greenhouse and want precise control over bloom timing, the guide on growing mums in a greenhouse goes deep on blackout scheduling and night-interruption lighting.
Week-by-week care timeline
The timeline below assumes plugs are received in late May (Zone 6) and target blooms in late September. Adjust all dates forward by 1–2 weeks for Zone 7–8 or back by 1–2 weeks for Zone 4–5.
| Week | Date (Zone 6 example) | Key Tasks |
|---|---|---|
| Arrival week | Late May | Harden off plugs 4–7 days; prepare containers or beds; gather supplies |
| Week 1 | Early June | Transplant plugs; water in with dilute 20-10-20 (200–300 ppm N); place in bright indirect light; check moisture daily |
| Week 2–3 | Mid June | Move to full sun; begin regular liquid feeding every other watering at 150–200 ppm N; first pinch when plants reach 6 inches |
| Week 4–5 | Late June | Monitor branching; second pinch when new shoots reach 4–6 inches; continue feeding |
| Week 6–7 | Early July | Optional third pinch (Zone 7–8 only); stop all pinching by July 4 in Zone 6 |
| Week 8–9 | Mid–Late July | Switch to low-N finisher (15-0-15); natural short-day induction begins; do not disturb root zone |
| Week 10–12 | August | Buds become visible; when buds reach pea-size switch to clear water only; watch for aphids and spider mites |
| Week 13–15 | Early–Mid September | Flowers open on most early-to-mid season varieties; enjoy display |
| Week 16+ | Late September–October | Late-season varieties finish blooming; cut back to 4–6 inches after bloom; mulch for overwintering if in-ground |
Greenhouse-specific adjustments
Growing plugs in a greenhouse gives you temperature and light control that outdoor gardeners do not have, which means you can start earlier in the year and schedule blooms more precisely. Maintain day temperatures of 65–72°F and nights of 60–64°F for plug establishment, as recommended in Ball's production guides. Once plants are in active vegetative growth, slightly cooler nights (58–60°F) produce shorter, sturdier internodes and deeper color. Use supplemental lighting (16-hour photoperiod) from transplanting through mid-June to prevent premature budding on early-arriving plugs. Switch to blackout curtains from late June if you want to advance bloom timing or use night-interruption lighting if you want to hold plants in vegetative growth past the natural short-day window. The detailed guide on growing mums in a greenhouse covers blackout scheduling, HID versus LED supplemental lighting, and humidity management for disease prevention. See our guide on how to grow chrysanthemums in a greenhouse for step-by-step blackout schedules, lighting choices, and humidity control.
How this compares to growing mums from stems
If you already have established garden mums, you can root stem cuttings taken in spring and essentially produce your own plugs. The timing and care from rooted cutting onward is nearly identical to what is described here, but the propagation phase adds 4–6 weeks before you reach the equivalent of a commercial plug. Growing from stems is a great way to multiply a variety you love or share plants with friends, but for most home gardeners who want reliable results with named varieties, buying plugs is the smarter starting point. For a complete walkthrough of the propagation stage itself, the companion guide on how to grow mums from stems covers hormone selection, rooting media, misting schedules, and when cuttings are ready to pot up.
Overwintering mums from plugs
The most common frustration with mums is planting them in fall, enjoying the blooms, and finding dead plants the following spring. The reason is almost always one of three things: the cultivar is not cold-hardy, the plant was planted too late to establish sufficient roots before the ground froze, or the soil stays wet over winter and the crown rots. Plugs planted in spring (April or May) have the full growing season to establish a root system before dormancy, which dramatically improves overwintering survival compared to fall-planted display mums.
After bloom, cut plants back to 4–6 inches. In Zone 5 and colder, apply 3–4 inches of loose mulch (straw or shredded leaves, not dense wood chips) over the crown after the ground freezes. Do not mulch too early, warmth under mulch before a hard freeze can actually stimulate late growth that gets killed. Remove mulch gradually in spring as temperatures stabilize. Container-grown mums in Zone 6 and colder should either be moved to an unheated but frost-protected garage or cold frame for winter, or the pots can be sunk into the ground up to their rims and mulched.
Troubleshooting common problems
Premature budding (buds forming on small plants in June or July)
This almost always means the plug was exposed to long, uninterrupted nights before you wanted it to bud, either it arrived already partially induced, or it was placed in a dark location (such as a shipping box) for too long. Greenhouse growers can prevent this with 16-hour supplemental lighting. For outdoor plants, if you catch buds very early (before they are pea-sized), pinching them off and placing plants under a low-wattage incandescent bulb for an hour in the middle of the night can interrupt the dark period and return the plant to vegetative growth. Once buds are pea-sized or larger, this does not work.
Leggy, sparse plants with few flowers
Usually caused by insufficient pinching, low light, or both. If plants stretched before you pinched them, a more aggressive hard pinch (cutting stems back by one-third rather than just the tip) can restore a compact shape, though it delays flowering. Move plants to full sun immediately.
Yellowing leaves
Lower leaf yellowing during vegetative growth usually indicates nitrogen deficiency, increase your feed frequency or concentration slightly. If yellowing is happening from the top down and new leaves are affected, suspect iron or manganese deficiency caused by pH above 6.5 (which locks out micronutrients). Check your media pH and if it is above 6.5, apply an acidifying fertilizer for one or two applications.
Aphids and spider mites
Aphids cluster under leaves and at growing tips; spider mites appear as fine webbing on undersides of leaves in hot, dry conditions. For aphids, a strong water spray to dislodge them is often enough on outdoor plants; for heavy infestations use an insecticidal soap spray. For spider mites, increase humidity around plants and use a miticide labeled for ornamentals. Check new plugs on arrival, Ball's transplant best-practice guidance specifically mentions considering fungicide or miticide dips for liners before transplanting if pests are a recurring problem in your growing space.
Crown rot and root rot
Almost always a drainage issue. If plants collapse at the base with brown, mushy stems, improve drainage immediately: lift container-grown plants and replace saturated media, or in-ground plants may need to be moved to a raised bed. Do not replant mums in a spot where crown rot has occurred without improving drainage and allowing the soil to dry out for a full season.
Powdery mildew
White powdery coating on leaves is powdery mildew, most common in late summer when nights are cool and days are warm with poor air circulation. Improve spacing between plants, avoid overhead watering in the evening, and apply a sulfur-based or potassium bicarbonate fungicide at first sign. Hardy variety selection helps, some cultivars show significantly better resistance than others, and supplier technical sheets often include disease resistance ratings.
FAQ
What are the core horticultural facts I must include so the guide is accurate and actionable?
Include chrysanthemum photoperiodism (they are short‑day/long‑night plants; flowering is triggered by uninterrupted long nights and varies by cultivar), typical crop timing from short‑day induction to flower (commonly ~42–77 days depending on variety), plug tray size effects on crop time, recommended propagation and grow‑on temperatures, moisture management targets for plugs and containers, fertilizer programs (ppm N targets for establishment, vegetative growth and finishing), pinching timing and technique to increase branching, container vs in‑ground root‑volume guidance, cultivar hardiness/use (garden vs florist types), blackout/night‑interrupt scheduling methods for controlled flowering, and common pests/diseases with cultural controls. Source guidance should come from university extension publications (e.g., Penn State, UMass, Cornell), Ball/industry GrowerFacts, and standard propagation texts (Hartmann & Kester).
Which authoritative source materials should I consult and cite when writing the guide?
Primary sources: university extension factsheets and production notes (Penn State, Cornell, UMass, Illinois Extension), peer‑reviewed floriculture research on chrysanthemum photoperiod and flowering time (horticultural journals), commercial technical GrowerFacts and propagation guides from Ball Seed and Proven Winners for plug sizing and cultivar data, and propagation/greenhouse textbooks (Hartmann & Kester). Use supplier technical sheets for cultivar‑specific habit, intended use and scheduling, and industry presentations for fertilizer/CRF guidance.
What plug sizes and tray cell counts should I explain, and how do they affect schedule?
Cover common plug sizes (small cells: 288/264; medium: 128; large: 72 cells) and explain that larger cells produce bigger liners but add roughly one week (or more) to sow‑to‑transplant timing versus 288‑cell plugs. Provide grower guidance tables mapping typical sow‑to‑transplant and transplant‑to‑finish intervals by plug size and final container (use Ball GrowerFacts as reference).
What potting mixes, pH and EC targets are required for plugs and for growing on?
Recommend a well‑drained soilless propagation mix for plugs (high porosity; e.g., peat/perlite/coir blends). Target media pH ~5.4–5.8 for plugs. Aim for electrical conductivity (extraction) ~0.7–1.0 mS/cm in the plug stage, increasing in the grow‑on stage as plants consume nutrients. For finished containers, use a finished media with adequate water‑holding capacity and a balanced fertility program (or appropriate CRF rate if used).
What are the temperature and light (photoperiod) conditions to recommend for each stage?
Germination/plug stage: daytime ~65–72°F (18–22°C), nights ~60–64°F (15–18°C). Grow‑on vegetative stage: maintain moderate temperatures consistent with cultivar recommendations; warmer temperatures speed growth, cooler nights slow crop time. For flowering control explain chrysanthemum short‑day response: flowering is induced by long uninterrupted nights; critical daylengths vary but many cultivars initiate buds when daylength drops near ~14.5 h and show bud development under ~13.5 h. Include how to use blackout curtains or night‑interrupt lighting to schedule flowering (reference greenhouse production texts).
What fertilization program should I include (ppm N, timing, CRF guidance)?
Provide a constant liquid feed approach: water‑in transplants with ~200–300 ppm N at sticking/transplant, maintain 100–225 ppm N during vegetative growth depending on vigor and media; switch to lower‑N (finish) mixes when buds begin to form and use clear water as buds reach pea‑size. Discuss CRF as an alternative: note that CRF requires higher label rates (e.g., 10–14 lb/cu yd examples in grower references), temperature affects release, and CRF reduces finishing flexibility.
Next Article
How to Grow Chrysanthemums in a Greenhouse Step by Step
Step-by-step greenhouse guide for growing chrysanthemums from seed or cuttings, boosting blooms and fixing leggy growth,
