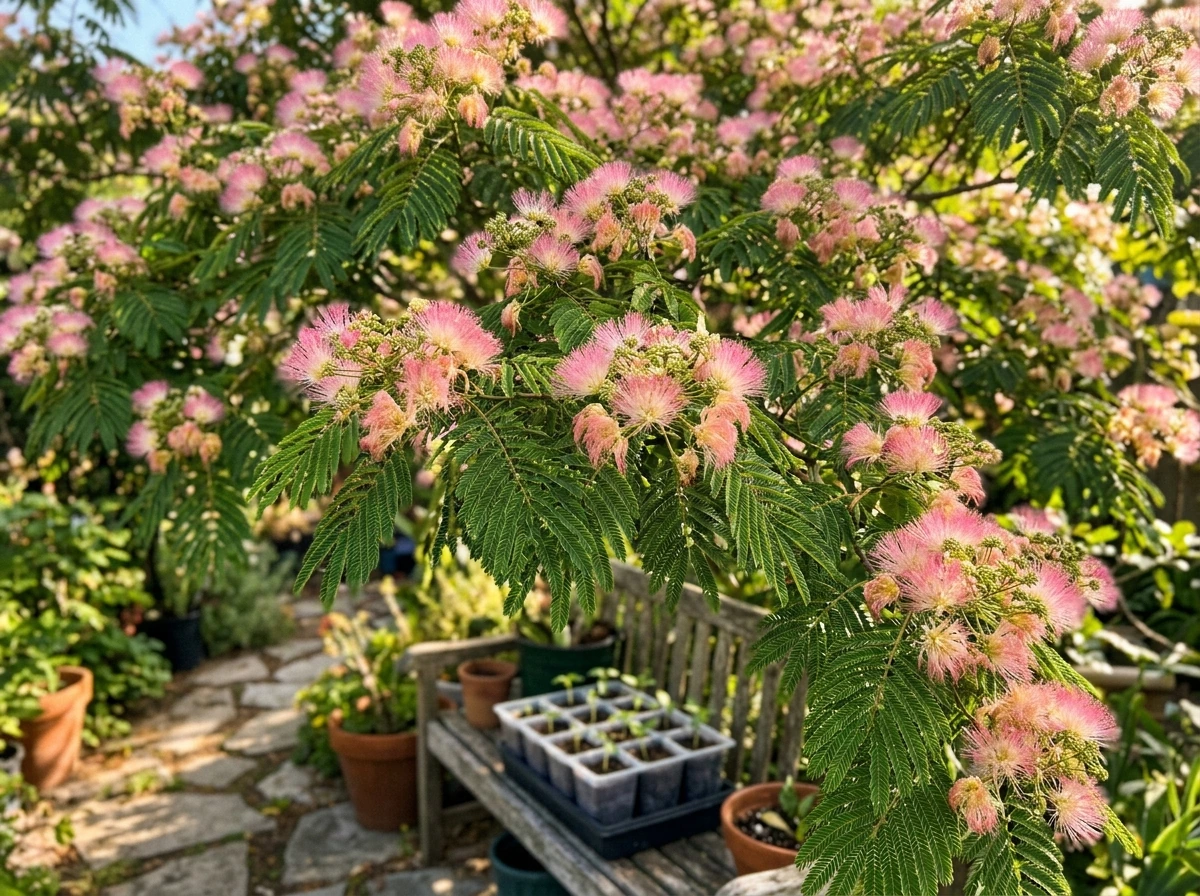
Mimosa EVO refers to a select ornamental strain of Albizia julibrissin, the Persian silk tree (also called mimosa, silk tree, or pink silk tree), grown specifically for its spectacular pink powder-puff blooms and feathery, fern-like foliage. If you're starting from seed today and want reliable results, here's what you actually need to know, from germination tricks through first bloom, with troubleshooting baked in at every stage.
Mimosa Evo Grow Tips: Seed to Bloom Guide for Success

Harriet Whitmore
24 Mar 2026
Which Mimosa EVO Do You Have, and What Does It Need?
Before touching a seed, confirm you're working with an Albizia julibrissin variety. The 'EVO' label typically marks a nursery-selected cultivar bred for improved bloom density, compact form, or disease tolerance compared to the straight species, which can make it a solid base for purple punch grow tips in your garden. Regardless of the cultivar name, the core growing requirements remain consistent with the species.
Mimosa EVO is cold-hardy down to around 0°F, putting it firmly in USDA zones 6 through 9B. If you're in zone 5 or colder, container growing is your best bet since hard freezes will kill the root system. In zones 7 through 9, it thrives outdoors year-round with minimal fuss. The plant is a full-sun lover, meaning it wants at least six to eight hours of direct sunlight daily, and it performs best in well-drained, slightly acidic to neutral soil (pH 6.0 to 7.5). It handles heat and drought far better than it handles waterlogged roots or deep shade.
One thing to note upfront: Albizia julibrissin is susceptible to a soil-borne fungal disease called Fusarium wilt (Fusarium oxysporum f. sp. pernicosum), which can be lethal. UC IPM notes that albizia (mimosa) is among the susceptible woody ornamentals for Fusarium wilt Fusarium wilt (Fusarium oxysporum f. sp. pernicosum). Choosing a resistant or tolerant cultivar like many EVO selections helps, but good soil drainage and avoiding overwatering are your best defenses regardless.
Getting Seeds to Germinate Fast and Reliably
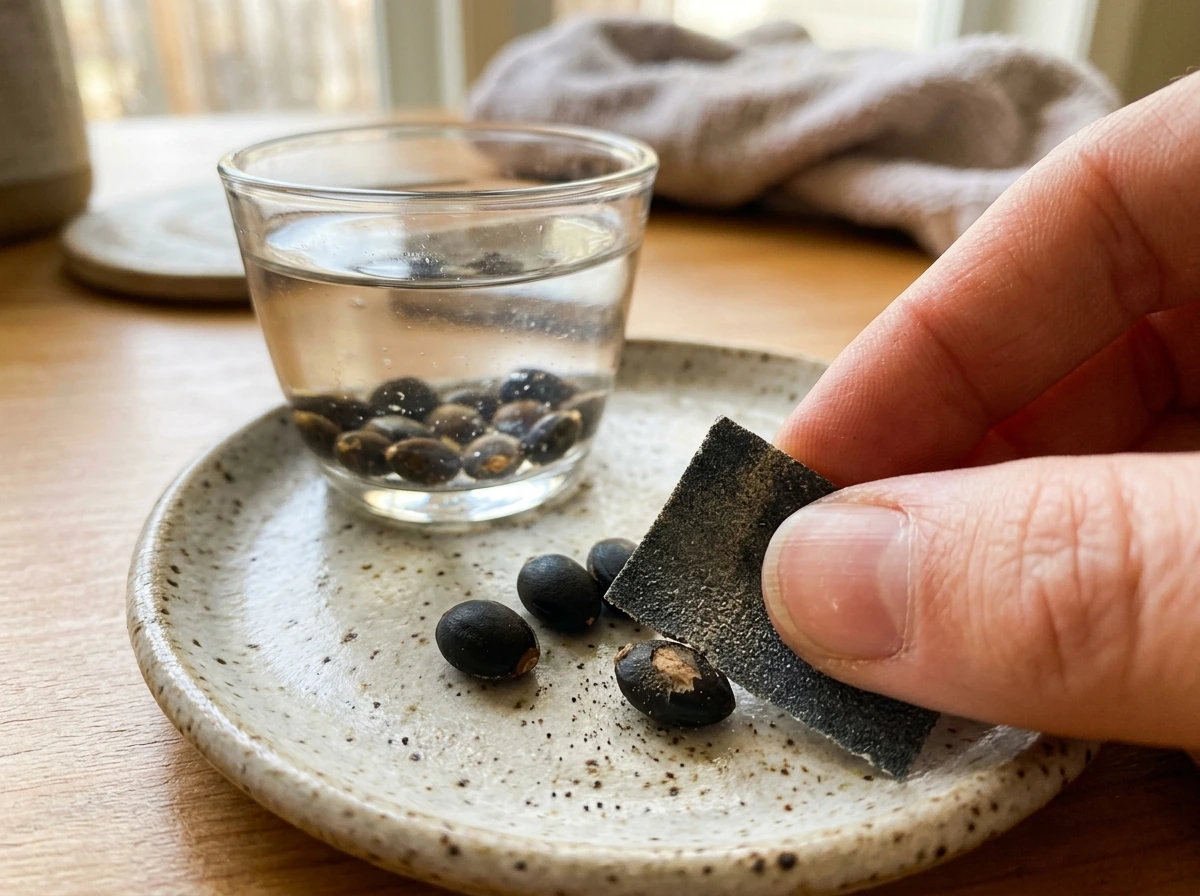
Mimosa seeds have a notoriously hard seed coat that resists water uptake. Skip this prep step and you'll sit there waiting weeks for nothing. The fix is scarification, which just means physically breaking or softening that outer shell so water can get in and trigger sprouting. For hard-seeded species, scarification is removing or abrading the hard seed coat (without damaging the embryo) so water uptake and germination can happen scarification physically breaks or softens the hard seed coat.
The most consistent method I've used is a two-step process: nick the seed coat with a nail file or piece of sandpaper (just a light scuff on one side, not deep enough to damage the inner seed), then soak the seeds in warm water for 24 hours. After soaking, seeds that have swelled up noticeably are ready to plant. Any that haven't swelled, give them another gentle nick and soak for another 12 hours.
Timing matters too. If you're starting indoors, aim for 8 to 10 weeks before your last frost date. For most of the US, that puts indoor starting between late February and early April. If you're direct-seeding outdoors, wait until soil temperatures reach at least 65°F consistently, timing is the whole answer to where to grow mums.
Timing is the whole answer to where to grow mums, and it works similarly for how to grow mums as perennials when choosing the right garden spot. If you're learning how to grow mums for profit, focus on timing, consistent sun, and strong drainage so plants produce market-ready blooms reliably where to grow mums.
If you are also planning chrysanthemums, the timing for when to grow mums depends on your local frost dates and how much sun you can provide. If you are also planning chrysanthemums, the timing for when to grow mums depends on your local frost dates and how much sun you can provide when to grow mums for fall.
- Lightly scarify each seed with sandpaper or a nail file on one side.
- Soak scarified seeds in warm (not boiling) water for 24 hours.
- Discard any seeds that haven't swelled; re-scarify and re-soak stragglers.
- Plant swelled seeds 1/4 to 1/2 inch deep in a well-draining seed-starting mix.
- Keep the growing medium moist but not soggy, and expect sprouts in 7 to 14 days at 70 to 75°F.
Use individual cell trays or small pots rather than a communal flat. Mimosa develops a taproot quickly and doesn't love having its roots disturbed, so starting each seed in its own cell reduces transplant shock later.
Light, Temperature, and Humidity for Seedlings
Once seeds sprout, they need strong light immediately. A south-facing windowsill can work in a pinch, but seedlings grown that way tend to stretch and go leggy within a week or two. A grow light positioned 2 to 4 inches above the seedlings for 14 to 16 hours a day produces compact, sturdy stems that handle transplanting much better. If you're using a basic LED shop light, that works fine.
Temperature is equally important at this stage. Mimosa seedlings germinate and develop best between 68°F and 78°F. Below 60°F, growth stalls noticeably. If your home is on the cooler side, a seedling heat mat set to 70°F under the trays makes a real difference, especially for germination. Once sprouts are 2 to 3 inches tall, you can remove the heat mat and maintain normal room temperature.
Humidity during germination helps, so covering your seed trays with a clear plastic dome or plastic wrap until sprouts emerge keeps moisture in. Remove the cover as soon as the first seedlings appear to prevent damping-off fungus, which thrives in stagnant, humid air. After that, ambient indoor humidity (40 to 60%) is perfectly fine.
Transplanting, Potting, and Early Growth Care
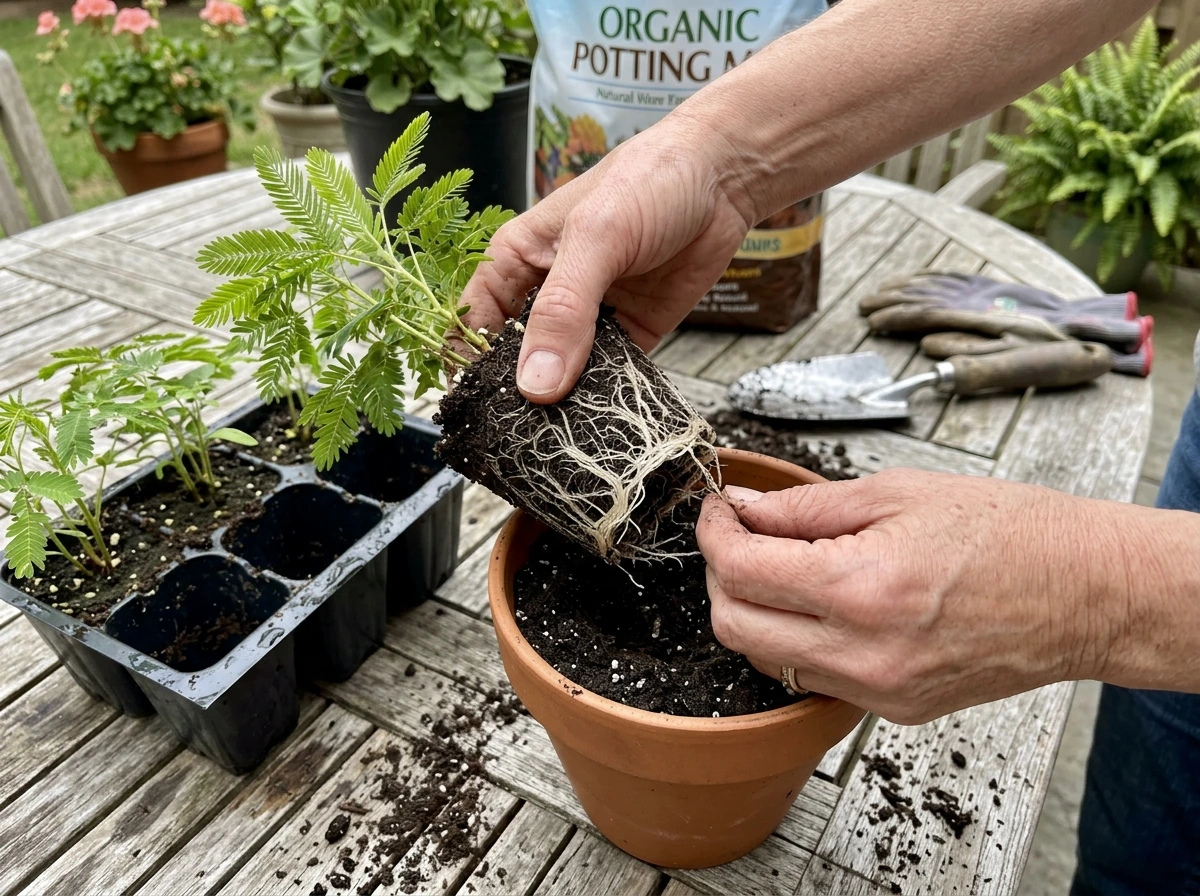
Mimosa EVO seedlings are ready to move up when they have at least two sets of true leaves and their roots are just starting to circle the bottom of the cell. That usually happens 4 to 6 weeks after germination. Don't wait too long here. The longer you leave them in a small cell, the more root-bound they get, and transplant shock becomes more of an issue.
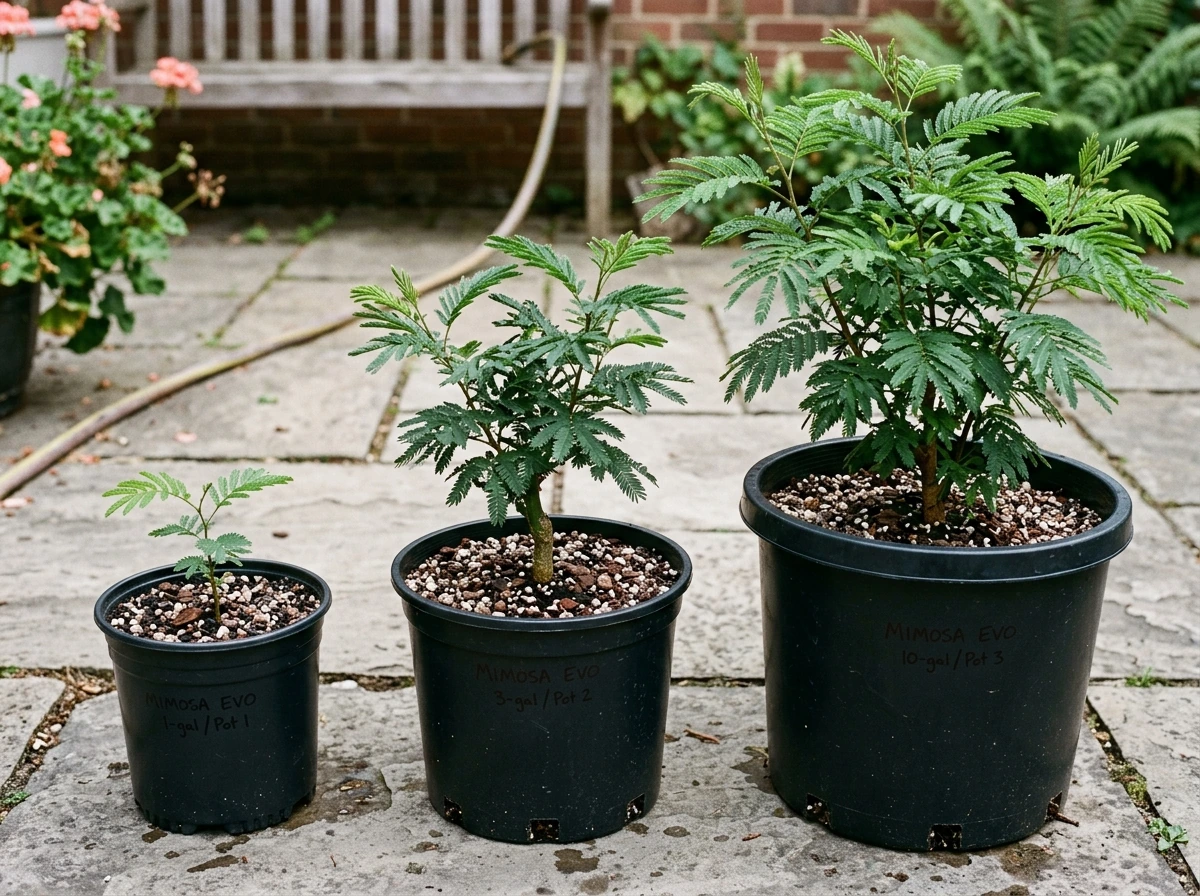
Container Growing
For container growing, start seedlings in a 1-gallon pot, then step up to a 3-gallon and eventually a 7- to 10-gallon container as the plant grows. Use a well-draining potting mix amended with 20 to 30% perlite to prevent waterlogging. Terracotta pots work especially well because they breathe and help prevent overwatering. Position the container in your sunniest outdoor spot once nighttime temperatures stay above 50°F.
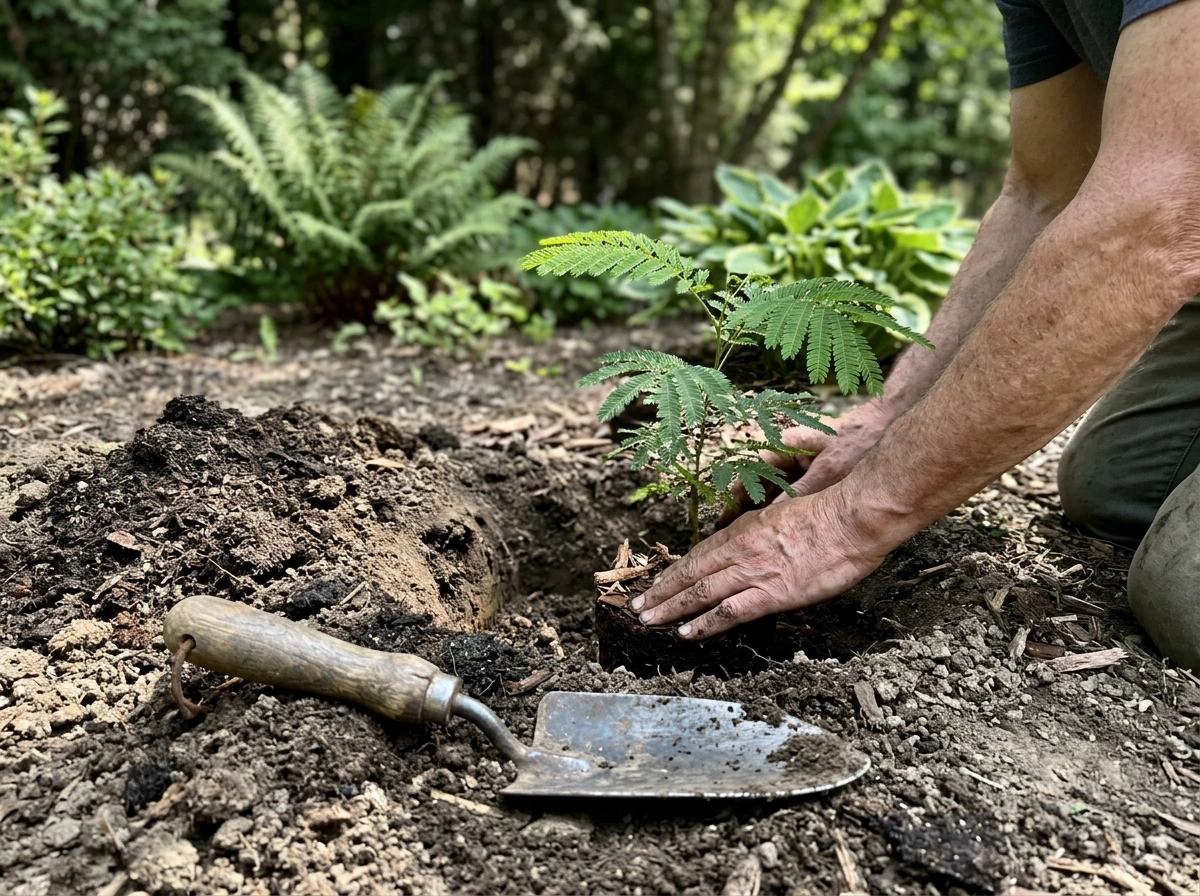
In-Ground Planting
For in-ground planting, harden off seedlings first by setting them outdoors in a sheltered, partially shaded spot for about a week before moving them to full sun. Dig a hole twice as wide as the root ball but only as deep. Plant at the same depth the seedling was growing, backfill with native soil (no need for heavy amendments unless your drainage is genuinely poor), and water in thoroughly. Space multiple plants at least 10 to 15 feet apart since mature mimosa trees have a wide canopy spread.
After transplanting, keep the root zone consistently moist for the first two to three weeks while the plant establishes. A 2- to 3-inch layer of mulch around the base (keeping it a few inches away from the trunk) helps retain moisture and regulate soil temperature during this critical period.
Watering, Feeding, and Pruning to Trigger Flowering
Watering
Once established (roughly 4 to 6 weeks after transplanting), mimosa is surprisingly drought-tolerant. For in-ground plants, deep watering every 10 to 14 days during dry spells is usually enough. Container plants dry out faster and may need watering every 3 to 5 days in summer heat. The rule I follow: stick your finger 2 inches into the soil. If it's dry at that depth, water deeply. If it's still moist, wait. Never let container plants sit in standing water in a saucer.
Feeding
Mimosa is not a heavy feeder, and pushing too much nitrogen produces lush, leafy growth at the expense of blooms. During the first growing season, a balanced slow-release fertilizer (something like a 10-10-10) applied once in spring is sufficient for in-ground plants. For containers, a diluted balanced liquid fertilizer every 3 to 4 weeks from spring through midsummer works well. Once July arrives, switch to a low-nitrogen, phosphorus-rich formula (like a bloom booster at 5-15-10) to encourage flower bud development for the following season.
Pruning
Mimosa flowers on new growth, so timing your pruning matters. The best window is late winter or very early spring, just before new growth begins. Remove any dead, crossing, or weak branches. For young plants, light shaping to encourage a sturdy branching structure helps long-term flowering performance. Avoid heavy pruning in summer or fall since you'll cut off developing flower buds. For container plants where you want to manage size, a light trim after blooming (mid to late summer) is acceptable.
Troubleshooting the Common Problems
No Germination After Two Weeks
The most common cause is skipping or inadequate scarification. If seeds haven't sprouted in 14 days, gently dig one up and check. A hard, dry seed that looks unchanged didn't absorb water. Re-scarify and re-soak. If the seed is soft and mushy, it rotted from overwatering or low soil temperatures. Start fresh seeds and keep the medium barely moist rather than wet, and add a heat mat if room temps are below 65°F.
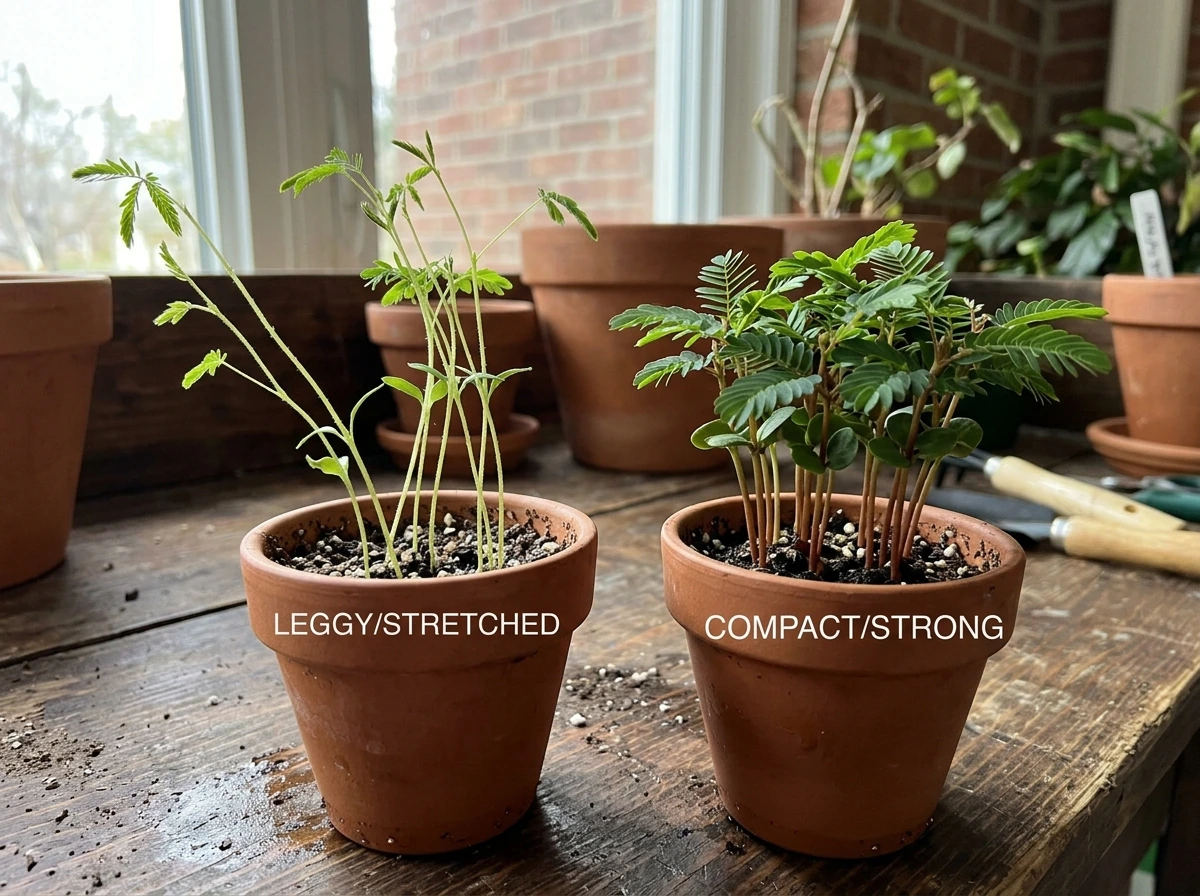
Leggy, Stretched Seedlings
Legginess is almost always a light problem. Move seedlings closer to the grow light (2 to 4 inches away) or give them more hours of direct sun. You can bury leggy stems slightly deeper when transplanting up to a larger pot, which helps stabilize the plant, but the real fix is more light going forward.
Yellow Leaves
Yellowing on established mimosa usually points to one of three things: overwatering (roots sitting in wet soil, leading to root rot), nitrogen deficiency (pale yellow on older leaves moving upward), or iron/manganese deficiency from high soil pH (yellowing between leaf veins on newer growth, called chlorosis). Check drainage first. If roots smell musty or soil is perpetually wet, cut back watering and improve drainage. If the plant is simply pale, a balanced fertilizer feed usually solves it within two to three weeks. For chlorosis, lower soil pH slightly with sulfur amendments or use a chelated iron foliar spray.
No Blooms
Mimosa EVO started from seed typically takes 2 to 3 years to reach first bloom, so patience is part of the deal in year one. If your plant is of blooming age and still not flowering, the most likely culprits are too much nitrogen fertilizer (promoting leaves at the expense of buds), insufficient sun, or heavy pruning at the wrong time. If you're also wondering when to grow mums, it can help to think in terms of matching timing to your local frost window and bloom goals, much like mimosa needs the right season for flowering. Back off nitrogen, maximize sun exposure, and make sure you're only pruning in late winter.
Pests and Diseases to Watch For
Mimosa is relatively pest-resistant, but a few problems do show up regularly, especially when plants are stressed by poor drainage or inadequate light.
| Problem | What You'll See | Organic Fix |
|---|---|---|
| Mimosa webworm | Silky webbing over branch tips; leaves skeletonized inside webs | Remove webbed clusters by hand; spray with Bt (Bacillus thuringiensis) when caterpillars are small |
| Spider mites | Fine stippling on leaves, tiny webs on undersides in dry/hot conditions | Blast off with water; apply neem oil spray every 5 to 7 days |
| Scale insects | Brown or white crusty bumps on stems; sticky honeydew residue below | Scrub off with a soft brush; apply horticultural oil spray in early spring |
| Fusarium wilt | Sudden wilting despite moist soil; yellowing and branch dieback progressing through the canopy | No cure once established; remove and destroy infected plants; avoid replanting mimosa in same soil |
| Damping-off (seedlings) | Stems pinch and collapse at soil line in newly germinated seedlings | Improve air circulation; use sterile seed-starting mix; water only when slightly dry; treat with diluted hydrogen peroxide (1 part H2O2 to 9 parts water) |
The mimosa webworm is the most common pest issue you'll encounter if you're in the eastern US. Catching it early when webs are small and removing them by hand is far easier than managing a full infestation. Bt spray is safe, effective, and won't harm pollinators when applied in the evening after bee activity slows down.
Your Weekly Plan: Seed to Bloom
Here's how the timeline actually plays out, broken into phases. I've kept it practical for both container and in-ground growers, with notes where the approach differs.
Weeks 1 to 2: Seed Starting
- Scarify seeds with sandpaper and soak in warm water for 24 hours.
- Plant in individual cells, 1/4 to 1/2 inch deep in sterile seed-starting mix.
- Set on a heat mat at 70 to 75°F, cover with a humidity dome.
- Check daily for moisture and sprouting; remove dome at first sign of green.
- Germination check: seeds should sprout within 7 to 14 days. No sprouts by day 14? Re-scarify remaining seeds.
Weeks 3 to 6: Seedling Growth Indoors
- Move seedlings under grow lights or to brightest window immediately after sprouting.
- Water when top 1 inch of mix is dry; avoid soggy conditions.
- Feed with diluted half-strength balanced liquid fertilizer starting at week 4.
- Container growers: begin checking root development at week 5 and pot up to 1-gallon pots when roots circle the cell bottom.
- In-ground growers: begin hardening off at week 5 by setting plants outdoors in sheltered shade for increasing amounts of time each day.
Weeks 7 to 10: Transplanting and Establishment
- Transplant outdoors once nighttime temps are reliably above 50°F.
- Container growers: place in sunniest available spot; water every 3 to 5 days in warm weather.
- In-ground growers: plant with mulch, water deeply every 3 to 4 days for the first month.
- No fertilizer needed at transplanting; let roots settle for 2 to 3 weeks first.
- Watch for pests: check branch tips weekly for early webworm webbing.
Month 3 Through End of First Growing Season
- Water established in-ground plants every 10 to 14 days during dry periods; containers every 3 to 5 days.
- Apply a balanced slow-release fertilizer once in spring for in-ground; liquid feed containers every 3 to 4 weeks through midsummer.
- Switch to a bloom booster (low nitrogen, higher phosphorus) in July for containers.
- Do not prune during summer or fall. Save pruning for late winter.
- Container growers in zones 6 or colder: bring pots into an unheated garage or shed before first frost.
Year 2 and Beyond: Setting Up for Blooms
- Prune in late winter (late February to early March) to shape and remove dead wood.
- Resume balanced fertilizer in spring; switch to bloom booster by midsummer.
- Expect first blooms in year 2 to 3 from seed, typically appearing in early to midsummer (June through August depending on your zone).
- After blooming, let seed pods mature if you want to collect seeds, or remove them to reduce self-seeding.
- Repeat the late-winter prune annually to maintain shape and encourage fresh flowering wood each season.
If you're also growing other flowering plants alongside your mimosa, keeping a consistent care calendar helps you manage everything without things slipping. Many gardeners growing mimosa alongside chrysanthemums, for example, find that the late-summer feeding and pruning schedules overlap conveniently, making seasonal care easier to batch together.
The honest truth about growing Mimosa EVO from seed is that the first growing season is mostly about building a healthy root system and sturdy structure. Year two is when things get exciting and the plant starts to look like what you pictured. Stay consistent with sun, drainage, and sensible feeding, and it will reward you with those unmistakable pink pom-pom blooms that make the wait completely worth it. If you're also wondering where to grow mums, focus on a spot with full sun to partial shade and soil that drains well so plants don't stay wet.
FAQ
Can I keep the plastic cover on after the seeds sprout to speed things up?
Yes, but start small and be selective: don’t keep seeds or seedlings in the same covered container after emergence. Once sprouts show, remove the plastic dome immediately, and switch to watering from the bottom (or very light top watering) so the surface doesn’t stay wet. Also avoid soaking the cells after transplanting, since mimosa is vulnerable to damping-off and later root issues when humidity stays high.
What should I do if my mimosa seedlings have grown a circling taproot in the cell tray?
If you see a long taproot circling tightly, transplant sooner rather than trying to correct it in place. The safest move is to up-pot when roots are just beginning to circle, not after they are densely knotted. When you transplant, handle by the root ball, and firm the soil lightly so the seedling doesn’t wobble (wobbling breaks fine feeder roots).
How often should I water mimosa in a container to avoid root problems?
Mimosa usually benefits from being kept slightly on the dry side between waterings, especially in containers. Use the 2-inch finger test, and in pots make sure there is never standing water in a saucer. If drainage is borderline, mix in more perlite (toward the high end of the 20 to 30% range) to prevent intermittent waterlogging.
My mimosa looks lush but isn’t flowering yet, how can I fix it if I gave too much nitrogen?
For mimosa, more nitrogen is not better. If you accidentally over-fertilized early, pause feeding for several weeks and lean back to light, balanced nutrition only. If leaves become very lush with few or no buds, switch to a low-nitrogen, higher-phosphorus bloom-encouraging blend as the article suggests, and prioritize full sun to recover flowering.
What’s the best way to handle chlorosis (yellowing between leaf veins) beyond adding fertilizer?
High soil pH can lock up iron and manganese, so even “green up” sprays may not hold. If you suspect chlorosis, confirm drainage first (wet soil makes nutrient uptake worse), then adjust pH gradually. For foliar iron chelates, treat in the early morning and expect improvement in new growth rather than older yellow leaves.
I pruned in late summer for shape, will it affect blooms, and what can I do now?
Pruning too late can remove developing buds because mimosa flowers on new growth. If you already trimmed in summer, avoid further pruning until the next late-winter window. You can still do light deadwood removal, but skip any structural shaping in warm months if your goal is maximizing bloom this year.
How do I tell the difference between drought stress and overwatering in young mimosa?
While mimosa can take drought once established, young transplants still need steadier moisture. If a container plant wilts mid-day, check the 2-inch soil depth before watering lightly. Water deeply until excess drains out, then wait until the next check shows the root zone has dried.
If my seeds do not germinate after scarifying, what should I troubleshoot first?
Mimosa seeds can fail for a few reasons beyond scarification, but the most common are cold medium and over-dry media after the soak. If germination stalls, re-check room or mat temperature (keep near the mid-70s during germination), and keep the growing mix just barely moist, not wet. Also discard any seeds that were soaked and then left to sit in water for long periods, since that increases rot risk.
Can I keep Mimosa EVO small in a pot, and what pruning strategy works best?
Yes, but do it thoughtfully: in containers you can manage size with light trim after bloom and by using appropriately sized pots. Avoid aggressive cutting that would remove a lot of new-growth potential, and remember that root restriction can stress the plant, so don’t stay in the smallest pot too long.
What’s the safest way to acclimate mimosa to full sun after moving it outside?
Choose the brightest available spot and protect only from extreme weather shocks. If nighttime temperatures are near the threshold, you can gradually acclimate over a week by increasing hours of direct sun and keeping the plant in a sheltered area during the coldest nights. This prevents leaf scorch and reduces transplant stress while you transition outdoors fully.
Next Article
How to Grow Fall Mums: From Transplant or Seed-to-Bloom
Step-by-step guide to grow fall mums from transplants or seed, with timing, care, and fixes for common failures.