Growing fall mums successfully comes down to one thing: timing. Get the timing right for your climate, and everything else falls into place. Whether you're starting from seed or working with transplants, the goal is the same: a compact, bushy plant that hits its natural blooming window right as temperatures cool and days shorten in late summer and fall. This guide walks you through every step, from picking the right variety to troubleshooting the problems that catch most beginners off guard.
How to Grow Fall Mums: From Transplant or Seed-to-Bloom

Harriet Whitmore
24 Mar 2026
Choosing Fall Mum Varieties and Timing for Your Climate
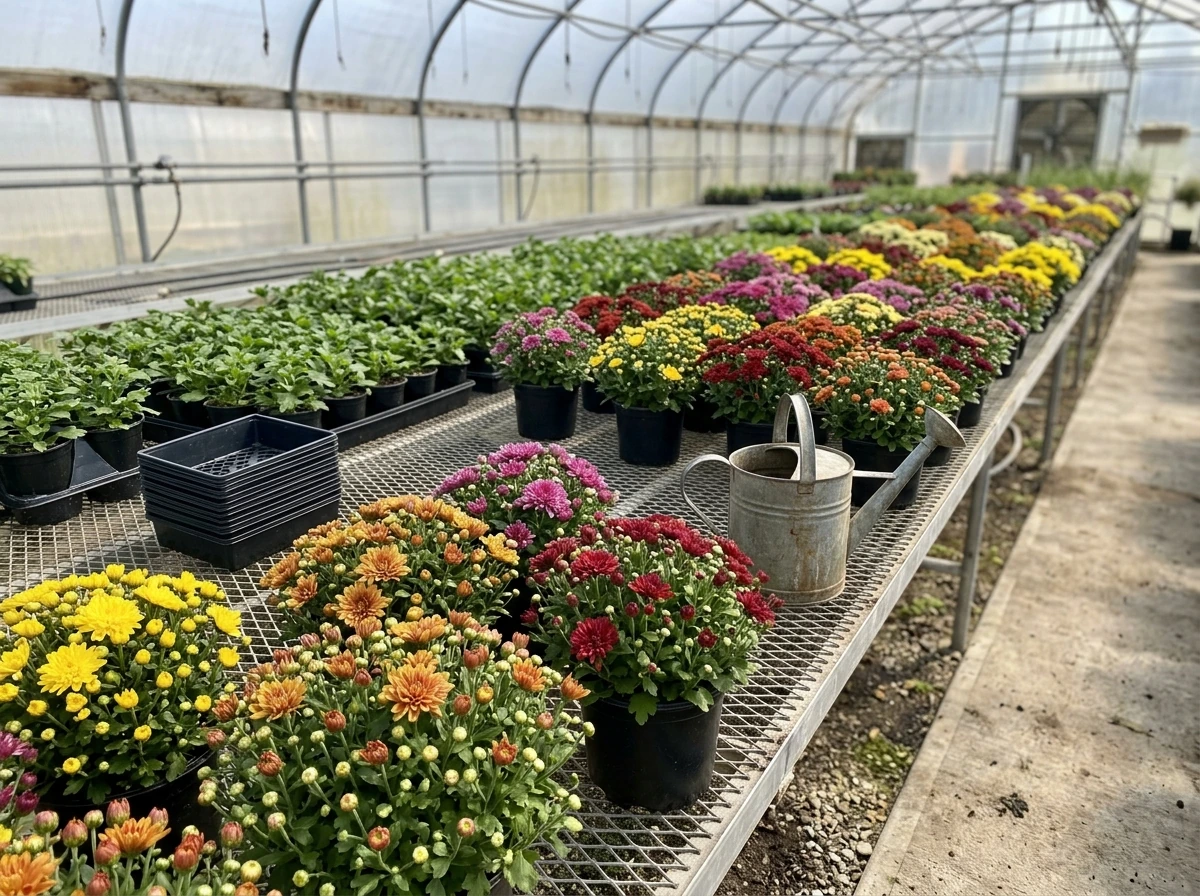
Not all mums are created equal, and that supermarket pot of mums sitting on your front porch is probably not the one you want to plant and expect to come back. Those are 'pot' or 'charm and cushion' types bred specifically for container culture and one-season display. What you want for a garden planting that will actually bloom reliably in fall are garden-hardy chrysanthemums, typically sold as Chrysanthemum x morifolium. These have been selected to survive in the ground, naturalize in suitable zones, and bloom in sync with natural fall daylength.
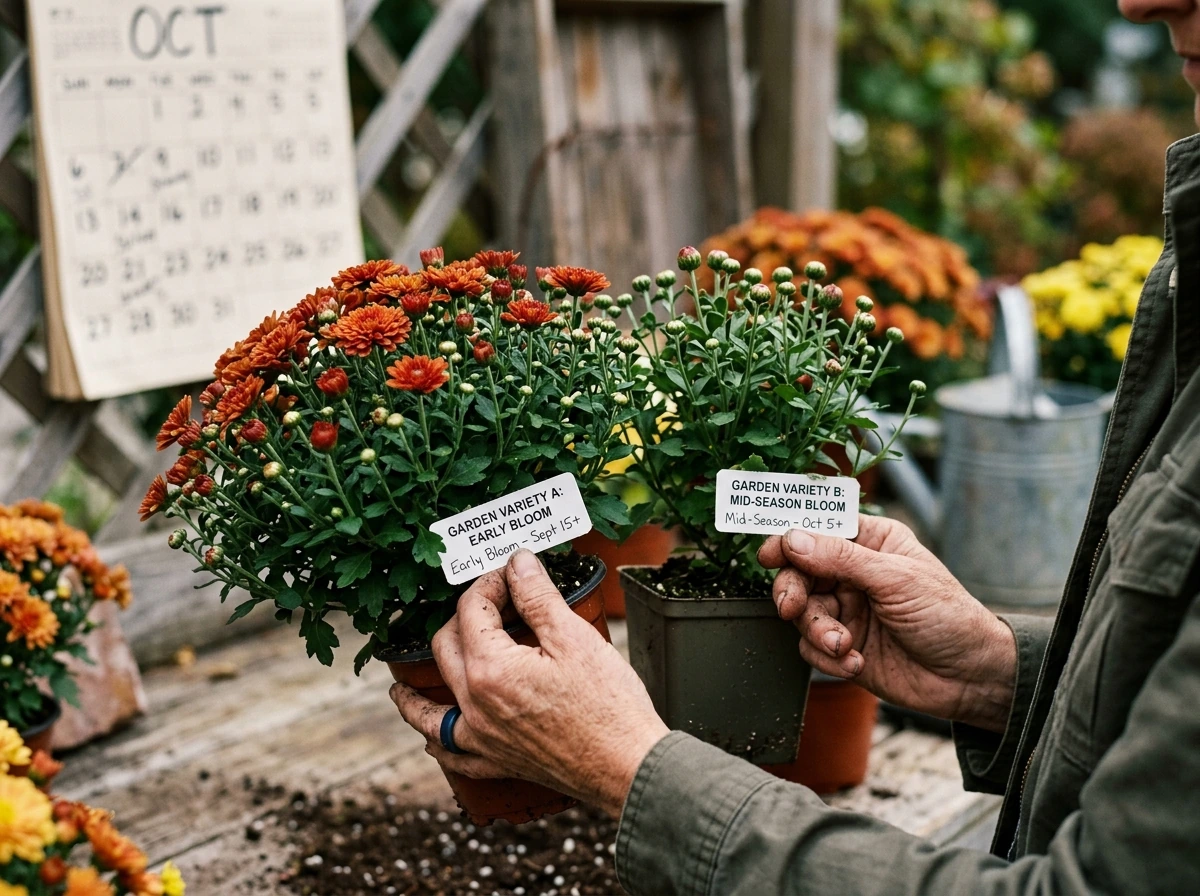
For fall bloom, look for varieties labeled as 'early,' 'mid-season,' or 'late' flowering. If you're in a short-season climate like the Upper Midwest or New England, lean toward early types so you get full bloom before hard frost. In the South and warmer zones (7 and above), late varieties give you more color deep into fall without rushing.
Timing your growing season to the variety matters just as much as the variety itself. Mums are short-day plants, meaning they initiate flower buds when nights get long enough (generally more than 12 hours of uninterrupted darkness). That natural trigger happens on its own as summer transitions to fall, typically from late July onward depending on your latitude. Your job is to make sure the plant is big enough and healthy enough to take advantage of that window when it arrives. Knowing when that shift happens in your region helps you count back to plan your seed start or transplant date.
As a rough guide: in USDA Zones 4 to 5, your natural short-day trigger arrives mid-to-late July and hard frost often hits by mid-October, so you need your plants established and bushy by mid-July. In Zones 6 to 7, you have a bit more runway. In Zones 8 and warmer, late-season heat can actually delay flowering by pushing back bud initiation, so earlier planting and variety selection matter even more. If you want a deeper dive into the best timing windows for your specific region, the related guide on when to grow mums for fall covers this in much more detail. when to grow mums for fall
Starting Mums from Seed: Supplies and Seed-Starting Setup
Starting mums from seed is genuinely rewarding but it does require more lead time than most people expect. You're looking at roughly 16 to 20 weeks from sowing to bloom for fall-flowering types, which means starting seeds indoors in late winter or very early spring, typically February through March for most zones. If you're reading this in late March 2026, you're right at the edge of ideal timing for Zones 4 through 6, so don't wait any longer.
Here's what you need before you sow:
- A quality seed-starting mix (not regular potting soil, which is too dense for tiny seedlings)
- Cell trays or small pots with drainage holes (drainage is non-negotiable for preventing damping-off)
- A shallow tray for bottom watering
- Grow lights or a very bright south-facing window
- A heat mat (optional but helpful for germination)
- A spray bottle for fine misting
One thing about chrysanthemum seeds that surprises a lot of people: they need light to germinate. Don't bury them. Press seeds lightly onto the surface of moist seed-starting mix and leave them uncovered or with just the thinnest dusting of vermiculite. The ideal germination temperature is around 60°F, and you can expect germination to take anywhere from two to three weeks, so patience is part of the deal here.
Moisten your seed-starting mix before filling the trays, so it's damp but not soggy. After sowing, use a fine mist rather than pouring water over the surface, which can shift or bury seeds. From that point on, water from the bottom by setting the tray in a shallow container of water and letting the mix wick up moisture. This keeps the surface from staying too wet, which is the single biggest cause of damping-off in young seedlings.
Germination and Early Seedling Care for Fall Bloom
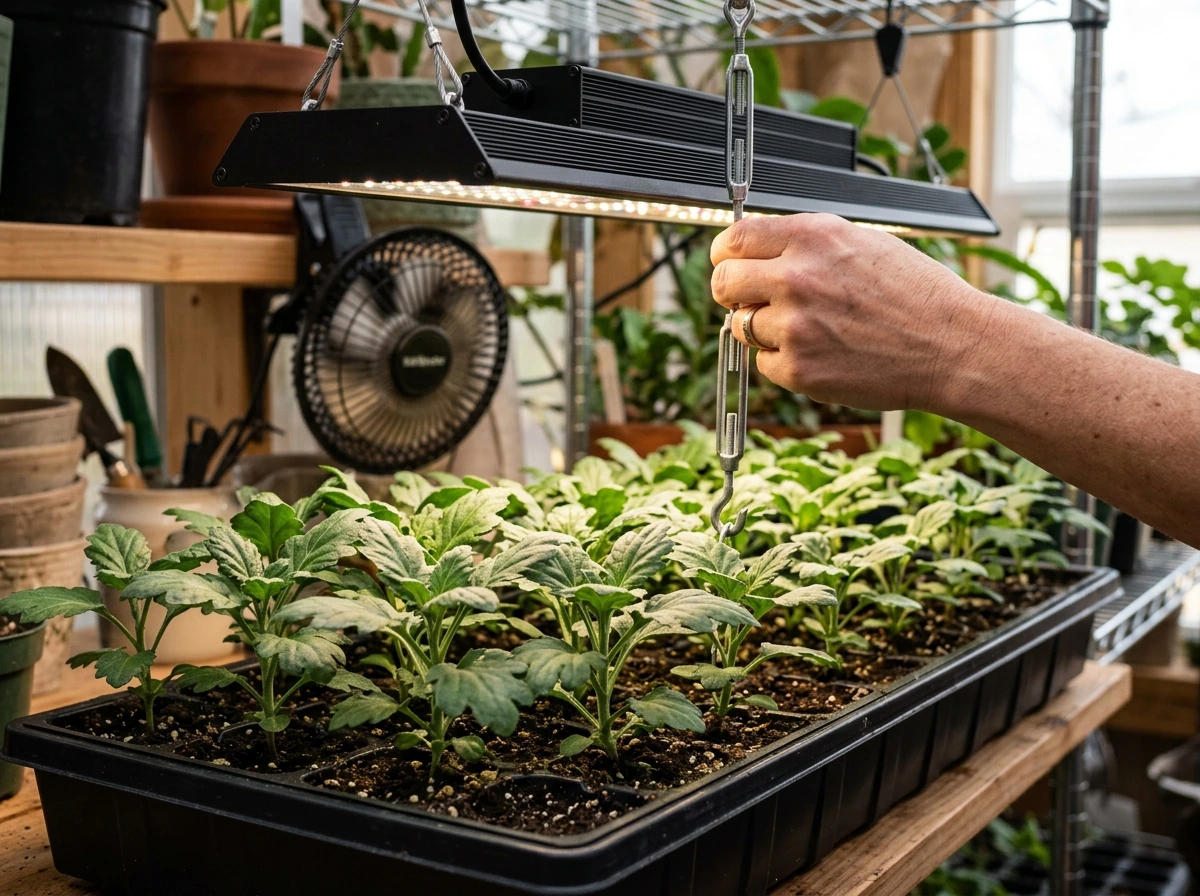
Once seeds germinate, your focus shifts to light and air circulation. Mum seedlings that don't get enough light stretch and become leggy fast, and a leggy seedling is harder to build into the compact, bushy plant you need for good fall bloom. If you're using a grow light, keep it 2 to 4 inches above the seedlings and run it for 14 to 16 hours a day. A bright window works but be honest with yourself: if the seedlings are leaning hard toward the glass within a week, they're not getting enough light.
Keep the growing temperature around 60°F if you can manage it. Cooler temperatures at this stage actually help build sturdier, more compact seedlings. The seedlings don't need fertilizer right away. For the first two to three weeks after germination, the seed-starting mix provides enough nutrition. Once you see the second set of true leaves (the ones that look like actual mum leaves, not the first round seedling leaves), you can start feeding with a diluted balanced liquid fertilizer at about half the recommended rate.
Air circulation matters more than most beginners realize. A small fan running nearby for a few hours a day strengthens stems and dramatically reduces the risk of fungal problems. It also reduces the humid stagnant conditions that pathogens love. If you're growing a tray of seedlings and one suddenly collapses at the soil line, that's damping-off. Remove it immediately, stop overhead watering on the remaining seedlings, and improve air circulation. The pathogen spreads through shared water, so act fast.
When seedlings are about 4 to 6 inches tall and have several sets of leaves, pinch out the growing tip (the very top of the main stem) down to just above a leaf node. This is the first pinch, and it redirects the plant's energy into side branches instead of height. That branching is what eventually gives you a dense, flower-covered plant rather than a single tall stem with a few blooms at the top.
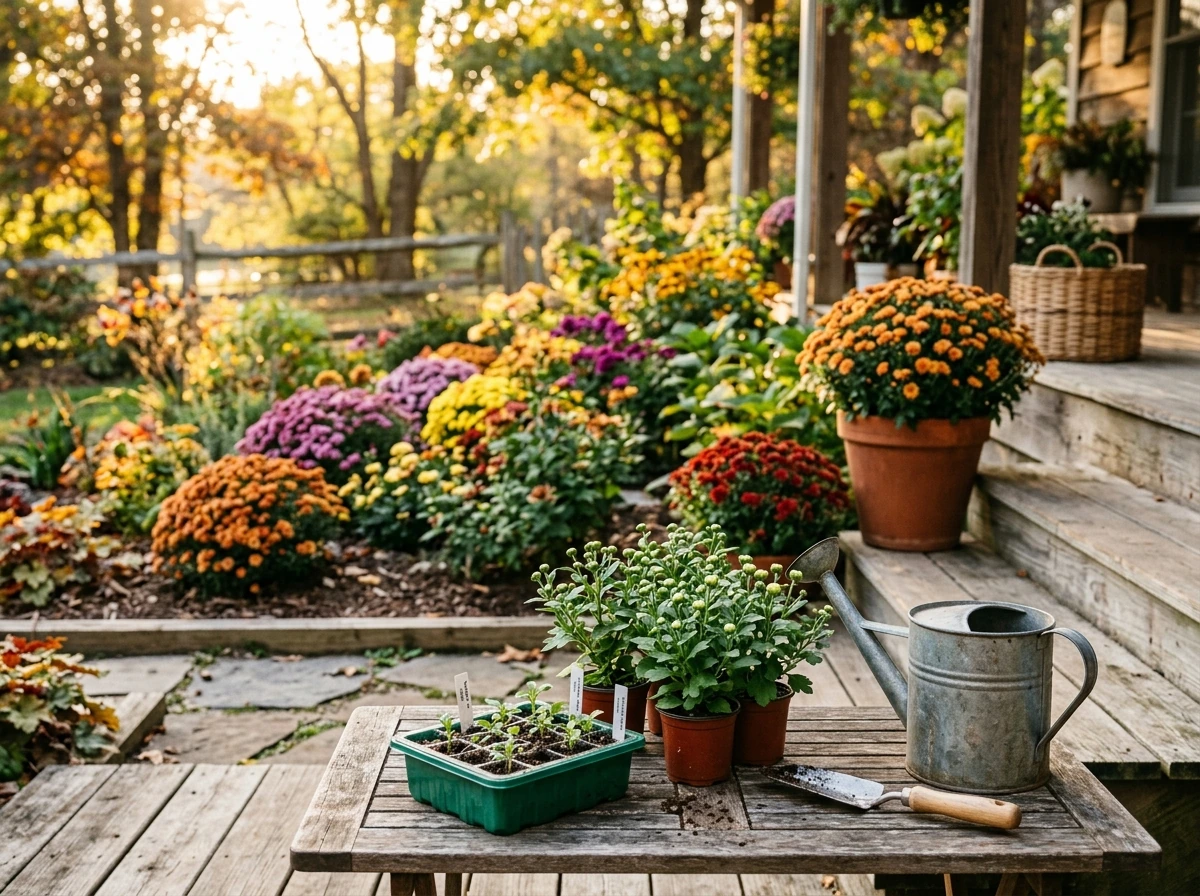
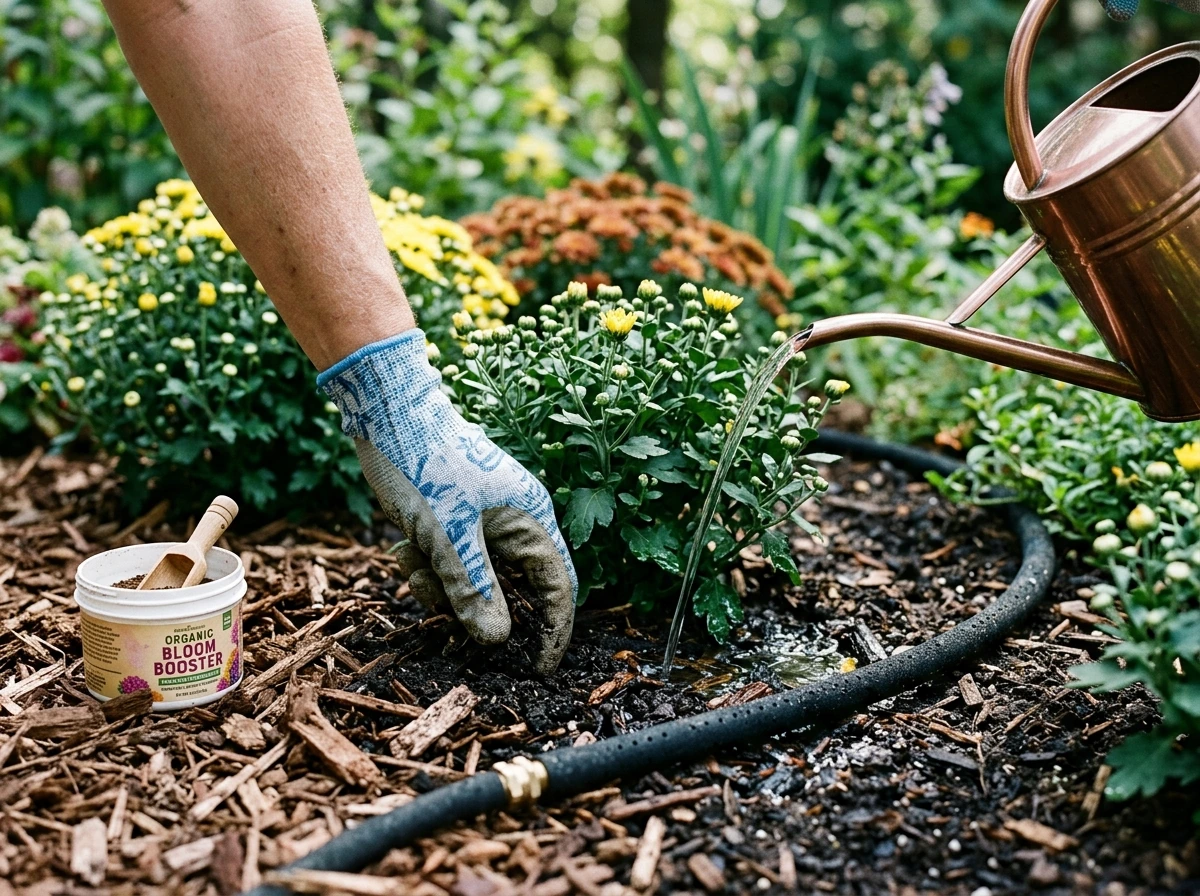
Transplanting Mums for Fall: Spacing, Soil, and Sun
Whether you're moving your seedlings outdoors or planting purchased transplants, the setup matters a lot. Mums want full sun, at least 6 hours a day. Less than that and you'll get fewer blooms and a plant that stretches toward the light rather than filling out. If you're still deciding where to site your mums, the related guide on where to grow mums goes deeper into location-specific factors. mimosa evo grow tips
Before planting, loosen and dig the soil to about 6 inches deep and break up any clumps. Mums don't like compacted soil and they don't like sitting in water. Good drainage is critical. If your soil is heavy clay, work in compost to improve both drainage and nutrient availability. Space plants 18 to 24 inches apart, which feels generous when they're small but becomes clearly necessary once they fill out. Crowded mums don't air out well and are more prone to fungal disease.
Plant at the same depth the seedling was growing in its container. Don't bury the crown (where stem meets roots). Water in thoroughly after planting. If you're transplanting seedlings you started indoors, hardening off is not optional: spend at least a week gradually introducing plants to outdoor conditions before putting them in the ground. Start by setting them outside in a sheltered, partly shaded spot for an hour or two, then increase outdoor time each day. Skipping this step leads to wilted, stressed transplants that can take weeks to recover.
About four weeks after transplanting, give plants their first in-ground feeding with a balanced granular or liquid fertilizer. From there, continue feeding regularly through mid-summer. Stop fertilizing once you see buds forming. Pushing nitrogen when a plant is trying to flower redirects energy back into leaves and delays or reduces blooming.
Ongoing Fall Care: Watering, Feeding, and Temperature
Mums are fairly drought-tolerant once established but they perform best with consistent moisture, especially during the bud-development phase. Aim to keep the soil evenly moist but never waterlogged. Water at the base of the plant, not overhead, to keep foliage dry and reduce disease pressure. If you're in a hot, dry region, a layer of mulch around (not over) the crown helps retain moisture and moderate soil temperature.
Temperature plays a more complicated role in fall mum success than most people realize. Very high temperatures above 85°F during mid-to-late summer can cause what researchers call 'heat delay,' pushing bloom back one to three weeks beyond the expected date. On the other end, cool nights below about 60°F too early in the season (while days are still long) can trigger premature budding, technically called 'crown buds,' where blooms form early but get buried inside the canopy foliage rather than opening properly. There's not much you can do to control weather, but knowing this helps you interpret what's happening with your plants and set realistic expectations for timing.
Continue pinching your plants through early summer to encourage bushiness. The general rule: pinch every time a stem reaches about 6 inches of new growth, removing the top inch or so. Stop pinching by mid-July in most northern zones and by early August in warmer zones. Pinching after that risks removing the buds that are just starting to form in response to shortening days.
If you're growing mums in a region where streetlights, porch lights, or other artificial light sources shine on your plants at night, be aware that interrupting the dark period (even briefly) can delay or prevent bud initiation. Peer-reviewed research on Chrysanthemum morifolium also reports that interrupting the long night with light can prevent flowering, underscoring the importance of uninterrupted darkness for bud initiation interrupting the dark period. Chrysanthemums respond to the length of uninterrupted darkness, not just total daylength, so even a few minutes of light in the middle of the night can reset the clock. Site your plants away from artificial light sources if bloom timing is a priority.
Troubleshooting: Common Seed-to-Mum Problems and Fixes
Here are the problems I see most often with seed-grown fall mums, and what to actually do about them:
| Problem | Likely Cause | Fix |
|---|---|---|
| Seeds not germinating after 3+ weeks | Seeds buried too deep or kept too warm/dark | Resow on surface, keep at ~60°F, ensure seeds receive light |
| Leggy, stretched seedlings | Insufficient light | Move closer to grow light (2–4 inches) or add supplemental lighting |
| Seedlings collapsing at soil line | Damping-off from overwatering or poor drainage | Remove affected plants, improve drainage and air circulation, switch to bottom watering |
| Slow growth after transplanting | Transplant shock or root disturbance | Keep soil moist, hold off on heavy feeding, give it 2–3 weeks to settle |
| Bushy plant but no buds forming by September | Too much artificial light at night, heat delay, or early pinching removed buds | Check for light pollution, review pinch-stop timing, check temps |
| Buds forming but flowers hidden in foliage | Premature 'crown buds' from early cool nights | Normal with weather fluctuations; plant will often produce lateral buds later |
| Yellowing lower leaves | Overwatering or nitrogen deficiency | Check soil drainage; if dry, feed with balanced fertilizer |
| Plants flopping over | Insufficient pinching or too much nitrogen | Stake if needed; reduce nitrogen feeding next season and pinch more consistently |
One thing worth saying plainly: if this is your first time growing mums from seed, you will likely lose a few plants along the way. That's part of the process. Start more seeds than you need, be consistent about bottom watering and light, and don't get discouraged if the timing isn't perfect in year one. Every season teaches you something useful.
How to Get Flowers in Time: Bud Formation, Hardening Off, and Expectations
Here's the honest truth about fall mum bloom timing: you're working with the plant's internal clock, not your schedule. Mums initiate buds when they sense that nights are consistently longer than about 12 hours of uninterrupted darkness. In most of the northern US, that shift starts naturally around late July. The plant's receptacles begin forming in the second week of those short-day conditions, with floret initiation following in the third week. From bud initiation to open flowers typically takes another 6 to 10 weeks depending on the variety and temperatures.
If you want to push bloom earlier, you can simulate short-day conditions by covering plants with a black cloth or dark tarp for at least 12 hours of continuous darkness each day, starting in mid-summer. This works well if you want blooms for a specific event or if you're in a warm climate where natural nights don't shorten fast enough. Be consistent: even one skipped night can set back the process. Do this for several weeks until buds are clearly visible and established, then you can stop the covering.
For transplants purchased in late summer at a nursery, the plants are often already in bud when you buy them. In that case, your hardening-off process is actually the most critical step. Many people buy a potted mum in September, put it straight into the ground, and wonder why it sulks for weeks or drops its buds. The answer is usually transplant shock combined with skipped hardening. Even if the plant looks healthy, take a few days to set it outside in its pot before planting, gradually exposing it to direct sun and outdoor temperature swings.
For seed-grown plants, if you've followed the seed-start timeline (seeds sown in February or March, plants pinched consistently through early summer, stopped pinching by mid-July), you should see buds appearing naturally in August and flowers opening in September through October, right in line with fall. If plants are behind schedule because of a late start or heat delay, resist the urge to panic. Cool nights in August and September will often push things along faster than you expect. And if blooms come a bit late, mums are tough enough to handle light frost, especially with a little protection, so you often get more time than you think.
If growing mums as a long-term perennial planting is your goal (rather than treating them as seasonal color), the related guide on how to grow mums as perennials covers the overwintering and long-term establishment process in depth. Fall mums are more adaptable than their reputation suggests, and once you understand how their flowering clock works, the whole process starts to feel a lot less like guesswork.
FAQ
How late can I plant fall mums and still get flowers before frost?
For fall bloom, plant mums so they can establish root growth before short-day flowering begins. Practically, aim to have plants in the ground by mid-season for your area (often mid-July to early August depending on zone and variety). If you plant in late summer, choose early flowering types, and keep expectations realistic for a smaller or later show.
Will the supermarket pot mums come back next fall if I plant them in the ground?
Mums that are bought in bud can be kept looking good through the end of the season, but they often struggle to re-bloom the next year. If you want repeat fall blooms, prioritize garden-hardy chrysanthemum types and plan for overwintering success (site choice, drainage, and protection). Treat most “seasonal porch pot” mums as one-year performers.
My seed-grown mums are getting tall and floppy, what should I change first?
If your seedlings are leggy, increase light immediately and also check temperature and spacing. Leggy growth usually means the light is insufficient, but very warm conditions can make stems weaker too. Don’t fix it by adding fertilizer early, instead tighten the light schedule to 14 to 16 hours, and keep air moving gently.
Can I cover chrysanthemum seeds with soil to help germination?
No, germination generally depends on light, so burying seeds usually reduces or prevents sprouting. Press seeds onto the surface of moist mix, use a light dusting only if needed, and mist rather than pour so the seeds stay near the surface. Germination can take 2 to 3 weeks, so avoid digging to check.
Do I need to pinch mums more than once, and when do I stop?
Yes, you can pinch more than once, but timing matters. Keep pinching until the plant is well-branched, then stop before bud initiation is far along, otherwise you may remove emerging buds. In most northern zones this means stopping around mid-July, and in warmer areas around early August.
What should I do if I see damping-off in my seedlings?
Bottom watering helps, but you also need to prevent airflow problems after germination. Use a fan for nearby air movement and avoid overhead watering once seedlings are established. If one collapses at the soil line, remove it quickly, improve airflow, and avoid re-wetting the surface for the next day or two.
My mums have lots of leaves but few or no blooms, what did I do wrong?
Pinching and fertilizer timing are the two big levers. Stop nitrogen once you see buds forming, because more leaf growth delays flowering. Also, don’t over-fertilize early, since the seed-starting mix can carry the seedlings for the first weeks after germination.
Is it okay to water mums from above to avoid disturbing the soil?
Overhead watering can increase disease by keeping foliage wet, especially once plants get bushy. Water at the base, early in the day if you can, and ensure plants have spacing and airflow. If you must water with sprinklers, do it early and avoid evening watering so leaves dry quickly.
Can porch lights or streetlights prevent my mums from blooming?
Light at night can interfere with bud initiation because mums respond to uninterrupted darkness, not just total hours of daylight. If streetlights or porch lights hit the plants, use physical shielding or move pots or beds away from the light source. Even occasional brief nighttime lighting can reset the flowering clock.
My soil is clay, what is the best way to prepare it for fall mums?
For heavy clay, the goal is to prevent waterlogged roots while still holding some moisture. Work in compost and consider raising beds if drainage is poor. If water pools after rain, mums may decline even if you water correctly, so drainage fixes often matter more than extra fertilizer.
How can I use dark cloth or tarps to make mums bloom earlier?
Artificial short-day covering can force earlier blooms, but it only works if the dark period is continuous. Cover at least 12 hours of true darkness each day, and choose a covering that blocks light completely. Remove the covering fully during the light period so the plant still gets normal daytime conditions.
If my mums are late to bud, is there anything I can do or should I wait?
Some mums naturally take longer depending on variety and heat. Instead of panicking, watch for the first visible bud set, then adjust expectations based on temperatures, cool nights usually help. If you planted late or experienced heat delay, it is often still possible to get blooms into September or early October with proper care.
Are fall mums worth growing as perennials, or should I treat them as annual color?
Yes, but you need to match the goal to the planting. If your goal is a long-term perennial, focus on overwintering conditions like drainage and winter protection, and avoid treating them as seasonal cutbacks. If your goal is one season color, concentrate on timing, sun, pinching, and bud-stage nutrition.
Next Article
How to Grow Mums for Profit: Sell-Ready Guide
Grow mums for profit with a step-by-step plan for varieties, scheduling, spacing, care, and pest control to sell market-