For reliable fall blooms, plant garden mums in spring after your last frost date, no later than early summer. For full timing details and zone-by-zone recommendations, see our guide on when to grow mums. In most USDA zones, that means getting rooted plants or divisions into the ground between April and mid-July, with earlier plantings giving you stronger root systems, better branching, and a much better shot at a big fall show. If you wait until late August to plant (like you see at every garden center), you might get flowers that season, but you are basically buying a decoration rather than growing a plant.
When to Grow Mums for Fall: Zone-by-Zone Planting Guide

Harriet Whitmore
9 Aug 2026
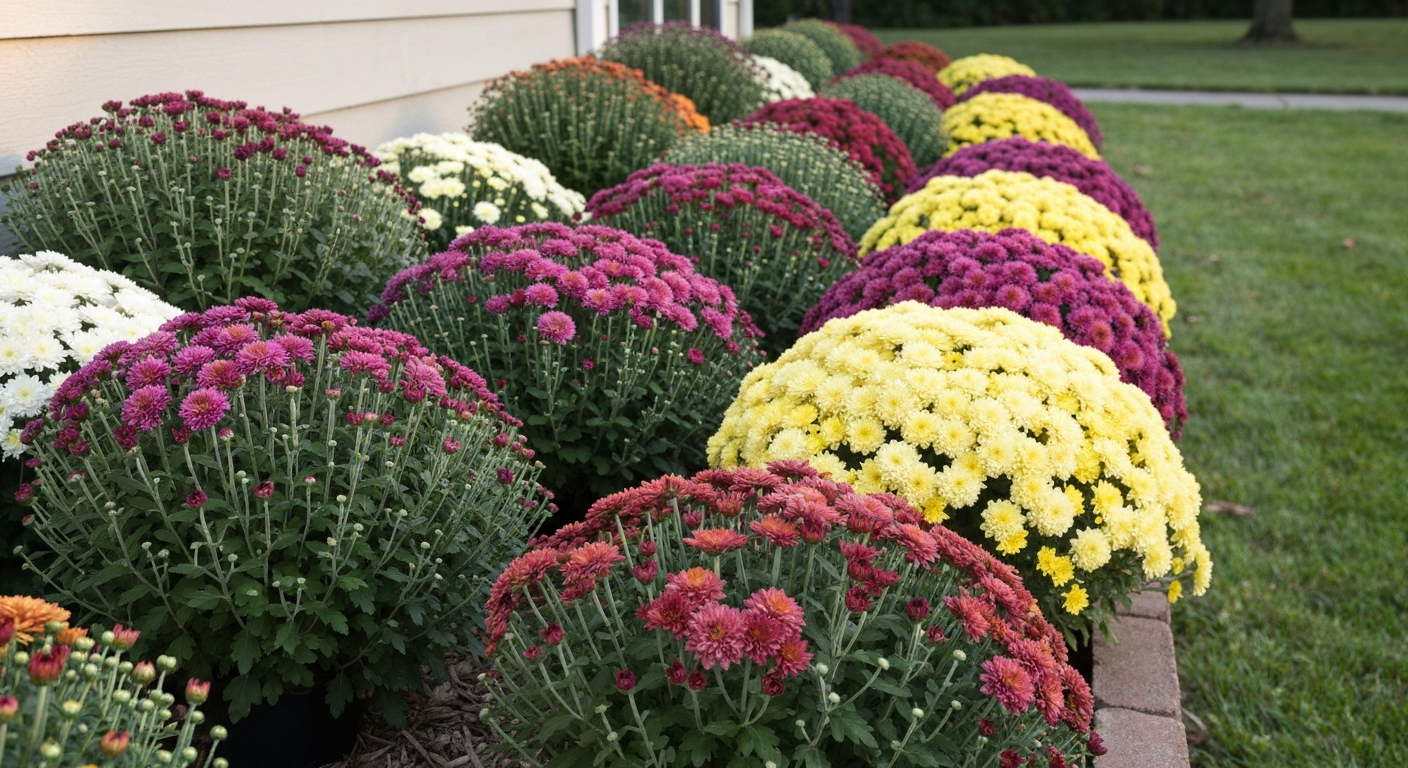
Zone-by-zone planting schedule for fall mums
Mums are short-day plants, meaning they start setting flower buds when nights get long enough (usually mid- to late summer). Your job is to get plants established and well-branched before that natural trigger happens, so timing depends heavily on your last spring frost and your first fall frost. Here is a practical cheat sheet by USDA zone. These dates assume you are planting rooted transplants or divisions, not seeds (seed timing is covered in its own section below).
| USDA Zone | Last Spring Frost (approx.) | Plant Transplants/Divisions By | Stop Pinching By | Expect Bloom |
|---|---|---|---|---|
| Zone 4 | Mid-May | Late May to June 1 | July 1 (late vars) | Late Sept – Oct |
| Zone 5 | Late Apr – May 10 | Early to mid-May | July 1 | Late Sept – Oct |
| Zone 6 | Mid-Apr | April – June 15 | Late June – July 1 | Sept – Oct |
| Zone 7 | Late Mar – Apr | April – June 30 | Late June – July 1 | Sept – Oct |
| Zone 8 | Mid-Mar | March – July 15 | July 1 – July 10 | Sept – early Nov |
| Zone 9/10 | Late Feb – Mar | March – July 15 | July 10 – July 15 | Oct – Nov |
A practical rule from extension resources: stop pinching early varieties by June 10, mid-season varieties by June 20, and late varieties by July 1. Pinching after these dates risks cutting off developing flower buds and pushes bloom past your first fall frost. If you are in Zone 4 or 5, lean toward early or mid-season cultivars since late types often do not finish before hard freezes arrive.
One more thing worth noting for production planning: once bud initiation begins, most garden-type chrysanthemum cultivars take roughly 6 to 8 weeks from bud development to open, marketable bloom. If you are growing for a specific date (a fall market, a wedding, your own porch display), count back 6 to 8 weeks from your target date and make sure plants are actively budding by then.
Annual or perennial: how to decide before you plant
This is where a lot of beginners get frustrated, and honestly I spent a couple of seasons confused about it too. Not all mums sold in fall are the same. Many of the big, puffy mums sold at grocery stores and garden centers in September are florist or forcing types bred for a single season of display. They will look gorgeous for weeks and then die over winter, even in relatively mild zones. True hardy garden mums (Chrysanthemum x morifolium, often labeled 'garden mums' or sold as 'hardy mums') are bred to overwinter in zones 5 through 9 and return each spring, but only if you plant them at the right time and give them decent drainage. For detailed steps on establishing hardy garden mums and ensuring they return each spring, see our guide on how to grow mums as perennials (bacf6bcb-4c96-46a7-a1ba-81ca19ec87c0).
The single biggest factor in overwintering success is planting time. Spring-planted hardy mums spend the whole season establishing a deep root system before winter hits, and their survival rate is dramatically better than plants dropped in the ground in late August. If you want perennial mums that come back year after year, plant in spring. See our guide on how to grow fall mums for step-by-step timing and care. If you want a seasonal display and do not care about overwintering, buying a blooming plant in fall is totally fine.
| Factor | Annual (Fall-planted, florist type) | Perennial (Spring-planted, hardy type) |
|---|---|---|
| Planting window | Late Aug – Sept for display | After last frost through June/early July |
| Root establishment | Minimal before winter | Full season to establish |
| Overwinter survival | Unreliable even in Zone 6+ | Good in Zones 5–9 with good drainage |
| Bloom timing control | Already budded at purchase | You control via pinching |
| Year 2 performance | Usually doesn't return | Returns and spreads with division |
| Best for | Quick seasonal color | Long-term garden planting |
Zone 4 and colder gardeners should treat almost all mums as annuals unless they can provide heavy winter mulch and consistently excellent drainage. In zones 6 through 8, spring-planted hardy mums reliably overwinter when drainage is good. Zone 9 and 10 gardeners deal with the opposite challenge: insufficient winter chill can reduce bloom quality, so growing mums as cool-season annuals and planting in fall for winter/spring bloom sometimes works better than trying to maintain them year-round.
Beds vs containers: picking the right spot and microclimate
Mums need full sun, which means at least 6 hours of direct sunlight per day. For guidance on choosing the best location, beds versus containers, microclimates, and drainage, see our detailed guide on where to grow mums. Chrysanthemum (NC State Extension plant toolbox) recommends full sun (generally ≥6 hours), organically amended, well‑drained soils with a near‑neutral to slightly acidic pH (about 6.0–7.0), noting poor drainage is a common cause of winter loss. Less than that and you get leggy plants, fewer flowers, and more disease. I have tried growing them in partial shade and it is never worth it. Beyond sun, the two factors that matter most are drainage and artificial light at night.
Poor drainage is the single most common cause of winter loss in mums, and it also causes root rot in summer. Raised beds and sloped ground are your friends. Flat, low-lying spots that hold water after rain are your enemy. If you are in a zone where you want mums to overwinter, drainage is non-negotiable.
Artificial light at night is a serious issue that most home gardeners do not think about. Because mums are triggered to bloom by long nights, any nearby light source (porch lights, street lights, landscape lighting) can interrupt the dark period and delay or suppress bud formation. I have had mums planted under a porch overhang near a light fixture that bloomed three to four weeks later than plants ten feet away in full darkness. If you notice your mums are not budding up when others nearby are, check whether they are getting any nighttime light exposure.
Beds
In-ground beds allow roots to spread freely, which supports larger plants and better overwintering. Space plants 18 to 24 inches apart to allow air circulation and accommodate the mature dome shape. Raised beds are ideal because they almost always drain well. In-ground beds benefit from organic matter additions at planting time (see soil prep below).
Containers
Containers give you flexibility to move plants for display, adjust microclimate, and protect them from early frost. A rooted cutting is typically finished in an 8-inch pot for smaller displays; a full, domed show plant needs a 10 to 12-inch pot or a 1 to 2-gallon container. The tradeoff: containers dry out fast, especially when plants are in full bloom in warm fall weather. Plan on checking moisture daily and watering every 1 to 2 days in hot weather. Container plants also need more frequent fertilization since nutrients wash out with frequent watering. Overwintering container mums is difficult unless you move them to an unheated garage or bury the pot in the ground before hard frost.
Soil prep and what to do before you plant
Garden mums want soil with a pH between 6.0 and 7.0, good organic matter content, and excellent drainage. Before planting, I always work in a 2 to 3-inch layer of compost and mix it into the top 10 to 12 inches of soil. If your soil is heavy clay, adding coarse perlite or grit improves drainage quickly. Do a simple pH test if you have not recently amended your beds. Soil that is too acidic (below 6.0) or too alkaline (above 7.0) locks up nutrients even if you are fertilizing regularly.
- Target pH: 6.0 to 7.0 (slightly acidic to neutral)
- Drainage: critical — raised beds or sloped sites are ideal
- Organic matter: work in 2 to 3 inches of compost before planting
- Heavy clay soil: amend with perlite or coarse grit to improve drainage
- Avoid low spots that collect water, especially if overwintering is the goal
- Full sun location: minimum 6 hours of direct sunlight per day
For container growing, use a professional-grade potting mix rather than garden soil. Straight garden soil compacts in containers and drains poorly. A peat- or coir-based mix with added perlite gives good moisture retention and drainage, which is the balance mums need.
Tools, supplies and a seasonal timing checklist
Getting the timing right matters as much as the tools you use. Here is what to have on hand and when.
| Timing | Task | Supplies Needed |
|---|---|---|
| Late winter (Feb–Mar) | Order rooted liners or plan seed sowing | Seed catalogs, liner order forms |
| 4–6 weeks before last frost | Start seeds indoors (if seed-grown) | Seed trays, grow lights, heat mat, potting mix |
| At/just after last frost | Plant rooted transplants or divisions outdoors | Compost, trowel, labels, pH tester |
| When plants reach 6–8 in | First pinch | Sharp clean scissors or pruners |
| Every 2–3 weeks after | Repeat pinching until cutoff date | Scissors/pruners, calendar reminder |
| Throughout growing season | Fertilize at 200–300 ppm N (water-soluble feed) | Water-soluble fertilizer, watering can/drip system |
| As buds develop | Reduce fertilizer to ~100 ppm or stop | Same fertilizer, diluted |
| Early–mid July | Final pinch, begin watching for bud initiation | Calendar, magnifying glass (optional) |
| Before hard frost (Zone 4–6) | Apply 4–6 in mulch for overwintering | Straw, shredded leaves, or wood chip mulch |
Which propagation method fits your timeline
There are four ways to propagate mums: seed, nursery transplants, stem cuttings, and division. Each has a different timeline and a different best use case. Knowing which one fits your situation saves you a season of disappointment.
Nursery transplants
For most home gardeners trying to hit a fall bloom window, buying rooted liners or potted transplants from a garden center is the simplest and most reliable choice. You plant after your last frost, pinch on schedule, and let the season do its work. This is where I would tell beginners to start, because it removes most of the timing complexity.
Stem cuttings
If you already have established plants or want to multiply a specific cultivar, stem cuttings are highly effective. Take 3 to 4-inch terminal cuttings in spring when new growth is fresh and vigorous. Dip the cut end in IBA rooting hormone (commercial propagation protocols commonly use 1,000 to 2,500 ppm), stick into a well-drained plug mix, and maintain a media temperature of 70 to 74 degrees F with high humidity. Root emergence typically happens in 10 to 14 days under mist or a humidity dome, with a strong root system forming within 2 to 6 weeks. After rooting, pinch the cutting 16 to 18 days after sticking to encourage branching. Cuttings taken in March through May give plenty of growing season before fall bud initiation.
Division
Division is the classic method for maintaining perennial mums and is also a good way to get free plants from an established clump. The key rule: divide in spring, not fall. When new shoots emerge from the crown in early spring, dig the clump, break it apart into sections with healthy roots and 3 to 5 shoots each, and replant at the correct spacing. Fall division stresses plants right before winter and reduces bloom reliability the following season. Spring division gives a full season of establishment.
Seeds
Seeds are the longest road to fall bloom, and the one that gives you the least predictability with named cultivars. See the dedicated section below for the full schedule and practical notes.
Growing mums from seed: timing and what to expect
Seed-grown mums require a substantially longer production timeline than cuttings or transplants, and named varieties (including most commercially popular cultivars) do not come true from seed. If you want Mimosa EVO or Purple Punch specifically, you need cuttings or liners, not seeds. That said, seed-grown mums are a real option if you are growing open-pollinated varieties, experimenting with new crosses, or simply want to start from scratch with species-type plants.
For fall bloom in most USDA zones, sow seeds indoors under lights 10 to 14 weeks before your last expected frost date. In zones 5 and 6, that typically means starting in late January through mid-February. Seeds need warmth for germination, with a media temperature around 70 degrees F. Use a shallow seed tray with a fine-textured, sterile seed-starting mix. Sow thinly, barely cover with mix, and keep evenly moist under a humidity dome or plastic wrap until germination. Thin or pot up seedlings when they have two true leaves.
- Sow 10 to 14 weeks before last frost date (late Jan to mid-Feb for Zone 5/6)
- Use sterile seed-starting mix at 70 degrees F media temperature
- Germination typically occurs in 10 to 20 days
- Thin to one plant per cell when seedlings have two true leaves
- Move to larger pots under strong grow lights as seedlings develop
- Transplant outdoors after last frost, just as you would a purchased transplant
- Begin pinching at 6 to 8 inches, following the same schedule as transplants
- Stop pinching by July 1 to give adequate time for bud development and fall bloom
The real challenge with seed-grown mums is bloom timing variability. Without a known cultivar response time, you cannot predict exactly when a seedling will respond to short days and reach full bloom. This makes seed growing riskier for gardeners in short-season zones (4 and 5) where the window between summer and first frost is tight. If you are experimenting with seed growing, I would suggest trying it alongside a known purchased transplant so you have a reliable fall display as a backup.
One practical tip from my own experience: grow seedlings under supplemental light (14 to 16-hour days) indoors to keep them vegetative and building size before you move them out. As soon as seedlings go outdoors and natural day length shortens in late summer, they will begin responding to the photoperiod just like any other mum. Your job is to have a sufficiently large, well-branched plant before that happens.
Pinching and feeding through the season
Pinching is the single most important cultural practice for getting that full, dome-shaped plant covered in flowers. The idea is simple: when a mum shoot reaches 6 to 8 inches tall, you remove the top half-inch to 1 inch of the growing tip. This breaks apical dominance (the tendency of the main stem to outgrow everything else) and triggers 2 to 4 new side shoots to grow from buds below the cut. Repeat that process every 2 to 3 weeks through early summer and you multiply the number of flowering tips dramatically. A plant pinched twice might have 4 to 8 times the flower sites of an unpinched plant.
The hard deadline is your pinching cutoff. Pinch early varieties no later than June 10, mid-season varieties by June 20, and late varieties by July 1. After those dates, buds are forming or about to form, and pinching removes them. I have made this mistake before, pinching a little too late, and ended up with a big leafy plant that did not bloom until after first frost.
For fertilizing, use a water-soluble balanced fertilizer during the vegetative growing phase at a concentration around 200 to 300 ppm nitrogen. This feeds steady growth without pushing overly soft, floppy stems. Once you see buds forming, back off to around 100 ppm or stop feeding altogether. Overfeeding during budding can delay bloom, cause bud blast, or produce too much leafy growth at the expense of flowers.
Cultivar notes: Mimosa EVO, Purple Punch and what makes them different
Not all mums behave the same way, and cultivar choice affects your scheduling decisions more than most gardeners realize. Two popular options that come up often are Mimosa EVO and Purple Punch, both of which are best propagated from cuttings rather than seed since they are named, selected cultivars with specific performance characteristics.
Mimosa EVO is an early to mid-season type that responds relatively quickly to short-day conditions, making it a good fit for northern gardeners in zones 4 through 6 who need bloom before hard frosts arrive. Its earlier response time means you can stop pinching closer to the early cutoff dates (around June 10 to June 20) and still get a full display in September.
Purple Punch is typically a mid-season cultivar with bold color and good dome habit, well-suited for container finishing in 10 to 12-inch pots. Its mid-season response time means the July 1 pinching cutoff applies, and in zones 5 and 6 you should plan for mid-to-late September bloom. In zones 7 and 8, Purple Punch often blooms in late September through October.
For both cultivars (and garden mums generally), the propagation and scheduling principles are the same: root cuttings in March through May, pinch on schedule, and let natural daylength trigger bud initiation. The cultivar-specific variable is the response time from bud initiation to open bloom, which is why knowing whether your cultivar is early, mid, or late season is essential to planning your pinching cutoff dates.
Overwintering mums so they come back next year
If you planted a spring-started hardy mum and want it to return, the most important thing you can do is not cut it back too early. After bloom and after the first hard freeze kills the top growth, leave the dead stems in place through winter. They trap insulating snow and protect the crown. In zones 5 and 6, add a 4 to 6-inch layer of straw or shredded leaves over the crown after the ground freezes. Remove that mulch gradually in spring as temperatures warm, watching for new shoots emerging from the base.
Drainage matters even more in winter than in summer. Crown rot from sitting in wet, frozen soil is the most common reason for overwintering failure. If you have heavy soil, I would almost always recommend a raised bed or a very well-amended planting site for mums you want to perennialize. Poor drainage in winter is often the real explanation when a gardener tells me their mums 'didn't survive the cold,' because the cold alone rarely kills a hardy variety planted in zone-appropriate conditions.
In spring, when you see those first green shoots pushing up from the crown, that is also your signal to divide if the plant has spread significantly. Lift the clump, discard the woody center, and replant the vigorous outer sections. This keeps the plant healthy, productive, and well-sized from year to year.
Growing mums for sale: basic scheduling and spacing
If you are thinking about growing mums to sell at a fall market or farm stand, the scheduling logic is exactly the same but compressed to hit a specific retail window. The industry standard for hitting early September retail is to plant rooted liners or established cuttings into final containers in early to mid-July, finish them in 10 to 12-inch pots or 1 to 2-gallon containers, and let natural daylength trigger bud development through July and August. From bud initiation, expect 6 to 8 weeks to full bloom under natural season conditions. For a practical guide to commercial steps and budgeting, see our article on how to grow mums for profit.
Commercial growers can shorten this to 5 to 6 weeks using blackout cloth to artificially create short-day conditions, forcing bud initiation earlier than natural daylength would allow. For home-scale sellers, natural season production is simpler: plant liners in July, skip the blackcloth, and plan for late September to early October bloom.
- Finish plants in 10 to 12-inch pots or 1 to 2-gallon containers for retail appeal
- Plant rooted liners into final containers in early to mid-July for natural-season crops
- Feed at 200 to 300 ppm N during vegetative phase, reduce to 100 ppm as buds form
- Space pots so foliage does not overlap, to maintain dome shape and air circulation
- Stop pinching by July 1 at the latest for late-season cultivars
- Expect 6 to 8 weeks from bud initiation to marketable bloom under natural daylength
Common problems and how to fix them
Late or no blooms are almost always caused by one of three things: pinching too late (removing developing buds), artificial light at night interrupting the dark period, or planting a late-season cultivar in a short-season zone. Check all three before assuming something else is wrong.
Leggy, flopping plants usually result from insufficient light or skipping the pinching schedule. Once a mum gets leggy it is very hard to fix mid-season. The solution is prevention: full sun and consistent early-summer pinching starting at 6 to 8 inches of growth.
Root rot shows up as wilting despite wet soil, yellowing lower leaves, and eventual collapse of stems. It is almost always a drainage problem. If you see it, improve drainage for the next planting, consider raised beds, and avoid overhead watering late in the day, which keeps the crown wet overnight.
Buds blasting (forming but not opening, or browning before opening) can happen from temperature extremes, inconsistent watering, or overfeeding during the budding phase. Keep soil moisture even and reduce fertilizer as soon as buds appear.
Aphids, spider mites, and leafminers are the insects you are most likely to encounter. Inspect plants weekly and address aphids with a strong water spray or insecticidal soap. Spider mites thrive in hot, dry conditions, so adequate watering reduces their pressure. Good air circulation (proper spacing and consistent pinching) reduces the risk of powdery mildew, which can affect mums in humid climates.
FAQ
What are the zone‑specific windows to plant mums so they reliably bloom in fall?
For fall bloom reliability, follow two planting strategies: establish hardy garden mums in spring for perennial performance, or finish vegetative liners in mid‑summer for same‑season retail bloom. General guidelines by USDA zone: Zones 3–5: plant hardy types in mid‑ to late spring (after last frost) so plants have the whole growing season to root and build reserves; for forced/seasonal bloom, transplant finished liners outdoors or into final containers in late June–early July and use short‑day timing to force. Zones 6–8: spring planting for perennials in April–May; for seasonal/retail crops, transplant liners into final position in early–mid July. Zones 9–10: spring (Feb–Apr) for perennials; avoid late summer planting for overwintering because mild winters and summer heat stress can reduce survival—schedule forced production for July–August finish. In all zones, if you’re forcing flowering (blackout/short days), plan 5–8 weeks from short‑day initiation to bloom and set transplant dates accordingly (commonly early–mid July to hit early–September retail). Adjust slightly earlier for trays/containers (they grow faster) and later for large beds.
How do I decide: annual/forcings mums vs perennial garden mums?
Decide by purpose: If you want guaranteed showy plants for one fall season or for retail sales, use cutting‑propagated florist/forcing types and finish them on a production calendar (plant liners in July). If you want plants that live year to year and naturalize, select true hardy garden mums and plant/divide in spring so roots establish through the growing season. Consider overwintering difficulty: most mass‑market fall mums are bred for appearance and don’t overwinter reliably; hardy selections (buy labeled hardy cultivars) tolerate winter if planted in spring and sited with good drainage and winter protection.
What are practical, cultivar‑aware pinching and pruning schedules to shape mums and still hit fall bloom?
Pinch to encourage branching: first pinch when plants reach ~6–8 in (15–20 cm). Repeat pinches every 2–3 weeks to build a dense dome. Stop pinching based on cultivar earliness so bud initiation isn’t delayed: a common rule: stop by June 10 for early varieties, June 20 for mid‑season types, and July 1 for late types. For forced crops on a calendar, stop pinching earlier to allow branching and then initiate short days to set buds in time for retail bloom.
What propagation methods work and what are realistic schedules for each (seed, cuttings, transplants, division)?
- Cuttings (recommended): take unrooted terminal cuttings, dip in IBA ~1,000–2,500 ppm, stick into well‑drained plug mix with bottom/media temp ~70–74°F (21–23°C), high humidity/mist. Root emergence often 10–14 days; develop usable liners in 2–6 weeks depending on environment. Pinch first 2–3 weeks after sticking to promote branching. - Rooted transplants/liners: purchase finished liners and pot up/plant out. For retail timing, transplant into final containers/beds early–mid July for September bloom under natural short days or after blackout initiation. - Seeds: seed production is slow and requires much earlier sowing (spring) and long season—rarely used for timed fall blooms. - Division: divide established clumps in spring when shoots emerge; planting divisions in spring gives best overwinter/perennial success and reliable next‑season bloom. For production, propagation→vegetative finishing→short‑day initiation→5–8 week finish is the standard timeline.
How do I time short‑day/blackout or night‑interruption control to schedule bloom?
Chrysanthemums are short‑day (long‑night) plants: floral induction occurs when nights exceed a cultivar‑specific critical length. Commercial growers use blackout (to create long nights) to induce flowering on schedule; conversely, night‑interrupting light or street lights will suppress buds. For natural‑season crops, rely on local photoperiod and plan final spacing/plant dates so nights become long enough about 6–8 weeks before your target bloom date. For forced crops: initiate uninterrupted dark periods nightly (typically 12–14 hours of darkness depending on cultivar) for several weeks; expect ~5–8 weeks from initiation to market bloom. Avoid any stray night light on plants from dusk to dawn during induction.
What soil, sun, spacing and container guidelines should I use for beds vs containers?
- Sun: full sun (≥6 hours direct sun) for best flower set. - Soil: well‑drained, organically amended soil; pH ~6.0–7.0. Avoid heavy, poorly drained sites—wet winters cause loss. - Spacing: bed plantings 18–24 in (45–60 cm) for clump habit; retail 8–12 in (20–30 cm) spacing depends on cultivar and desired dome fullness. - Containers: 8 in pots for single liners; 10–12 in (1–2 gal) for showy domed retail plants. Containers dry faster—water and feed more frequently. For commercial finishing, larger pots or earlier planting produce fuller habit by retail.
Next Article
When to Grow Mums: Timing Guide for Buds and Blooms
When to grow mums: exact sowing, transplanting, frost and short-day timing for buds, blooms, and troubleshooting.