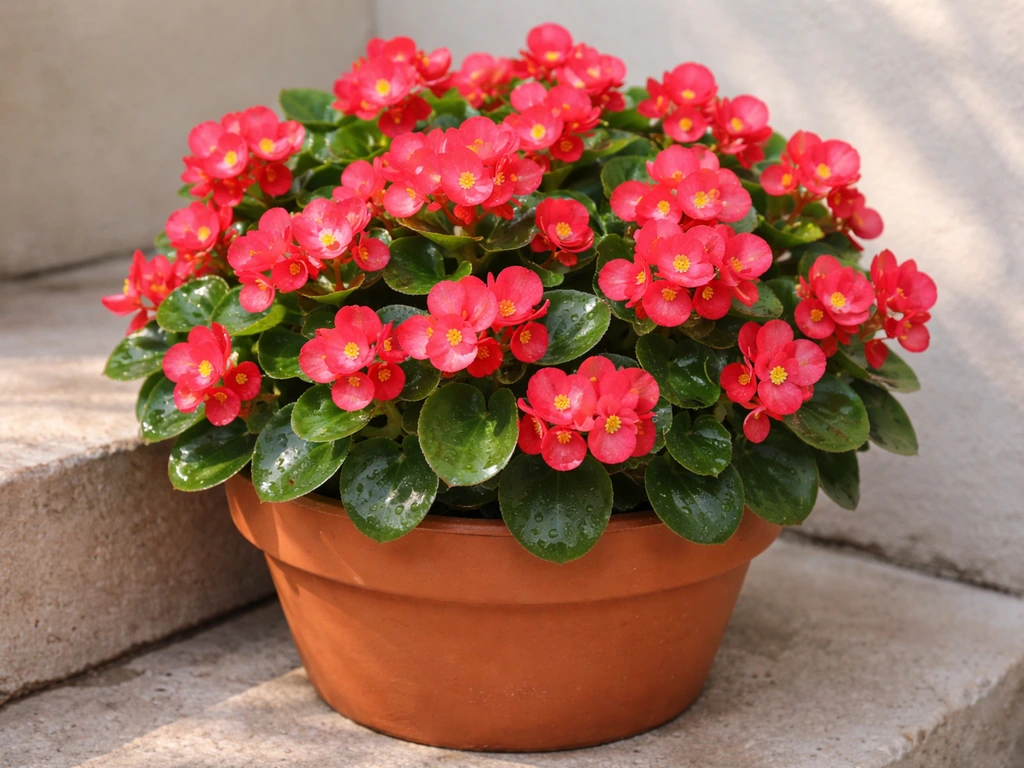
You can root begonia stem cuttings in water in as little as one to six weeks, then pot them up into soil for a healthy, blooming plant. The process is genuinely simple: snip a healthy stem just below a node, strip the lower leaves, drop it in a clean glass of room-temperature water, keep it in bright indirect light, change the water every few days, and wait. For stem or tip cuttings, the American Begonia Society recommends cutting about half an inch below a node that has not flowered to support reliable vegetative propagation blank" rel="noopener noreferrer">cut about half an inch below a node that has not flowered. Most fibrous and cane-type begonias (think wax begonias, angel wings, and polka dot begonias) take to water propagation very easily. Once you see a good set of roots, you transition to a small pot of well-draining mix, give it a little extra humidity for a week or two, and you're on your way to blooms. If you want blooms, this is also where learning how to grow a begonia from cuttings pays off.
How to Grow Begonia in Water: Step-by-Step Guide

Which begonias actually work well in water
Not every begonia propagates the same way, so it helps to know what you're working with before you start cutting. Fibrous-rooted begonias with proper stems are the easiest group for water rooting. That includes wax begonias (Begonia semperflorens), angel wing and cane begonias, and begonia maculata (the polka dot type). Wax begonias are especially fast, sometimes showing roots in as little as five to seven days. Cane types like angel wings and begonia maculata typically take the full four to six weeks but root reliably and reward you with impressive blooms once established.
Rex begonias are a different story. They're typically propagated from leaf cuttings by scoring the primary veins and pinning the leaf flat onto moist medium, which is not the same process as stem-in-water rooting. If you have a Rex, you can technically try a stem cutting in water if the plant has produced a reasonable stem section, but don't expect the same easy results. Tuberous begonias grown from corms are also a separate situation, with their own propagation needs. For straightforward water rooting, stick with fibrous or cane types.
Whatever type you have, start with a healthy parent plant. If you are specifically trying to learn how to grow weeping begonia from cuttings, the same water-rooting and transplant tips apply. A stressed, pest-ridden, or overwatered mother plant produces weak cuttings that are more likely to rot than root. Pick a plant that looks vigorous, has firm stems, and shows no signs of fungal issues or soft tissue.
Setting up your water-rooting container
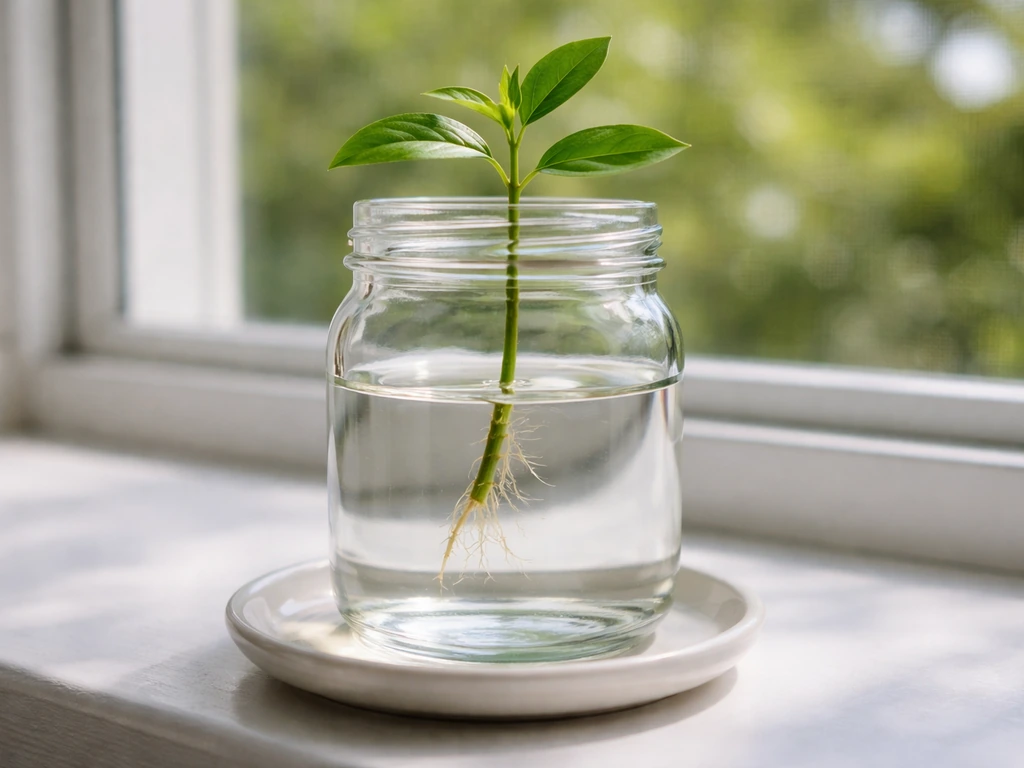
The container matters more than most people think. A clear glass jar looks pretty on the windowsill and lets you watch root development, but it also lets in light, which encourages algae to grow and turns your water green. An opaque container, like a ceramic mug or a dark-colored jar, cuts off that light source and dramatically reduces algae problems. If you want to monitor root progress and use a clear glass, just keep it out of direct sun and plan on more frequent water changes.
Water type makes a real difference too. Cold tap water straight from the faucet can shock the cut tissue and slow rooting down. Let tap water sit at room temperature for a few hours before using it, which also allows some chlorine to off-gas. Many gardeners swear by filtered or rainwater, and while I haven't found it dramatically faster, it does seem to result in cleaner, less smelly water during the rooting period. Room-temperature water is the non-negotiable part here.
Place your container in a spot with bright, indirect light. A spot near a north or east-facing window is ideal indoors. Avoid direct sun, which heats the water, promotes algae, and can stress the cutting. Good ambient warmth (around 65 to 75 degrees Fahrenheit) helps speed up rooting. This is also why rooting in colder months is slower and trickier, since the process is temperature-sensitive. This same water-rooting approach can also help you learn how to grow montbretia from cuttings before moving it into soil.
How to take a begonia cutting and set it up in water
Here's exactly what to do, step by step: Follow the same blank" rel="noopener noreferrer">water-rooting steps for how to grow begonia semperflorens, then transition the cutting carefully into soil once roots are a few inches long.
- Choose a healthy stem on your parent plant that has at least two or three nodes (the bumpy joints where leaves attach) and has not recently flowered. Non-flowering growth roots more reliably.
- Use a clean, sharp pair of scissors or pruning snips. Make your cut about half an inch below the lowest node you want to keep, using an angled cut to maximize the exposed surface area that will produce roots.
- Strip all leaves from the bottom one or two nodes so no foliage sits underwater. Submerged leaves rot quickly and contaminate the water.
- Leave two or three healthy leaves at the top of the cutting. If the remaining leaves are very large, you can trim them in half to reduce moisture loss through the leaf surface.
- Fill your container with room-temperature water and place the cutting so the bottom node or two are submerged but all remaining leaves stay above the waterline. This positioning rule prevents rot at the leaf axils.
- Do not cover the container with a lid or plastic wrap during water rooting. Covering tends to trap too much moisture around the stem tissue, which encourages rot rather than roots.
- No rooting hormone is required for water propagation. If you want to try it, a very light dip of the cut end is fine, but go easy since too much can actually slow rooting down.
How long rooting takes and what to look for
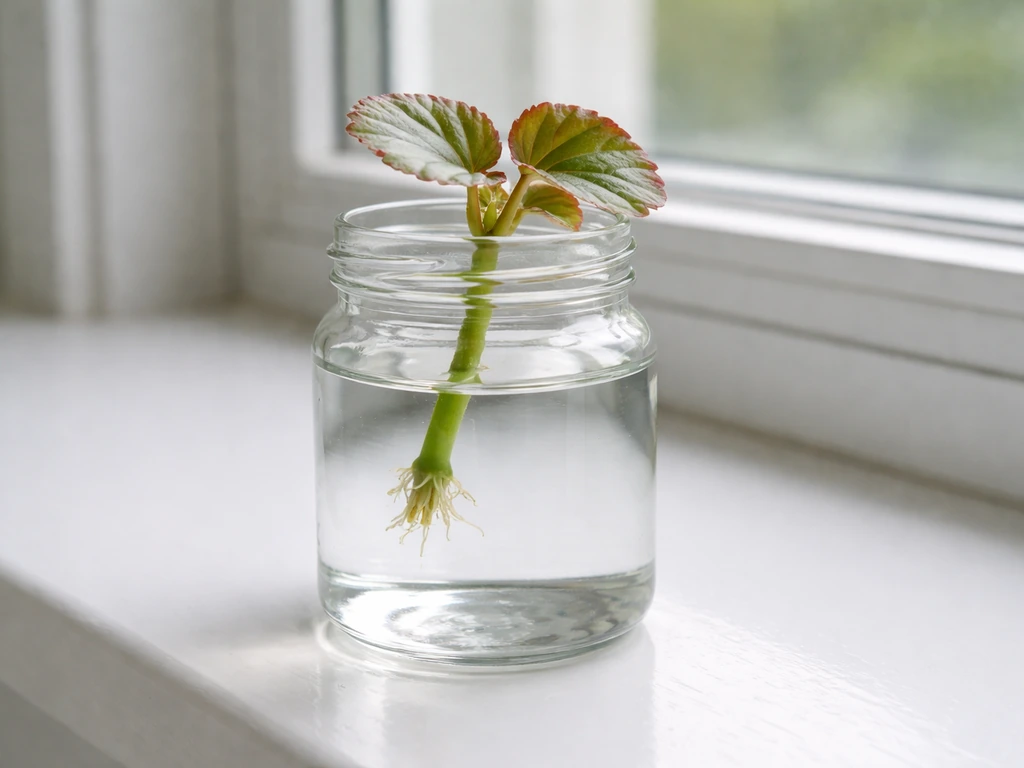
Most begonia cuttings in water will show the first tiny root nubs within one to two weeks, with a usable root system developing over four to six weeks total. Wax begonias are the speedsters of the group, often showing solid roots in five to seven days under warm conditions. Cane types and angel wings generally need the full four to six weeks. If you're propagating in late fall or winter when temperatures drop and light levels are lower, budget closer to six weeks or even a bit longer.
A cutting is ready to pot up when it has multiple roots that are at least an inch long and look white or pale yellow, not brown or mushy. A few short root stubs aren't enough. You want a genuine cluster of roots that can actually anchor the plant and uptake water from soil. Patience here pays off. Rushing to soil too early is one of the most common reasons water-rooted cuttings fail after transplant.
Keeping the water clean while roots develop
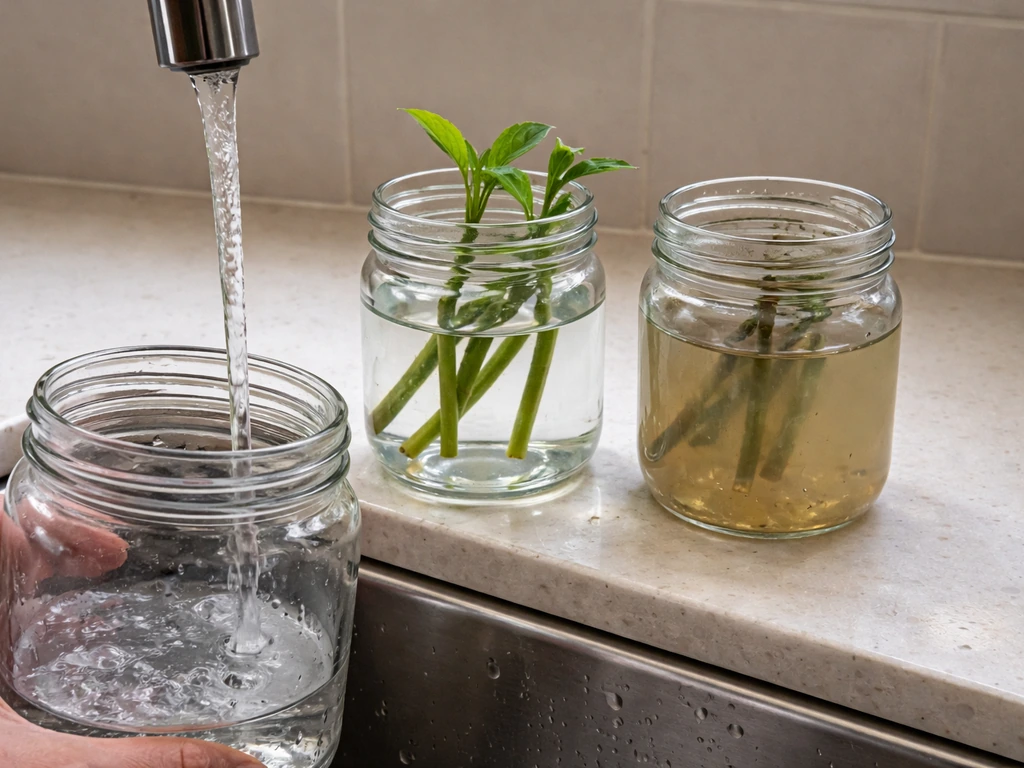
Water maintenance is the part most beginners skip or do inconsistently, and it's where things go wrong. Fresh, oxygenated water keeps the cut tissue healthy and discourages the bacterial and fungal growth that leads to rot. Change the water every three to four days at a minimum. Some sources suggest once a week is fine, and while you can get away with that in cool, clean conditions, more frequent changes give you noticeably better results especially in warmer weather when microbes multiply faster.
Each time you change the water, give the container a quick rinse to remove any slippery biofilm building up on the inside walls. Check the cutting while you're at it: remove any leaves that have fallen into the water, and trim away any stem tissue that looks soft, brown, or mushy. A small pair of clean scissors makes this easy. Think of each water change as a quick health check.
Hold off on fertilizing during the water-rooting phase. Begonias should only be fed when they're actively growing in a proper medium, and adding fertilizer to your rooting water is more likely to encourage algae and bacterial growth than to help the cutting. Save feeding for after transplant.
Moving from water to soil (the critical transition)
The first two weeks after you move a water-rooted begonia cutting into soil are the most critical. Roots that developed in water are structurally different from roots that grew in soil. They're adapted to pulling oxygen and nutrients from water, not from air pockets in a growing medium. Planting and then ignoring them like an established plant is a recipe for wilting and failure. After you get the water-rooted cutting through this transition, you can follow the same growing routine for healthy polka dot begonias.
Start with a small pot, a three to four inch container is ideal. Going too large is a common mistake because excess soil holds excess moisture, and a cutting with a small, delicate root system sitting in soggy mix will rot. A small pot dries out at a rate that matches what the cutting can handle. Use a well-draining mix, a standard houseplant potting mix amended with perlite works well for begonias, since it holds enough moisture to keep the roots from drying out completely between waterings while still draining freely.
Plant the cutting at roughly the same depth the stem was sitting in the water, burying the rooted node section but not the stem above it. Water gently after planting to settle the mix around the roots.
For the first one to two weeks, create a humidity tent over the cutting by loosely placing a clear plastic bag or a cut plastic bottle over the pot. This mimics the humid environment the cutting was used to and dramatically reduces transplant stress. Don't seal it airtight. Leave a small gap for airflow to prevent fungal issues. After about a week, start opening the tent for longer periods each day to gradually harden the cutting off to normal indoor air. By two weeks, most cuttings are stable enough to live without the tent.
Once the plant is settled and showing new leaf growth (usually within a few weeks), that's your signal to start feeding. Use a balanced water-soluble fertilizer to support general growth early on. Once the plant is established and you want to encourage flowering, switch to a formula with lower nitrogen and higher phosphorus, which pushes the plant toward blooms rather than more leafy growth. Expect your first flowers roughly eight to twelve weeks after a successful transition to soil, depending on the begonia type and conditions.
Fixing the most common problems
Cutting turns mushy or rots at the base
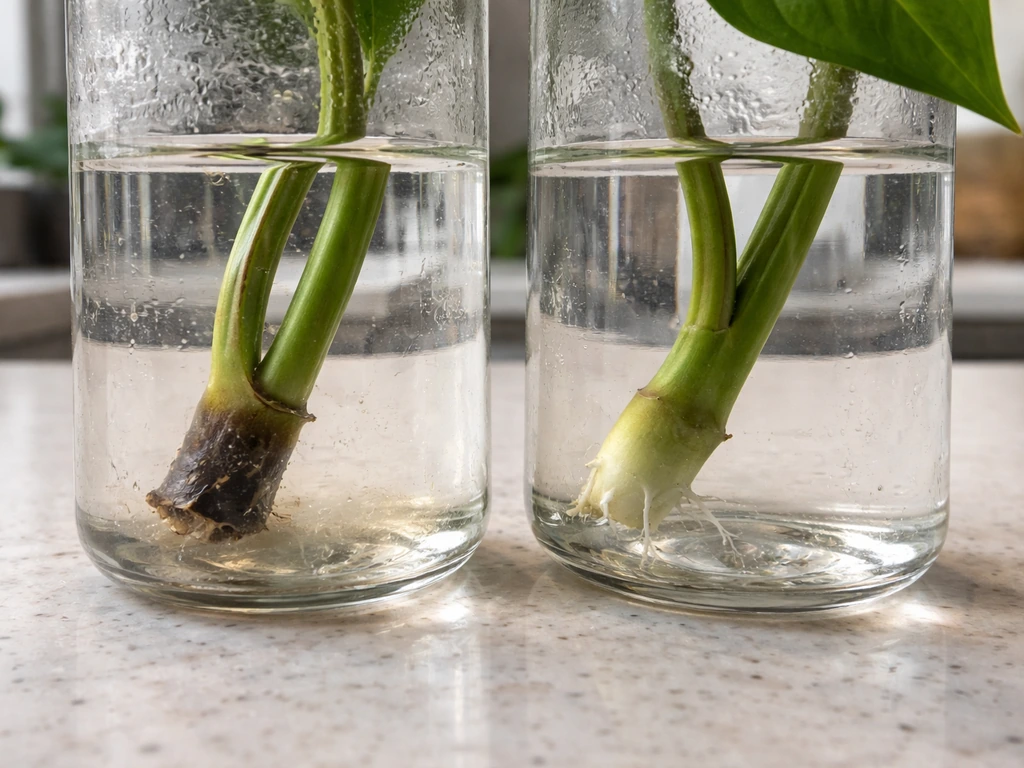
This is the most common failure and almost always comes down to one of three things: submerged leaves rotting in the water, water not being changed frequently enough, or a contaminated container. Pull the cutting out, trim off all soft tissue with clean scissors until you reach firm green or white stem, and start fresh in clean water in a clean container. Make sure no leaves are touching the waterline.
No roots after three or more weeks
Check the temperature first. If your home is cool (below 65 degrees Fahrenheit), rooting slows dramatically. Move the cutting somewhere warmer. Also make sure the node is actually submerged. If the stem is sitting in water but the node is above the waterline, roots have nowhere to initiate. Try re-cutting the stem slightly shorter so a node sits just below the surface. If the cutting came from a recently flowered stem, that can also inhibit rooting. Take a fresh cutting from non-flowering growth.
Yellow leaves on the cutting
A little yellowing on the lowest leaf or two is normal as the cutting adjusts. If multiple leaves are yellowing rapidly, the cutting is likely sitting in too much direct light, or the water has gone bad and is producing ethylene or other gases that stress the plant. Change the water, move the cutting to softer indirect light, and remove any yellow leaves so they don't contaminate the water.
Green, cloudy water and algae
Algae grows when light hits the water. Switch to an opaque container, or wrap your glass jar in foil or dark paper. Increase your water-change frequency to every two to three days until the problem clears up. Algae itself won't necessarily kill your cutting, but it competes for oxygen in the water and makes the whole setup more hospitable to rot.
Wilting after transplanting to soil
Some temporary wilting after the move from water to soil is normal. The plant is adapting from one environment to another. If you didn't use a humidity tent, add one now, even retroactively. Make sure the pot isn't sitting waterlogged but also isn't drying out completely. If wilting continues beyond a few days and the soil is fine, carefully unpot the cutting and check the roots. If they look brown and mushy, rot has set in and you'll need to trim and restart. If they look pale and intact, it's just adjustment stress and the tent and patience will usually pull it through.
Leggy, weak growth after potting up
If your begonia stretches toward the light and looks floppy rather than compact and bushy, it's not getting enough light. Move it closer to a bright window, or supplement with a grow light. Once growth has stabilized, pinching out the growing tip encourages the plant to branch and produce a fuller shape, which ultimately means more flowers.
A quick comparison of begonia types for water rooting
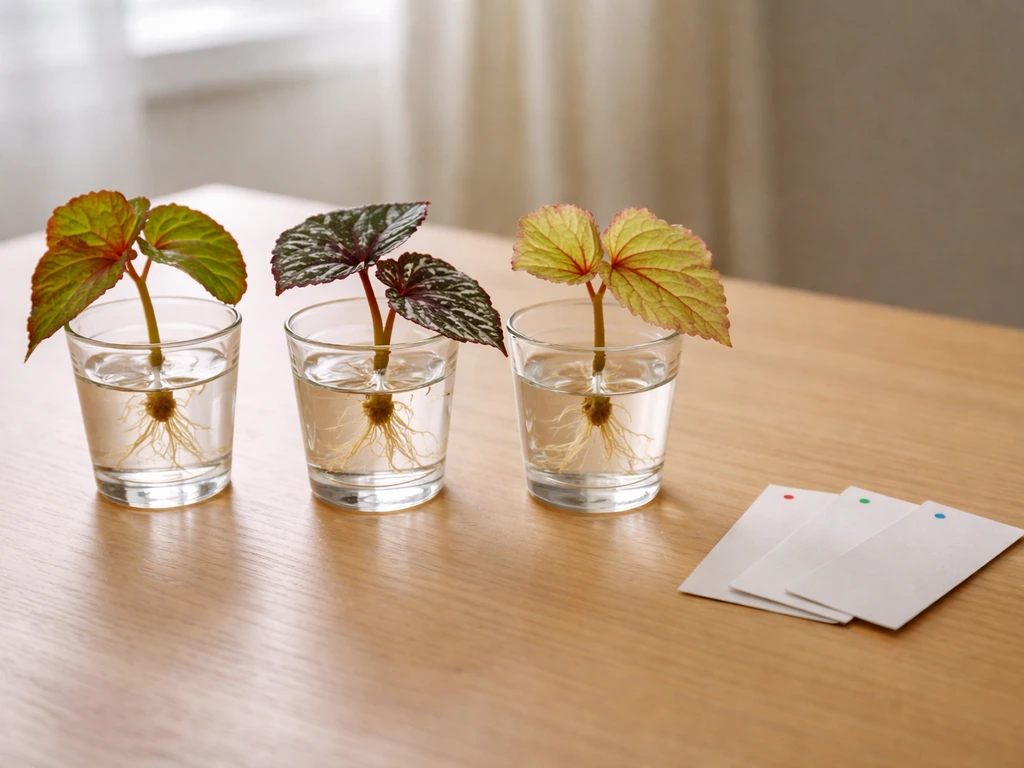
| Begonia Type | Water Rooting Ease | Typical Rooting Time | Notes |
|---|---|---|---|
| Wax begonia (Begonia semperflorens) | Very easy | 5 to 14 days | Fastest rooter, great beginner choice |
| Cane / Angel wing begonia | Easy | 3 to 5 weeks | Reliable, reward with showy blooms |
| Begonia maculata (polka dot) | Easy to moderate | 4 to 6 weeks | Same process, slightly more sensitive to cold water |
| Rex begonia | Difficult via stem | Variable or fails | Leaf propagation is the standard method for Rex types |
| Tuberous begonia | Not recommended | N/A | Grown from corms, not suited to stem-water rooting |
If you're just getting started, a wax begonia or a cane-type begonia is the place to begin. They're forgiving, they root quickly, and once you've done it once you'll have the confidence to try the trickier types. The same fundamentals covered here apply broadly across the begonia family, so getting comfortable with the basic process opens up the whole genus. If you want to skip trial and error, follow this guide on how to grow begonia corms for a more dependable start.
FAQ
How much of the begonia cutting should be submerged in water? (Should leaves be in the water?)
Use a jar that is wide enough for the stem to sit without crowding, then keep only the node submerged, trim leaves so none dip below the waterline, and position the cutting so it is stable (a skewer or clothespin across the rim can help). This prevents leaf rot, uneven rooting, and stems tipping over between water changes.
Can I leave a water-rooted begonia in water for longer instead of potting right away?
Yes, but only temporarily. If you plan to delay potting, keep changing the water on schedule and only pot when roots are pale and firm and at least about 1 inch long with a few roots, not just stubs. Prolonged time in water after roots are established can make transplanting harder because the roots are adapted to water, not a medium.
My begonia cutting smells bad or turns slimy. What should I do?
The fastest correction is to remove the leaves, rinse the container, trim any mushy parts back to firm tissue, and restart in fresh room-temperature water. If you see a strong foul smell, discard the water immediately and sanitize your container first, since biofilm and bacteria can keep causing rot even if you “just change the water.”
Should I use distilled water, filtered water, or rainwater for water propagation?
Tap water is usually fine if it is room temperature and has been left out for a few hours, but if you notice consistently cloudy or smelly water, switch to filtered or rainwater for the next batch. The goal is cleaner, oxygen-friendly water, not a faster growth trick.
Why is my begonia taking so long to root, even though I’m changing the water?
Warmth and light intensity matter more than most people expect. If your home is cooler than about 65°F, rooting slows and cuttings are more prone to rot, even with perfect water changes. Move the setup to a warmer spot (near but not in direct sun) to keep the water at a stable temperature.
Does water propagation work for every begonia, including Rex and tuberous types?
A wax or cane-type begonia can work well, but leaf-only propagation (like scoring veins and pinning the leaf) is generally for Rex begonias, not for stem rooting in water. If your begonia has a thick rhizome or Rex-style leaves, expect different methods and different success rates than stem-in-water propagation.
How do I know the best time to move a water-rooted begonia into soil?
Too-early transplant is the biggest risk. If roots are only tiny nubs, wait, because water roots need time to develop an anchor system. When you do pot, plant at the same depth as the submerged node and keep humidity high for 1 to 2 weeks so the roots do not dry out or fail to cope with air pockets in soil.
When can I start fertilizing after propagating begonia in water?
Yes, but you should avoid pouring in nutrients during the rooting phase. Any fertilizer in the water can feed algae and bacteria, which raises the odds of rot. Once you see new leaf growth in soil, then start with light feeding and only shift toward bloom-focused fertilizer when the plant is established.
What does it mean if my cutting’s leaves turn yellow in water?
Light that is too strong can stress a cutting, even if it roots. If you see rapid yellowing or the cutting looks “cooked,” move it to softer indirect light, increase water-change frequency, and remove yellow leaves right away so they do not keep contaminating the water.
My begonia cuttings keep failing. What are the most common hidden causes?
If the water stays clear and you still get failure, the usual culprits are a node not actually submerged, a cutting with soft or damaged tissue, or a parent plant that produced weak growth. Confirm the node is just below the surface, trim back to firm tissue if needed, and take a fresh cutting from non-flowering, healthy stems.
How to Grow Begonia Semperflorens: Step-by-Step Care
Step-by-step begonia semperflorens care for steady blooms: light, soil, watering, feeding, planting indoors or outdoors,