You can grow geraniums (Pelargonium) from cuttings in as little as two to three weeks, and it is genuinely one of the easier propagation projects a home gardener can take on. Cut a healthy stem, let the cut end callous briefly, stick it into a well-draining rooting medium, keep it warm and in bright indirect light, and you will almost certainly have rooted plants ready to pot up within a month. The key details are getting the stem selection right, avoiding soggy media, and keeping the temperature around 70 to 75°F. Everything below walks you through the full process, from snipping that first cutting to seeing your first flowers.
How to Grow Geraniums From Clippings: Step-by-Step

Harriet Whitmore
15 Jun 2026
Which geranium types work best for cuttings, and when to take them
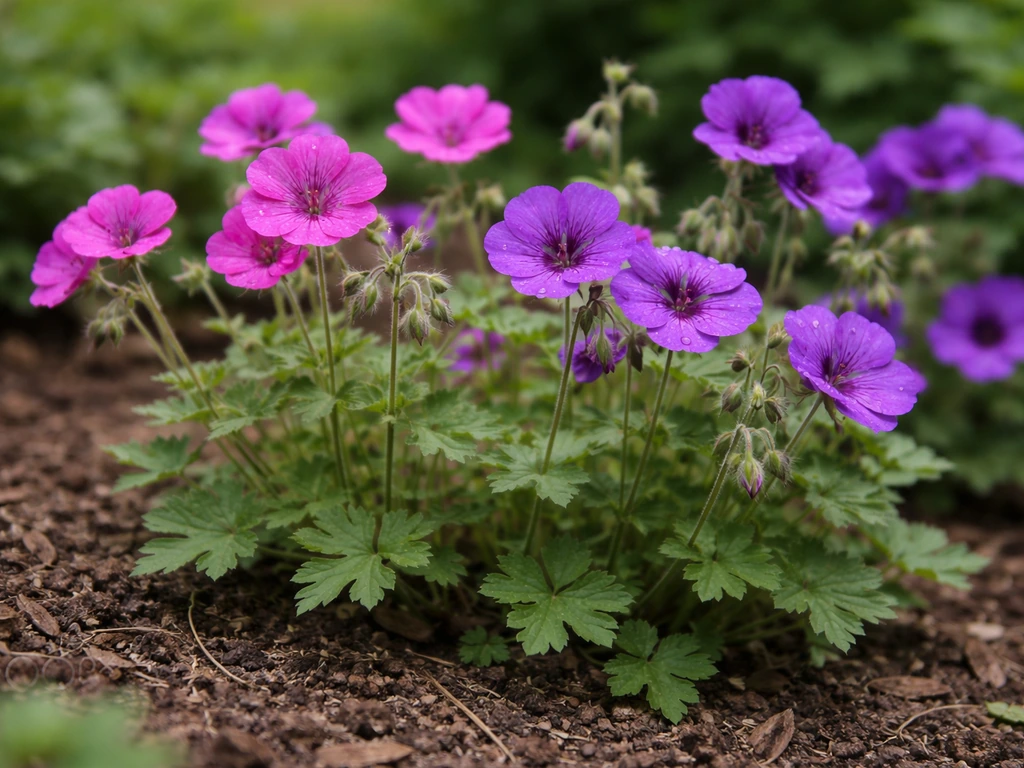
Almost all Pelargoniums root reliably from stem cuttings, but the two types most home gardeners are working with are zonal geraniums (the classic upright, rounded-leaf type with distinctive banded foliage) and ivy-leaf geraniums (the trailing type popular in hanging baskets). Both propagate the same way. Zonal geraniums are especially worth propagating from cuttings rather than seed because the leaf zoning, flower color, and overall habit you love will not come true from seed. Cuttings are simply the only way to get an exact copy of a plant you already have.
Timing matters. The two most practical windows are late summer to early fall (late August into September) and late winter (around February). Late summer is the classic approach: you take cuttings from outdoor plants before frost threatens, root them indoors, and overwinter small plants ready to go again in spring. February cuttings let you cut back stockplants that have been kept indoors over winter and use those fresh shoots to start new plants for the coming season. If you are reading this in mid-June, you are actually in a fine position too. Plants in active growth during spring and summer produce cuttings that root quickly, and you will have established plants to enjoy before the season ends.
How to take a cutting correctly
What you need
- A sharp, clean pair of scissors or pruning snips (wipe the blades with rubbing alcohol before you start)
- A healthy parent plant that has been watered recently but is not waterlogged
- Small pots (2.5 to 3 inches works well) or a seedling tray
- Your rooting medium (more on that below)
- Optional: a clear plastic bag or a cut-off clear plastic bottle for a humidity tent
Selecting and cutting the stem
Look for a stem tip that is actively growing but not flowering. You want the terminal two to four inches of a non-woody, green stem. Avoid stems that are already blooming or forming seed heads because the plant will direct energy toward those rather than building roots. If the only stems available have flower buds, pinch those buds off before you take the cutting. Make your cut just below a leaf node (the bump where a leaf joins the stem) at roughly a 45-degree angle using one clean slice, not a sawing motion. A clean cut heals faster and is less prone to rot.
Once you have your cutting, strip off all leaves from the bottom half of the stem, leaving two or three leaves at the tip. You want some leaf area for photosynthesis, but too much foliage means the cutting loses water faster than it can take any up. Let the cut end sit out in open air for about 30 minutes to an hour before sticking it into your rooting medium. That brief drying period lets the wound start to callous, which meaningfully reduces rot risk.
One note on rooting hormone: sources disagree on this for Pelargoniums specifically. Some recommend skipping it entirely because the cut base can rot if hormone powder or gel traps moisture there. Others suggest a light dusting of hormone powder after dipping the cut end in water. My experience leans toward skipping it on geraniums unless you are working with a particularly slow-rooting variety. Geraniums root readily on their own, and keeping things simple reduces failure points.
Rooting methods: water, soil, and starter plugs
Soil or media rooting (the most reliable method)
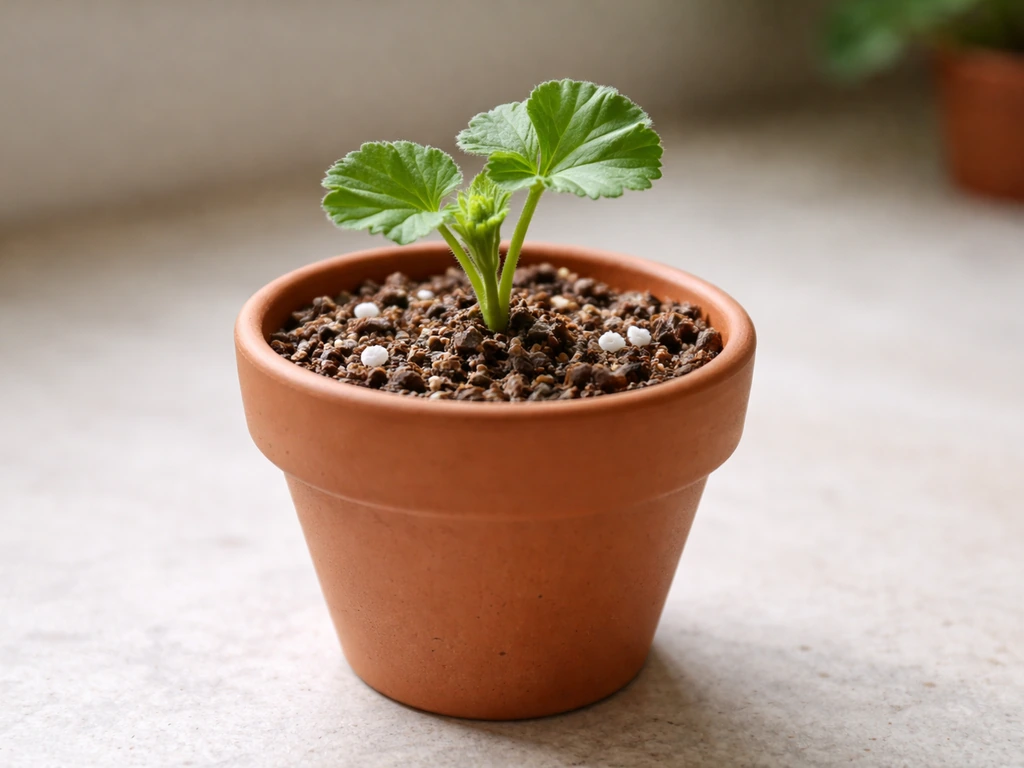
Rooting directly into a well-draining medium is the approach I trust most for geraniums because it avoids the transplant shock that sometimes follows water rooting. The best media options are vermiculite on its own, coarse horticultural sand, or a 50/50 blend of soilless potting mix and perlite. All of these hold just enough moisture while letting excess water drain freely. Avoid regular garden soil or dense potting mixes at this stage because they compact around the stem and stay too wet.
Fill a small 2.5 to 3 inch pot with your chosen medium and moisten it thoroughly before you stick the cutting. Then push the stem about one inch deep into the medium, firm it gently so the cutting stands upright, and water lightly. Place the pot somewhere warm with bright, indirect light. Keep the medium consistently moist but never soggy. Check it every couple of days and water when the top inch starts to feel dry.
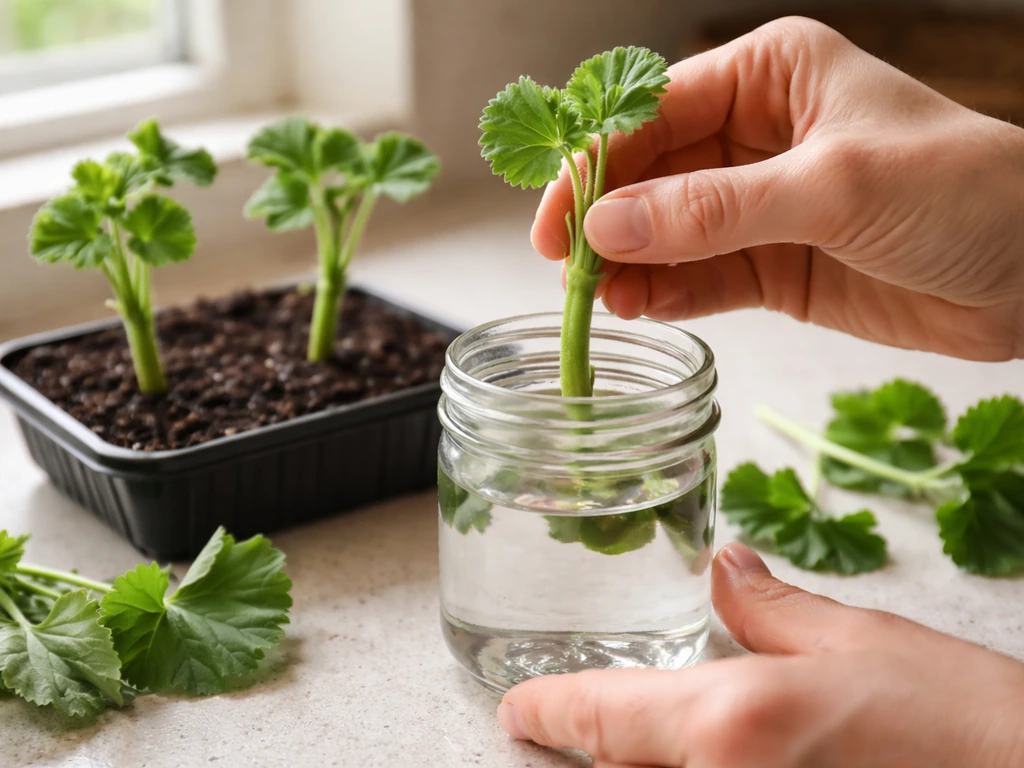
Water rooting
Water rooting works with geraniums and is satisfying to watch because you can see the roots develop. Set your prepared cutting in a glass or small jar of water so that the bottom inch of the stem is submerged but the leaves stay above water. Keep the glass in bright, indirect light and change the water every two to three days to prevent bacterial buildup. Roots usually appear within two to three weeks. The downside is that water roots are fragile and structurally different from soil roots, so transplanting can set the cutting back. If you go this route, pot the cutting into soil as soon as you see healthy roots rather than letting them grow long and tangled.
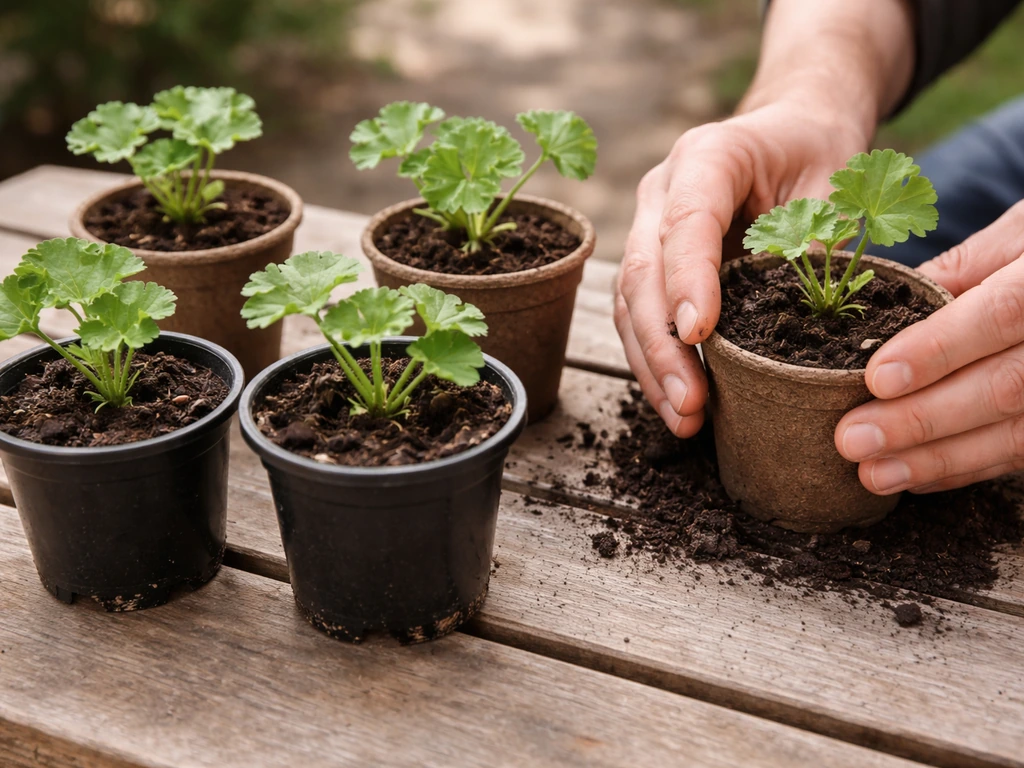
Starter plugs
If you propagate a lot of cuttings at once, pre-formed peat or coir starter plugs (the kind sold for seed starting) are a convenient option. Moisten the plug, poke a hole with a pencil, insert your cutting, and press the plug closed around the stem. Plugs make transplanting easy because you simply move the whole plug into a larger pot when roots appear at the sides. They are not strictly necessary, but they are handy if you are doing a batch of ten or more cuttings.
Conditions that actually matter while cuttings root
| Condition | What to Aim For | Why It Matters |
|---|---|---|
| Temperature | 70 to 75°F (soil temp if possible) | Warm soil drives root initiation; too cold and roots stall |
| Light | Bright, indirect light — no direct sun | Direct sun wilts unrooted cuttings before they can establish |
| Humidity | Moderately high, especially first week | Reduces water loss from leaves while roots are not yet functional |
| Watering | Moist but never waterlogged | Soggy media is the main cause of rot and failure |
| Air circulation | Gentle — vent if condensation is heavy | Stagnant air encourages fungal problems; balance with humidity needs |
For humidity, you can cover pots with a clear plastic bag or set a clear plastic bottle with the bottom cut off over the cutting. This is helpful but not always necessary for geraniums, which are tougher than many cuttings. If you do use a cover, check it every day. If you see heavy condensation or any sign of mold, prop the cover open slightly or remove it entirely for a few hours to let air circulate. After about a week, start increasing ventilation gradually, and by week two you can usually remove the cover entirely. Keep the whole setup away from heating vents and air conditioners, both of which create extremes that stress unrooted cuttings.
Roots typically form in two to three weeks under good conditions, though some varieties take a bit longer. You can test gently by giving the cutting a light tug. If it resists, roots have anchored. Another sign is a new leaf beginning to unfurl at the tip, which almost always means the root system is active.
Transplanting into pots or the garden
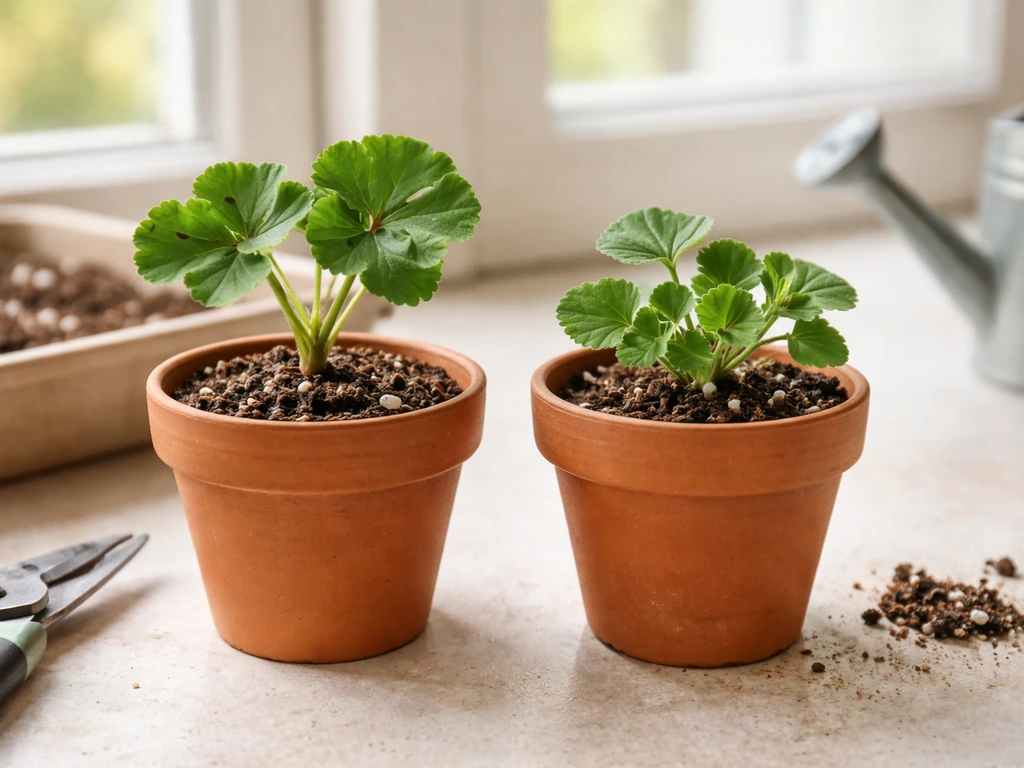
Moving into individual pots
Once your cutting has a good root system (you can see roots beginning to peek out of the drainage hole or feel resistance when you tug), it is ready for a proper home. Move it into an individual pot that is a step up in size, about a 4 to 6 inch pot for a single rooted cutting. Use a sterile potting mix with good drainage, and mix in a slow-release all-purpose granular fertilizer at planting. Make sure the pot has drainage holes. Geraniums hate sitting in water at any stage, and a pot without drainage is a reliable way to lose a plant you have spent three weeks growing.
If the cutting was rooted in water or a very open medium like pure vermiculite, handle the roots gently when transplanting. Firm the potting mix around the roots without compacting it, water thoroughly, and set the newly potted plant back in its bright indirect light spot for a few days before moving it to a sunnier location. Remove any flower buds at transplanting so the plant focuses energy on establishing its root system rather than blooming immediately.
Moving outside
If your goal is planting in the garden or outdoor containers, do not rush the transition. Geraniums rooted indoors need to be hardened off before they go outside. Start by setting the pots outdoors in a shaded, sheltered spot for two to three hours on the first day, then bring them back inside. Gradually increase outdoor time over seven to ten days, and slowly introduce them to more sun. Wait until outdoor temperatures are reliably staying at or above 70°F before leaving them outside permanently. Spacing in garden beds or large containers should be about 12 inches apart for upright zonal types.
Getting your plants to actually bloom
Pinching for bushy growth
Once your transplanted cutting has settled in and put out two or three new sets of leaves, pinch out the growing tip. This sounds counterintuitive when you are eager to see flowers, but pinching forces the plant to branch rather than grow tall and leggy, and more branches means more flowering stems. Just pinch or snip the very tip above a leaf node. Do this once or twice during the early growing period and you will end up with a much fuller, more floriferous plant.
Feeding for flowers
If you added slow-release fertilizer at potting, you are covered for the first couple of months. Once that runs out, or if you did not add it at planting, switch to a liquid fertilizer every two to three weeks during the growing season. For the best flowering, use a fertilizer with a higher middle number (phosphorus) such as a 10-30-20 or similar bloom-booster formula. Too much nitrogen (the first number) pushes lots of leafy growth at the expense of flowers. When blooms start, deadhead spent flower heads regularly to keep the plant producing new ones.
What to expect and when
- Weeks 1 to 3: Cutting is in the rooting medium, focused entirely on root development. No visible growth at the tip is normal.
- Weeks 3 to 5: Roots are established, the tip starts to push new growth. Transplant into individual pots around this time.
- Weeks 5 to 8: Plant is actively growing in its pot, putting on new leaves. Pinch at least once during this period.
- Weeks 8 to 12: Most geraniums are producing flower buds or early blooms by this stage under good light and feeding conditions.
When things go wrong: fixes for common problems
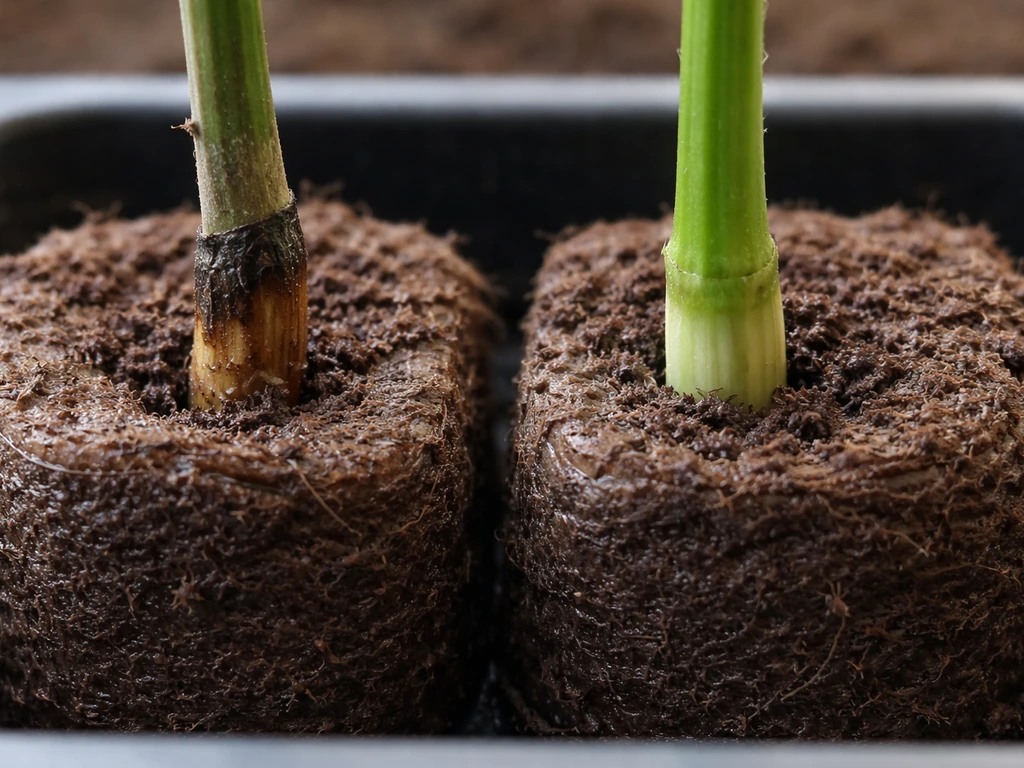
Cuttings rotting at the base
This is the most common failure and it almost always comes down to too much moisture. The rot typically starts as a brown, water-soaked discoloration at the cut end and moves up the stem. To prevent it: let the cut end callous before sticking it in the medium, use a free-draining medium rather than dense soil, and never let the pot sit in standing water. If you catch rot early, you can sometimes re-cut the stem above the affected area, let it callous again, and re-stick it. If the rot has reached the leaves, that cutting is lost.
No roots forming after three weeks
Usually this is a temperature problem. If the space is cooler than 65°F, root development slows dramatically or stops entirely. Try moving the cuttings somewhere warmer or using a seedling heat mat set to around 70 to 72°F. Also check that the medium is consistently moist, not drying out completely between waterings. A cutting that wilts repeatedly has to spend energy recovering rather than building roots.
Mold, fungus, and damping off
White or gray mold on the surface of the medium or on leaves is a sign of too much humidity and not enough air movement. Remove the humidity cover, increase ventilation, and pull affected cuttings to prevent spread. Damping off (a fungal collapse of the stem at soil level) is usually triggered by a combination of high humidity, cool temperatures, and overwatering. Using a sterile rooting medium rather than garden soil goes a long way toward preventing this. If it happens despite all that, start fresh cuttings in clean pots with new medium.
Leggy, weak growth after rooting
If your new plants are stretching toward the light with long gaps between leaves, they need more light. Move them to a brighter spot, ideally a south or west-facing window with four to six hours of direct light once they are established. Pinching the growing tips as described above will also help redirect energy into bushier growth. Legginess that develops after transplanting outdoors is usually a sign of too much shade.
Wilting and slow recovery after transplant
Some wilting right after transplanting is normal. The root system is adjusting and cannot yet keep up with the water demands of the leaves above. Keep the plant out of direct sun for a few days after transplanting and water it well. If it is still wilting after a week, check that the roots are not sitting in waterlogged soil and that the pot has functional drainage. Persistent wilting in moist soil usually points to root rot rather than drought, and those two problems need opposite solutions, so it is worth pulling the plant from the pot briefly to check root health.
Geranium propagation rewards you pretty quickly once you understand what the plant actually needs: warmth, drainage, and patience for those first two to three weeks. Once you have the process down with one cutting, it is easy to keep multiplying plants indefinitely. If you are thinking about where to site your new plants or what to grow alongside them, or how to keep your stock plants healthy through the colder months, those questions are all worth exploring once your cuttings are happily rooted and growing. If you want the next steps after rooting, this guide on how to grow hardy geraniums will help you keep plants healthy beyond propagation. If you want to keep your geraniums going during winter, follow the steps in this guide on how to grow geraniums over winter through the colder months. Geraniums also need bright light and consistent watering once they are growing, not just while you are rooting cuttings what to grow alongside them. For more on planning ahead, check where to grow geraniums based on your light and climate. If you want to expand your garden beyond geraniums, a good next step is deciding what to grow with geraniums for compatible color and texture what to grow alongside them.
FAQ
Can I use store-bought geraniums or ones from grocery stores to make cuttings?
Often yes, but expect slower rooting if the plant is stressed or recently moved. Before cutting, check for healthy green, non-blooming tips, and avoid stems that look chilled, limp, or heavily pruned. If the plant has been treated with plant growth regulators, rooting may still work, but timing can be less predictable.
What cutting length should I use, and can I take cuttings shorter than two inches?
Aim for the top two to four inches of a non-woody green stem, with a leaf node included near the cut. Very short cuttings can work, but success drops because there is less stored energy and fewer resources for new root growth. If you must use a shorter piece, keep more leaf area at the tip and maintain warmth and consistent (not soggy) moisture.
Do geranium cuttings need bottom heat, or will room temperature be enough?
If your space stays around 70 to 75°F, bottom heat usually is optional. If nights drop below 65°F, rooting slows dramatically, so a heat mat or warmer spot can make a big difference. Also keep cuttings away from cold windowsills and drafts, because temperature swings can stall rooting.
How do I know when to transplant, especially if roots are not visible?
Use a gentle tug test after about two to three weeks, a rooted cutting should resist. Another reliable sign is new leaf growth at the tip, because the plant is using energy to expand foliage. If both signs are absent, give it more time rather than transplanting too early, which can trigger rot or collapse.
Can I root multiple geranium cuttings in the same pot or should each one have its own pot?
For best results, root them in individual small pots or at least in separate plugs, because crowded cuttings compete for moisture and air movement around the stems. If you root in a shared container, the risk of mold and rot rises since one problem can spread quickly. If you do it in batches, space them so leaves do not touch and check daily.
What if my cuttings turn black at the stem base, but the tip still looks green?
Blackening at the cut end usually means rot has started. If rot is limited to the very bottom, re-cut above the affected tissue, let the new cut callous again, and re-root in fresh, drier medium. If rot has reached leaf stems or the tip begins to collapse, discard the cutting and start new ones, because partially rotted cuttings often fail after replanting.
Should I mist the cuttings or water from the bottom?
Misting is generally unnecessary and can increase humidity around the stem, which raises mold risk. Instead, water to moisten the medium evenly, then let the top inch dry slightly before watering again. If you are prone to overwatering, bottom watering can help you avoid soaking the stem base, but only when the medium is very free-draining.
Is rooting hormone always a waste of time for geraniums?
It is usually optional for pelargoniums, but it can help if you are working with a plant that is less vigorous or cuttings that seem slow to root. If you use hormone, keep application light and ensure excess moisture does not sit in contact with the cut end. When in doubt, prioritize callousing and consistent warmth, those factors usually matter more than the hormone.
What light level should I use during rooting, and can I place cuttings in direct sun?
Bright indirect light is the safe target during rooting. Direct sun can overheat and dry the cutting before roots form, which often causes wilting. After roots are established and the plant is growing, gradually increase to a few hours of direct sun, then fully harden off for outdoor placement.
How do I harden off rooted geranium cuttings if the weather is unpredictable?
Harden off gradually, but protect against sudden cold snaps. Keep pots in a sheltered spot at first, bring them inside overnight if temperatures drop, and extend the hardening window if the first few days are cloudy or cool. Permanently outdoors only when nighttime temperatures reliably stay warm, not just daytime.
Can I leave cuttings in water longer than two or three weeks to get bigger roots?
It is better to pot up as soon as you see healthy roots rather than waiting for long tangles. Water roots are structurally different from soil roots and can break or stall when moved, which can set the plant back. If roots are long, you can gently tease them apart, but avoid rough handling.
Why are my cuttings wilting even though the medium is moist?
Wilting with consistently moist medium often points to root issues like early rot or damping off, or to temperature stress and lack of oxygen in the medium. Check that the pot drains and the medium is airy, then inspect the stem base for browning. If there is no rot and the stem is healthy, adjust toward warmer conditions and avoid repeated soaking.
Do geraniums need fertilizer during the rooting stage?
Generally no, the cutting can rot more easily if you add nutrients too early, and it is not yet absorbing reliably. Wait until after transplanting into a proper pot with drainage and established roots. Then use slow-release at planting or a diluted liquid feed during active growth, especially once new leaves are clearly coming.
How can I prevent leggy growth after transplanting?
Ensure enough light early, avoid extended shade, and pinch the growing tip once new growth is established (as you already do in the process). If your plants stretch even after pinching, it usually means light is still too low, move them closer to a brighter window or provide more direct sun gradually.
Next Article
How to Grow Hardy Geraniums: Seed, Planting, Care Tips
Step-by-step guide to grow hardy geraniums from seed or divisions, with site, planting, care, pruning, and troubleshooti