Begonia corms (more precisely, stem tubers) are one of the most rewarding things you can plant in spring. Start them indoors about 8–12 weeks before your last frost date, place them hollow-side up just beneath the surface of a well-draining, slightly acidic mix, keep them warm and barely moist until shoots appear, then grow them on in bright indirect light. Do that right and you will get months of spectacular flowers from summer through early fall. I have grown tuberous begonias through failures and successes alike, and this guide gives you everything I wish I had known at the beginning.
How to Grow Begonia Corms: Complete Guide for Gardeners

Harriet Whitmore
24 Jul 2026
Why grow begonia corms (and who this guide is for)
Tuberous begonias are the showiest members of the begonia family. The double-flowered exhibition types look almost impossibly opulent, while compact and trailing series produce waves of color in pots and hanging baskets all season long. Unlike many summer bulbs, they actually prefer the dappled shade that frustrates gardeners who want color under a tree or on a north-facing patio. If that describes your garden, these plants were practically made for you.
This guide is written for home gardeners at any level who want species-specific, actionable instructions rather than vague general bulb-growing advice. You will find the correct terminology (corms versus tubers and why the distinction matters), variety guidance, zone-by-zone timing, exact soil recipes, planting steps, care through the season, overwintering, propagation, and a troubleshooting section for the problems most likely to derail you. Work through it in sequence the first time, and you will have a reliable system you can repeat every year. For step-by-step instructions on how to grow a begonia, see the detailed guide.
Corms, tubers, rhizomes, what you actually have in your hand
Garden centers and seed catalogues often use 'corm' and 'tuber' interchangeably when selling tuberous begonias, which causes genuine confusion. Technically, what tuberous begonias produce is a stem tuber, a swollen underground stem that stores nutrients and water between growing seasons. Histological Studies on the Formation and Thickening Growth of Bulb and Tuber in Ornamental Plants (Okayama University) describes the tuberous begonia storage organ as a stem-derived stem tuber (often disk-shaped) rather than a true bulb or corm. A true corm (like a crocus or gladiolus) has a distinct basal plate, a papery tunic, and produces new growth from a single apical point. Stem tubers, by contrast, can have buds scattered across the upper surface, and roots can emerge from almost anywhere on the lower surface. The tuberous begonia tuber is typically disk-shaped or irregularly rounded, often with a slightly concave or cupped hollow on one face, that hollow is where your shoots will emerge, and it is the face that needs to point up.
Rhizomatous begonias (including rex begonias) are entirely different: they produce a thick horizontal stem that crawls at or just below the soil surface. Fibrous-rooted begonias, wax types (semperflorens), polka dot begonias (Begonia maculata), and cane-stem types, grow from a conventional fibrous root system and are not lifted and stored at all. For specific care tips for polka dot begonias (Begonia maculata), see our guide on how to grow Begonia maculata. Understanding these distinctions matters practically: the care, planting depth, overwintering method, and even the potting mix rationale all differ between the groups. When you see 'begonia corm' on a packet, you are almost certainly buying a tuberous begonia stem tuber.
Which begonias grow from corms (tubers), and how they differ from the rest
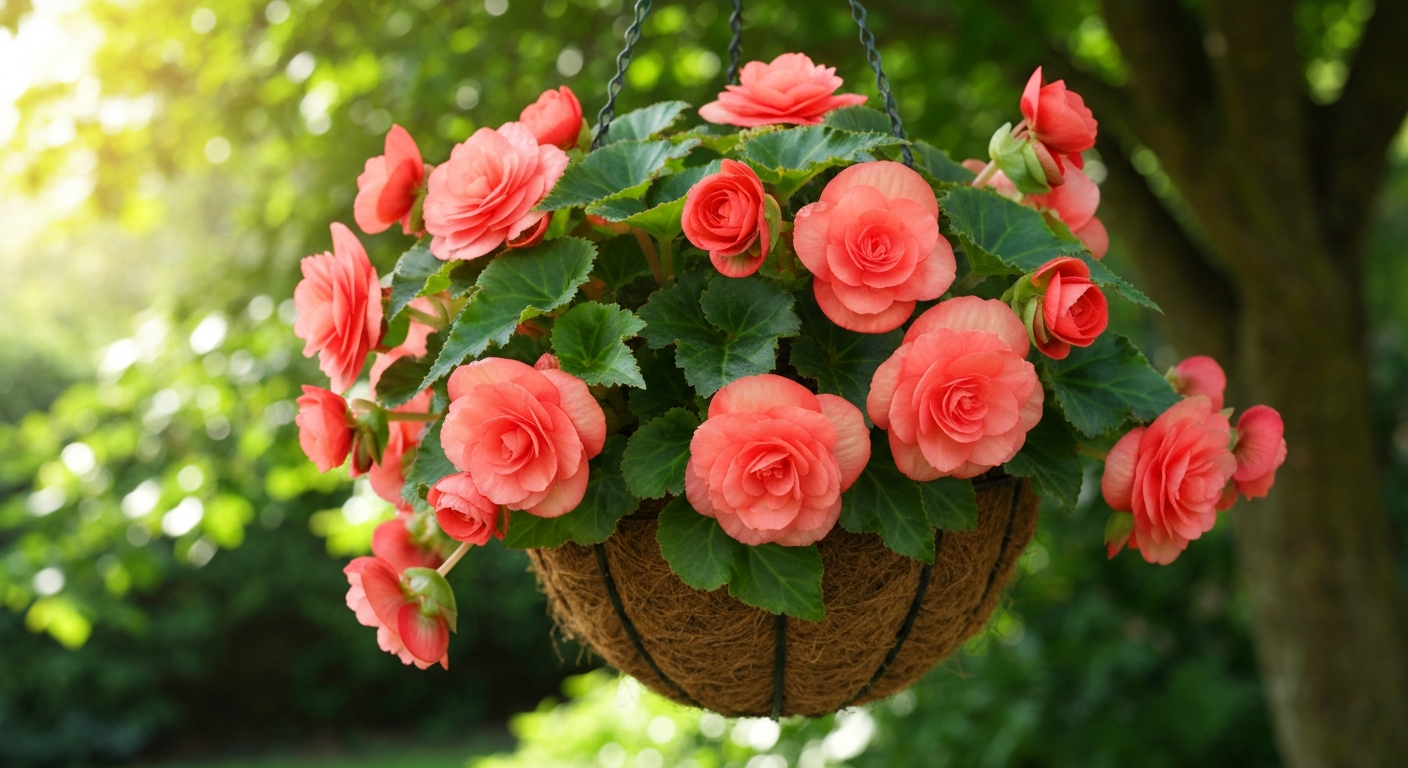
The tuberous group is formally classified as Begonia × tuberhybrida (the Tuberosa or Tuberhybrida group) and related high-altitude Andean species hybrids. They are summer-dormant in winter, grow explosively once temperatures warm up, flower from midsummer until frost, then die back and can be lifted and stored as dormant tubers. The American Begonia Society recognizes several subgroups within the tuberous category, including giant-flower and exhibition types, compact multiflora types, and pendula (trailing) types that excel in hanging baskets.
By contrast, rex begonias are rhizomatous: they grow for their dramatic patterned foliage, rarely go fully dormant, and are kept as houseplants rather than lifted. Wax begonias (Begonia semperflorens) and polka dot begonias (Begonia maculata) are fibrous-rooted and grow as tender perennials or annuals, they do not produce any storage organ worth lifting. Weeping begonias are typically pendula-type tuberous hybrids or related trailing cultivars, so they do share the same corm-growing method covered in this guide, though their basket culture has its own quirks. If you are growing any of the non-tuberous types, the planting and overwintering instructions in this article do not apply to them.
| Begonia Type | Root/Storage Organ | Dormant in Winter? | Lift and Store? | Primary Use |
|---|---|---|---|---|
| Tuberous (×tuberhybrida) | Stem tuber (disk-shaped) | Yes | Yes (zones 3–8) | Beds, containers, baskets |
| Rex begonia | Rhizome | Rarely/partially | No — keep as houseplant | Foliage houseplant |
| Wax/Semperflorens | Fibrous roots | No | No | Bedding annual or houseplant |
| Polka dot (B. maculata) | Fibrous/cane roots | No | No | Houseplant, tender perennial |
| Weeping/Pendula begonia | Stem tuber (pendula type) | Yes | Yes (zones 3–8) | Hanging baskets |
Choosing varieties and picking healthy corms
Which cultivar is right for you
My honest beginner recommendation is to start with one of the modern F1 seed-produced series rather than named exhibition cultivars. Series like Nonstop, Illumination, and Tubby (also sold as Rosana and Beluga in some markets) have been bred specifically for uniform, earlier flowering, better garden vigor, and more forgiving production compared to old collector varieties. They are also widely available as pre-started tubers or seeds from mainstream garden suppliers. Once you get the hang of the growing cycle with a reliable F1 series, you can experiment with named exhibition types like the Blackmore and Langdon selections, 'Billie Langdon' being a classic example, which produce extraordinary very large double blooms but demand cooler summers and more careful attention.
If your summers run hot (think consistent daytime highs above 85–90°F), look specifically for boliviensis-derived or interspecific hybrids. The classical ×tuberhybrida types trace back to cool Andean cloud-forest species and genuinely struggle in prolonged heat and humidity. Boliviensis and modern interspecific series are bred for better heat tolerance and work far better in warmer regions. Pendula types in this group are also ideal for hanging baskets, where air circulation helps manage heat and humidity around the foliage.
What to look for when buying corms
- Firm, dense texture with no soft or mushy spots — softness signals rot inside
- Smooth or slightly rough surface without deep wounds, mold, or gray-white fungal patches
- Visible pink or reddish bud eyes on the concave (hollow) upper face, even if tiny
- Size appropriate for the variety: exhibition types run 2–4 inches across, multiflora types are naturally smaller
- No shriveled, desiccated appearance — some wrinkling from dry storage is normal, but deep collapse means the tuber has lost too much moisture to recover reliably
- Buy from suppliers who store corms cool and dry (40–50°F) rather than in warm retail environments where premature sprouting and rot are common
Supplies, tools, and your planting timeline
What you need before you start
- Shallow seed trays or nursery flats for pre-sprouting (no drainage holes needed at this stage, or just barely moist trays)
- 6–8 inch pots for individual upright tubers; 10–12 inch hanging baskets for pendula types (1–3 tubers per basket)
- Well-draining potting medium — see the soil mix section below
- Plant labels and a waterproof marker (variety names blur together fast once spring gets busy)
- A heat mat set to 70–80°F for warm, bottom-up rehydration during pre-sprouting
- A liquid fertilizer with a balanced or slightly higher phosphorus and potassium ratio for the flowering season
- Bamboo stakes and soft ties for upright exhibition types with heavy blooms
- A trowel and small hand fork for bed planting and autumn lifting
Planting timeline by USDA zone
The key date to work backward from is your local last spring frost date. Use NOAA climate normals for your specific county or zip code rather than generic zone averages, there can be a two-to-three-week difference in last frost dates within the same hardiness zone. Tuberous begonias need to go outdoors only when nights reliably stay above 50°F and soil temperatures reach at least 60–65°F. Starting indoors gives you a meaningful head start because the tubers take time to wake up and develop substantial shoots before they can handle outdoor conditions.
| USDA Zone | Approx. Last Frost | Start Indoors | Transplant Outdoors | First Autumn Frost / Lift Corms |
|---|---|---|---|---|
| Zone 3 (e.g., northern MN) | Late May | Early–mid March (10–12 wks before) | Early June | Mid September — lift before first frost |
| Zone 4 (e.g., northern WI) | Mid May | Late Feb–early March | Late May | Late September — lift before first frost |
| Zone 5 (e.g., Chicago, IL) | Late April–early May | Mid–late February | Mid–late May | Mid October — lift before first frost |
| Zone 6 (e.g., St. Louis, MO) | Mid April | Early–mid February | Early–mid May | Late October — lift before first frost |
| Zone 7 (e.g., Virginia) | Late March–early April | Late January–early February | Late April | Early November — lift before first frost |
| Zone 8 (e.g., Seattle, WA / Dallas, TX) | Mid March | Early January | Early–mid April | Mid November — lift or mulch heavily |
| Zone 9–11 (e.g., Southern CA, FL) | No reliable frost | January or direct plant | Year-round or spring | Leave in ground; divide every 2–3 years |
These are starting-point estimates. If your area has a reputation for late cold snaps, or you garden on a frost-prone low spot rather than a raised bed, add one to two weeks of buffer before transplanting outdoors. I have lost a full tray of nearly transplant-ready begonias to a late April cold snap and now I always harden off for at least ten days before the tubers go anywhere near the garden.
Soil mix recipes for containers and in-ground beds
Getting the soil right is probably the single biggest factor in whether your tubers rot or thrive. Tuberous begonias want a mix that holds enough moisture for steady growth but drains quickly enough that the tuber is never sitting in waterlogged medium. Heavy garden soil straight from the ground is almost always too dense, even soils that drain well for other plants tend to compact in containers and hold too much water around the crown of the tuber.
Container potting mix
My go-to container recipe is 50% sphagnum peat moss or coir, 25% finished compost or leaf mold, and 25% perlite or coarse vermiculite. This is a variation of the classic Cornell peat-lite approach with added organic matter for fertility. The peat or coir retains just enough moisture between waterings, the compost provides slow-release nutrients and improves texture, and the perlite keeps the mix airy enough that water moves through rather than pooling. Mix in a small amount of dolomitic lime if you use peat (about 1 tablespoon per gallon of mix) to buffer the pH toward the target range of 5.5–6.5. Coir naturally sits closer to neutral and usually needs no buffering.
In-ground bed amendment recipe
For garden beds, work in a generous 3–4 inch layer of compost across the planting area and till it to about 10–12 inches deep. If your native soil is heavy clay, also work in a 2–3 inch layer of coarse horticultural grit or coarse sand. Avoid fine sand, which actually makes clay worse. For sandy soils that drain too quickly, focus on the compost and add some coir or peat to slow drainage and improve moisture retention. Recheck pH before planting: tuberous begonias grow best at pH 5.5–6.5, so if your soil tests above pH 7.0, incorporate elemental sulfur per the package rate for your soil type and volume.
pH and drainage notes
- Target pH 5.5–6.5 for both containers and in-ground beds
- Never plant tubers in poorly drained spots — if water ponds for more than 30 minutes after rain, raise the bed or relocate
- Avoid adding fresh manure directly around tubers; it can introduce pathogens and burn tender emerging shoots
- Refresh container mix each season — reusing last year's mix without amendment significantly increases disease pressure
Pre-plant preparation: rehydrating, inspecting, and pre-sprouting your corms
Do not skip this step. Dry-stored tubers benefit enormously from a controlled rehydration and warm pre-sprouting period before they go into pots or beds. It lets you see which tubers are viable before you invest time in containers, and it dramatically compresses the time from planting to visible growth in the garden.
- Inspect every tuber carefully. Press the surface gently — firm is good, soft or spongy indicates internal rot. Trim away any small areas of surface mold with a clean, sharp knife, then dust the cut with sulfur powder or powdered charcoal. Discard any tuber that is more than a quarter rotted or has no visible bud eyes.
- Set viable tubers hollow (concave) side up in a shallow tray. Barely moisten the tray with damp peat, coir, or vermiculite — the medium should feel damp to the touch, not wet. The tuber itself should rest on the damp surface rather than being buried.
- Place the tray on a heat mat set to 70–80°F (21–27°C). This bottom heat mimics the warming of spring soil and encourages the bud eyes to break dormancy. Keep the area out of direct light at this stage.
- Check daily and mist lightly if the medium surface dries out. Avoid overwatering — waterlogged conditions here cause crown rot before the tuber has any defense. Within a few days to two weeks, you will see small pink or red shoot primordia appearing from the hollow center.
- Once shoots are clearly visible (1/2 inch or more), move the tray to a bright, cooler location (60–70°F / 15–21°C) with indirect light. Begin watering a little more regularly but still conservatively. Roots will begin to form from the lower surface within a week or two.
- Pre-sprouted tubers with shoots 1–2 inches tall and some visible root activity are ready to pot up or plant into their permanent containers. They are not yet ready to go outdoors.
Step-by-step planting instructions
Planting in containers
Container sizing matters more than many people expect. Use a pot only slightly larger than the tuber, a 6–8 inch wide, relatively shallow pot works well for a single standard tuber. Pendula and hanging basket types can take one to three tubers in a 10–12 inch basket. Avoid oversized pots: the surrounding soil stays wet far too long, and that excess moisture around the tuber leads directly to rot. I have killed good tubers in beautiful expensive planters simply because the pots were four inches too large.
Fill the container about two-thirds full with your prepared mix. Set the tuber hollow-side up so its top surface sits about half an inch (1–1.5 cm) below the eventual soil line. Backfill gently so the tuber is covered by no more than half an inch to one inch (1–2.5 cm) of medium. Firm the medium lightly, do not pack it. Water once to settle the mix, then wait until the surface begins to dry before watering again. At this early stage, before the plant has significant leaf area, it is consuming very little water and the biggest risk is overwatering.
Planting in garden beds
After your bed is amended and raked level, use a trowel to create individual shallow planting pockets. The planting depth rule is the same as for containers: place the tuber so its top surface sits roughly half an inch to one inch below the soil surface, hollow-side up. Deeper planting dramatically increases the chance of rot and slows emergence significantly, resist the instinct to bury them deeper for 'safety.' Space upright varieties 12–18 inches apart; pendula and trailing types can be planted 12 inches apart in a landscape context or closer in mixed containers.
Planting checklist
- Tubers inspected and any surface mold removed and treated
- Pre-sprouting complete: visible shoots at least 1/2 inch, some root activity present
- Soil mix prepared to correct recipe — pH confirmed at 5.5–6.5
- Container size appropriate (not oversized) or bed drainage confirmed
- Tuber placed hollow/concave side up
- Planting depth: top of tuber no more than 1 inch below soil surface
- Spacing: 12–18 inches for upright types, 12 inches for trailing types
- Watered in gently after planting
- Labeled with variety name and planting date
- Location chosen: bright indirect light, protected from strong wind and afternoon sun
Light, temperature, watering, and feeding through the season
Light and temperature
Tuberous begonias are not sun-lovers. They want bright, indirect light for most of the day, the equivalent of dappled shade under a high tree canopy, or morning sun with afternoon shade. In practice, an east-facing porch, a spot under an open-canopied tree, or the shade side of a wall works beautifully. Avoid more than two to three hours of direct afternoon sun, especially in warm climates, as it scorches the foliage and triggers early dormancy. The ideal temperature range for active growth is 60–75°F (15–24°C). Above 85–90°F the classical ×tuberhybrida types slow down noticeably, drop buds, and become susceptible to powdery mildew. If you live in a hot-summer region, grow heat-tolerant boliviensis-derived or interspecific varieties and site them where afternoon shade is guaranteed.
Watering
Water consistently but never excessively. The classic guidance, let the top inch of potting mix dry slightly between waterings, is genuinely the right approach here. Container-grown begonias in warm weather may need water every two to three days; in-ground plants in cool, cloudy weather may go a week. Always water at the base, not overhead, since water sitting on the leaves and in the crown creates the perfect environment for botrytis and other fungal issues. During the period after planting and before significant leaf growth, water very sparingly, this is when rot risk is highest and when I have personally lost the most tubers.
Fertilizing
Once the shoots reach 3–4 inches tall and the plant is clearly in active growth, begin a regular feeding program. For the first half of the season (shoot development through bud set), a balanced liquid fertilizer (roughly 20-20-20 or a balanced slow-release granular) applied every two weeks works well. As plants come into full flower in midsummer, shift to a fertilizer slightly higher in phosphorus and potassium (such as a 15-30-15 or tomato-type formula) to support continued blooming rather than pushing more foliage. Ease off fertilizing about six weeks before your expected first autumn frost to allow the plant to begin its natural wind-down without forcing tender new growth that would be frost-killed.
Keeping the plants looking great: deadheading, pruning, and staking
Tuberous begonias produce flowers in clusters of three: typically one large double central flower flanked by two smaller single male flowers. The central flower is the showpiece; the side flowers are useful for the plant's natural seed-setting but do nothing for garden display. Pinch out those two smaller flanking flowers as buds to redirect the plant's energy into the main bloom. Deadheading spent flowers regularly keeps the display tidy and prevents botrytis from getting a foothold on decaying petals. Do not pull faded flowers off, grip and twist gently or use small scissors to avoid tearing the stem.
Upright exhibition-type begonias with large double flowers will almost certainly need staking. A single bamboo cane placed two to three inches from the main stem, tied loosely with soft plant tape, is usually enough. Do not tie tightly or you will damage the brittle stems. Stake early in the season, before heavy blooms develop, so you are not wrestling with a fully loaded plant later. For container-grown plants, also rotate the pot a quarter turn every week or two so the plant develops symmetrically.
Overwintering: lifting, cleaning, and storing your tubers
In USDA zones 3–8, tuberous begonias must be lifted and stored indoors over winter or they will freeze and be lost. In zones 9–11 they can stay in the ground, though even there a light mulch helps in the coldest months. The lifting process is straightforward but timing matters, if you lift too early you waste some of the growing season; too late and a hard frost kills the tuber. My rule is to start the process when the first light frost browns the foliage, or about two to three weeks before your expected first hard frost.
- About three to four weeks before your expected first hard frost, stop fertilizing and reduce watering to begin signaling dormancy.
- After the first light frost kills the foliage, or if foliage yellows and collapses naturally, cut stems back to about 2–3 inches above the tuber.
- Dig or tip the tubers out carefully with a hand fork, keeping the soil ball intact to minimize root damage.
- Brush off loose soil gently — do not wash at this stage, as excess moisture increases storage rot.
- Allow tubers to cure in a dry, shaded location at 50–60°F for one to two weeks. This drying period toughens the surface and reduces the chance of mold developing in storage.
- Once fully dry, remove any remaining stem stubs and old roots. Inspect each tuber — discard any that are soft or heavily molded.
- Dust clean tubers lightly with sulfur powder or a fungicide dust to protect against storage rot.
- Pack tubers in shallow trays, open paper bags, or cardboard boxes with barely damp (not wet) peat moss, vermiculite, or coir. Each tuber should be surrounded by medium without touching the others.
- Store at 40–50°F (4–10°C) in a dark, well-ventilated space — a basement, garage, or insulated shed. Check monthly; discard any tubers that develop soft spots, and lightly mist any that appear to be shriveling badly.
Propagating and dividing tubers
Mature, large tubers (typically three or more years old) can be divided in late winter just before you begin pre-sprouting. Wait until the bud eyes are clearly visible as small pink nodules, that visibility is essential because each division must have at least one bud eye to produce a plant. Use a sharp, clean knife to cut through the tuber, ensuring each piece includes a visible eye and a reasonable amount of storage tissue. Dust every cut surface immediately with powdered sulfur or activated charcoal to seal the wound, then allow the divisions to air-dry for 24–48 hours before pre-sprouting.
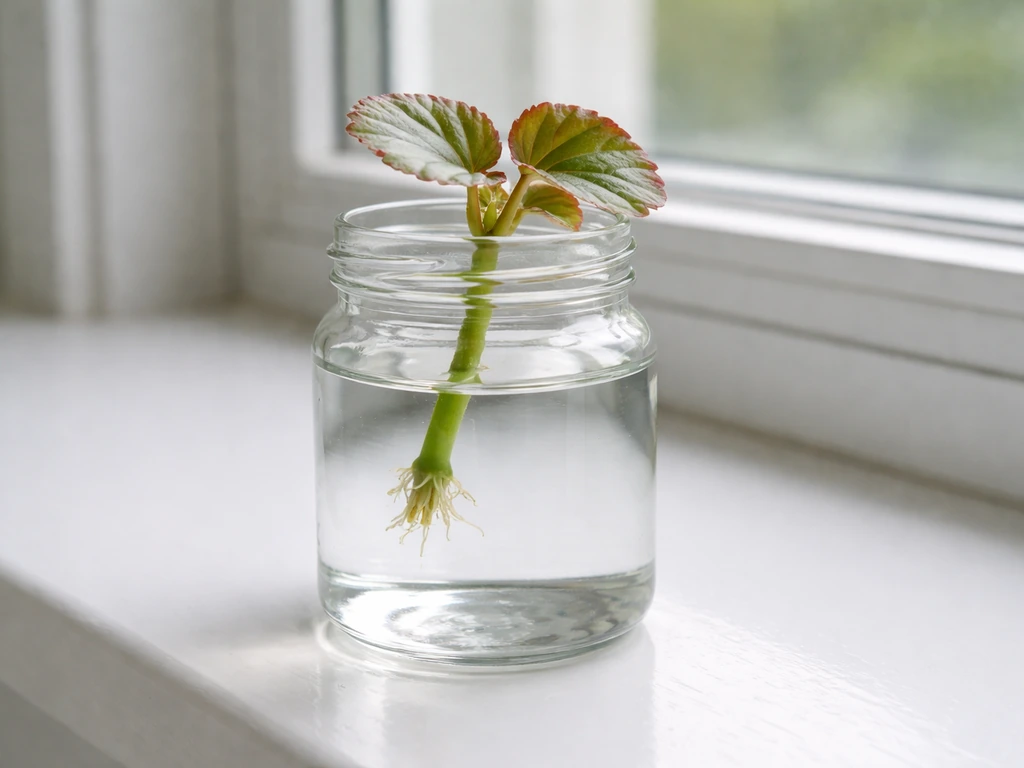
Stem cuttings are another option in early summer. Once your tubers produce multiple shoots, you can remove a basal shoot (about 3–4 inches long with a small heel of tissue) and root it in a moistened perlite and peat mix under humidity. Cuttings from tuberous begonias root reliably at 70°F with a humidity dome and indirect light, usually within three to four weeks. For an alternative rooting method, see how to grow begonia in water for step-by-step instructions on rooting stem cuttings directly in water. Plants grown from stem cuttings will not produce a meaningful storage tuber in their first season, so they are not suitable for overwintering the same way, but they can be grown as indoor plants over winter and allowed to develop further the following season.
Troubleshooting common problems
The most likely failure points, and how to fix them
| Problem | Likely Cause | Fix |
|---|---|---|
| Tuber rots before shoots appear | Overwatering during pre-sprouting or planting in cold, wet soil | Water very sparingly until shoots emerge; ensure soil temp is above 60°F; improve drainage |
| Shoots emerge then collapse | Crown rot from excess moisture or planting too deep | Check depth (no more than 1 inch cover); reduce watering; remove rotted tissue and dust with sulfur |
| No shoots after 3+ weeks | Tuber not viable, planted upside-down, or soil too cold | Check orientation (hollow side up); verify soil temp with a thermometer; try pre-sprouting before replanting |
| Powdery white coating on leaves | Powdery mildew, favored by warm days, cool nights, and poor airflow | Improve spacing for airflow; apply potassium bicarbonate or neem oil spray; move containers to better-ventilated spot |
| Gray fuzzy rot on flowers and buds | Botrytis (gray mold), common in cool damp conditions | Remove and bin all affected tissue; avoid overhead watering; reduce humidity; apply fungicide if severe |
| Buds drop before opening | Heat stress, sudden temperature swings, or inconsistent watering | Shade from afternoon sun; water more consistently; use heat-tolerant variety in hot climates |
| Yellowing leaves from base up | Normal wind-down toward autumn dormancy, or overwatering/root rot | If early in the season, check soil moisture and drainage; if late summer, begin dormancy protocol |
| Spindly, weak stems | Insufficient light during indoor growing phase | Move to brighter (but still indirect) light; ensure at least 14–16 hours of bright light or supplement with grow lights |
| Holes in leaves, chewed edges | Vine weevil larvae (roots) or adult weevils (foliage) | Apply nematode drench for larvae in containers; use sticky traps and nighttime inspection for adults |
| Silver stippling on leaves | Spider mites, especially in hot, dry conditions | Increase humidity around plants; spray with insecticidal soap or neem oil; repeat every 5–7 days for 3 treatments |
Pests and diseases quick-reference
- Botrytis gray mold: the number one disease issue, especially in cool, humid conditions — prevention through airflow and dry foliage is more effective than treatment
- Powdery mildew: favored by temperature fluctuation and crowding; the classical tuberhybrida types are more susceptible than boliviensis-derived cultivars
- Vine weevil: particularly damaging in containers; adult notches leaf edges at night, larvae destroy roots and tubers underground; use nematodes in containers as a preventive
- Aphids: cluster on new growth and flower buds; knock off with a water jet or treat with insecticidal soap
- Spider mites: worst in hot, dry periods; look for fine webbing on undersides of leaves and a dusty or bronzed appearance to the foliage
- Bacterial leaf spot: brown, water-soaked patches that expand quickly in wet conditions; remove affected leaves promptly and avoid overhead irrigation
- Thrips: cause silvery streaking on petals and distorted flowers; blue sticky traps help monitor; treat with spinosad or insecticidal soap
A few final thoughts on getting the most from your begonia corms
Tuberous begonias have a reputation for being fussy, and I understand why, the first time I lost a tray of tubers to rot from overwatering, I was pretty discouraged. But most of the failures I have seen come down to a handful of the same mistakes: too much water too early, too deep planting, too much direct sun, and not matching the variety to the climate. Get those fundamentals right and the plants are genuinely rewarding and surprisingly resilient. For gardeners also interested in summer-flowering corms, see our guide on how to grow montbretia.
If you are also growing other begonia types alongside your tuberous varieties, keep in mind that the care protocols are quite different. Fibrous-rooted types like semperflorens and polka dot begonias are grown and maintained differently from the tuber-based methods in this guide. For specific care of polka dot begonias, see how to grow polka dot begonia. For specific care instructions for fibrous-rooted types, see how to grow begonia semperflorens. Understanding which type you have is always the first step, and hopefully after reading this, you have a very clear picture of exactly what you are working with and what it needs to thrive.
FAQ
What is the correct terminology: corms, tubers, rhizomes, bulbs—what do tuberous begonias actually have?
Tuberous begonias produce stem tubers (often disk‑shaped). They are not true bulbs or corms. Unlike corms (compact, with a basal plate and tunic) or rhizomes (horizontal stems), tuberous begonia storage organs are stem‑derived tubers with buds on the top surface and roots from the underside. Use 'tuber' or 'tuberous begonia' for accuracy in horticultural practice.
Which begonia groups are grown from tubers, and how do they differ from rex, wax, polka‑dot or cane types?
Tuberous group (Begonia ×tuberhybrida and related interspecific hybrids) are the ones started from tubers. Rex and other rhizomatous begonias grow from rhizomes, wax/semperflorens and many trailing/cane types are fibrous‑rooted and propagated from cuttings/seedlings. Tuberous types are prized for large showy flowers and seasonal growth habit; rex are foliage specialists; wax and cane types are usually easier, continuous bloomers and more heat/humidity tolerant depending on species.
How do I choose beginner‑friendly tuberous begonia varieties?
Choose modern seed‑produced series (Nonstop®, Illumination®, Beluga®, Tubby®) for uniform, early flowering and easier culture. For hanging baskets or hot summers, select boliviensis‑derived or interspecific heat‑tolerant series. Reserve exhibition/large‑flower named cultivars for experienced growers — they need cooler, steadier conditions and more attention.
When should I start tubers indoors and when can I set them outside by USDA zone?
General timing: - Zones 3–6: start tubers indoors 10–12 weeks before last frost (for exhibition) or 6–8 weeks for seed‑series; set out after night temps >50°F and soil ≥60–65°F. - Zones 7–8: start 6–8 weeks before last frost; set out after nights consistently >50°F. - Zones 9–11: tubers can be grown in ground as perennials (plant after all frost risk or in fall/early spring depending on local microclimate). Always use local last‑frost/first‑frost normals (NOAA/extension) to schedule; harden off seedlings 7–10 days before transplant.
How do I pre‑prepare (rehydrate or pre‑sprout) stored tubers before planting?
Inspect tubers for firm texture and healthy buds. Rehydrate by placing tubers on moist peat/coir or a damp paper towel in a shallow tray at warm bottom heat (~70–80°F) until pink shoot primordia appear (days–2 weeks). Keep medium moist but not soggy to avoid crown rot. Once shoots form, move to bright, cooler conditions (60–70°F) and plant shallowly when shoots are ½–1 inch long or soil temperatures are safe for outdoor set‑out.
Exact planting steps: orientation, depth, spacing, soil mix recipes and pot size
Steps: 1) Choose a light, well‑draining mix: recommended bedding/container mix = 50% peat or coir + 25% compost or well‑aged leaf mold + 25% perlite or vermiculite; pH 5.5–6.5. 2) Use shallow, wide pots (6–8″ for single tuber; 10–12″ hanging baskets for 1–3 tubers depending on series). 3) Plant with the hollow/concave (growth face) up; cover with ½–1″ (1–2.5 cm) of medium. 4) Spacing in beds: 8–12″ (20–30 cm) between plants depending on mature habit; exhibition types need more space. 5) Water lightly after planting—do not saturate; keep medium evenly moist but never waterlogged until roots and shoots develop.
Next Article
How to Grow Begonia in Water: Step-by-Step Guide
Step-by-step how to grow begonias in water from cuttings, prevent rot and algae, then pot for flowering success.