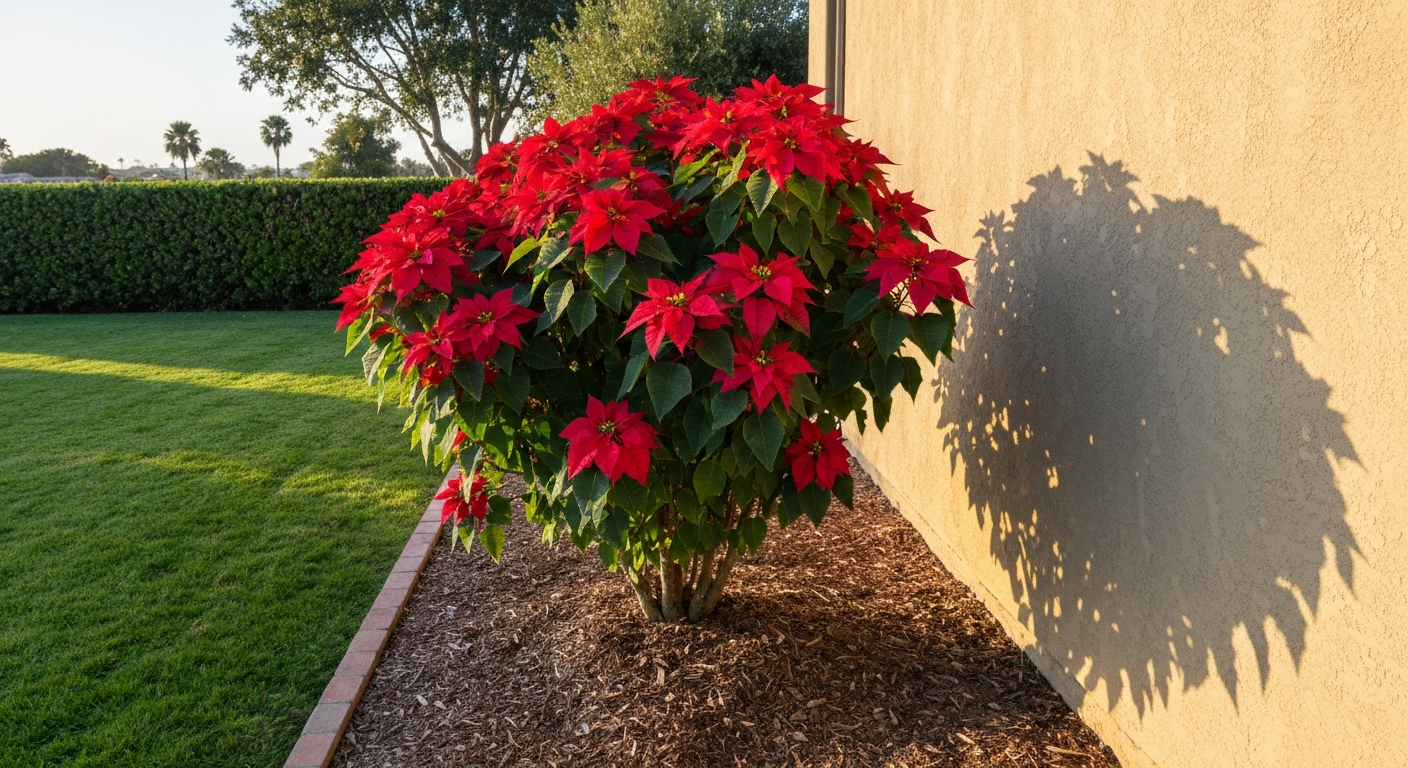
You can grow beautiful, bract-filled poinsettias in the Philippines, but you need to do one thing that most beginners skip: cover them with blackout cloth every evening from around late September to force the long dark period they need to color up by Christmas. For a step-by-step guide on how do you grow a poinsettia, see our detailed growing guide. Without that, the natural night length in the Philippines (roughly 11 to 12 hours in Manila and similar cities) is simply not long enough to reliably trigger bract development. Get the blackout timing right, keep the roots well-drained in our tropical humidity, and poinsettias are genuinely rewarding to grow here.
How to Grow Poinsettia in the Philippines: Holiday Guide

Harriet Whitmore
10 Aug 2026

What to expect growing poinsettias in the Philippines
Poinsettia (Euphorbia pulcherrima) is native to Mexico, where it grows as a woody shrub in seasonally dry, warm conditions. The Philippines shares the warmth but not the dry winters or the long nights, which means you are working with the plant's preferences rather than against them on temperature, but you do have to compensate for light. That said, poinsettias grow vigorously here. I have seen potted specimens in Manila reach knee height in a single season with almost no fuss, and in-ground plants in Cebu and Davao can become impressive shrubs within two or three years. The real challenge is timing those iconic red (or pink, white, or bicolor) bracts for December 25. Do that well and everything else follows naturally.
The good news for Philippine gardeners is that the basic plant care, sun, water, fertilizer, is straightforward in our climate. What takes practice is the photoperiod discipline: the blackout schedule has to be consistent, every single night, with no light leaks, for eight to ten weeks. I will walk through the whole process, from choosing varieties to troubleshooting a plant that refuses to color.
At-a-glance seasonal timeline for Philippine gardeners
Poinsettia is a short-day (more accurately, a long-night) plant. Bract initiation is triggered by uninterrupted dark periods of at least 12 to 14 hours every night for eight to ten consecutive weeks. Commercial growers typically use about 14 hours of darkness to be safe. In the Philippines, natural nights run roughly 11.3 to 12.3 hours from September through December, depending on your city, too short to guarantee color without help. That means you need to extend the dark period artificially using blackout cloth or a dark room.
Here is how to map that onto a Christmas deadline. If you start blackout treatment on October 1 and run it for 8 weeks, you finish around November 26, giving bracts time to fully develop and color up by December 25. Starting September 17 gives you a 10-week buffer and is the safer option, especially for slower-responding cultivars or plants that had any stress during the season. I personally start mine on September 20 to split the difference and have never missed Christmas color by more than a few days.
| Blackout Start Date | Treatment Duration | Expected Bract Completion | Notes |
|---|---|---|---|
| September 17 | 10 weeks | ~November 26 | Safest option; suits slower cultivars and beginner schedules |
| September 20 | ~9.5 weeks | ~November 29 | Good middle ground; works well for most commercial cultivars |
| October 1 | 8 weeks | ~November 26 | Minimum practical window; best for fast-response cultivars only |
| October 7 or later | Less than 8 weeks | After December 10+ | Risky — bracts may not fully color by Christmas |
Your practical daily blackout routine: cover or move plants into complete darkness by 5:30 to 6:00 PM and uncover them no earlier than 7:00 to 8:00 AM the following morning. That gives roughly 13 to 14 hours of darkness, which is enough to satisfy even the pickiest cultivars. Mark the start and end dates on your calendar and treat them as non-negotiable.
| City | Approx. Natural Night (Sept–Dec) | Blackout Hours Needed | Daily Cover Time |
|---|---|---|---|
| Manila | 11.3–12.3 h | ~1.5–2.5 h extension | Cover by 5:30 PM, uncover by 7:30 AM |
| Baguio | 11.2–12.3 h | ~1.5–2.5 h extension | Cover by 5:30 PM, uncover by 7:30 AM |
| Cebu | 11.3–11.4 h | ~2.5 h extension | Cover by 5:00 PM, uncover by 7:30 AM |
| Davao | 11.4–12.1 h | ~2–2.5 h extension | Cover by 5:15 PM, uncover by 7:30 AM |
Choosing varieties: which cultivars actually work in the tropics
Not all poinsettia cultivars handle heat equally well, and in the Philippines the finishing period (September through November) is still warm, often with daytime temperatures pushing 30°C or above. Standard commercial cultivars bred for temperate greenhouses can struggle here. They produce smaller bracts or take longer to color when nights stay warm.
The cultivars I have had the most success with, and that I see performing well in Philippine trials and retail, are interspecific hybrids marketed for improved heat tolerance. The Princettia series (Suntory Flowers) is worth seeking out if you can source it, with compact growth and reliable tropical performance in pink, hot pink, and white. Cultivars from Danziger and Dümmen Orange also publish culture charts suited to warmer finish temperatures. For colors, red remains the most common here (and what local buyers expect for Christmas), but white, pale pink, and bicolor options are increasingly available through online sellers and florist suppliers. When buying local retail stock, ask about the variety name if possible. Many Philippine florists sell unlabeled pot plants, but even those tend to be selected lines that perform acceptably in our climate since they were grown here before being sold.
- Red cultivars: most widely available locally, strong bract development, classic Christmas look
- Pink and hot pink (e.g., Princettia types): compact, perform well in heat, excellent for container growing
- White and cream: slower to show color contrast, rewarding when done right, good for mixed holiday arrangements
- Bicolor and marble types: less common in the Philippines but available through specialty importers; treat the same as standard cultivars
Picking the right spot: sun, shade, wind, and shelter
Poinsettias want full sun to bright indirect light, a minimum of six hours of direct sun daily for the best bract development. For guidance on training and supporting vigorous, sun-loving climbers, see our page on how to grow pyrostegia venusta. In the Philippines that usually means an east-facing or south-facing position that gets morning to midday sun with some protection from the brutal 1 PM to 4 PM afternoon heat, especially during the hottest months. I have grown them in full western exposure in Metro Manila and they survived, but the bracts were smaller and the foliage looked stressed by November.
Wind is a bigger issue than most Philippine gardeners realize. Strong winds, especially the amihan (northeast monsoon) that arrives in October and November, can physically damage tall poinsettia stems and stress the plant at exactly the moment it needs to be developing bracts undisturbed. A windbreak, a wall, fence, or row of taller shrubs, on the windward side makes a real difference. For container plants, simply moving them to a sheltered spot during strong wind events is enough.
Baguio and highland areas above 700 to 1,000 meters above sea level actually have a natural advantage: cooler temperatures, especially at night, come closer to the ideal finishing range of 15 to 18°C that commercial producers target. Lowland growers in Metro Manila, Cebu, and Davao are working with nighttime temperatures that rarely drop below 22 to 25°C during the finish period. This does not prevent bract formation, but it can slow development and reduce bract size compared to highland or greenhouse-cooled plants. Ventilation and light shading during the hottest part of the day help lower ambient temperatures around the plants.
In-ground, containers, or greenhouse: pros and how to set each up
Growing poinsettias in the ground
In-ground poinsettias in the Philippines can grow into large, impressive shrubs over two to three years and will flower naturally if the blackout treatment is applied (or if they happen to be shaded naturally in a way that mimics long nights). The biggest requirement is drainage. Our tropical soils, particularly the heavy clay soils common across much of Luzon, the Visayas, and Mindanao, hold water too long, and poinsettia roots are highly susceptible to root rot. Before planting, dig the bed at least 40 to 50 cm deep, incorporate generous amounts of coarse organic matter (coco husk chips, rice hulls, or pine bark), and if the site is naturally prone to standing water, raise the bed 15 to 20 cm above the surrounding grade. Space plants 60 to 90 cm apart depending on expected mature spread. Set each plant at the same depth it was in its nursery container and water in well.
Container growing
Containers are the most practical option for most Philippine home gardeners because they let you move plants around for the blackout treatment, control the soil mix completely, and bring plants indoors during typhoon season. Use a 6-inch pot for single-stem retail plants and a 8 to 10-inch pot if you want a fuller, multi-stem specimen. Containers must have generous drainage holes, at least three to four holes for a 6-inch pot. Terra cotta is ideal in our climate because it breathes, which helps prevent the waterlogging that kills more Philippine poinsettias than any pest or disease.
Greenhouse and blackout cloth setups
A simple shade house with blackout capability is the setup I recommend for anyone serious about reliably timing bracts every year. You do not need an expensive structure, a bamboo or metal frame covered with 50 to 60 percent shade cloth for normal growth, plus a layer of opaque black polyethylene film or proper horticultural blackout cloth that you draw over the frame each evening, works well. The key is that the blackout layer lets in zero light, check for pinholes and gaps by standing inside the covered structure in daylight. Any light leak, even a narrow beam from a streetlight or neighboring house, can interrupt the dark period and delay or prevent flowering. Growing poinsettias in a greenhouse also addresses the temperature problem somewhat: you can use fans for ventilation and orient the structure to maximize airflow during warm nights.
Potting mixes and soil recipes using Philippine materials
The target for any poinsettia mix is a well-aerated, fast-draining root zone with a pH of 5.5 to 6.5 and an electrical conductivity (EC) below 2 dS per meter. In practical Philippine terms, that means you are building a light, porous mix that drains within seconds of watering but still holds enough moisture to keep roots from drying out between waterings. Garden soil alone almost never achieves this. Here are three practical mix recipes using locally available materials.
| Mix Name | Recipe (by volume) | Best For | Notes |
|---|---|---|---|
| Basic Coir Mix | 60% cocopeat + 20% perlite or pumice + 20% composted bark or aged rice hull | Container growing, beginners | Widely available; coir replaces peat; rinse coir before use to reduce EC |
| Drainage-Heavy Mix | 50% cocopeat + 30% coarse perlite or washed sand + 20% pine bark chips | Areas with heavy rainfall or prone to overwatering | Extra drainage buffer; good for lowland humid areas |
| In-Ground Amendment Blend | 50% native topsoil + 25% cocopeat + 15% rice hull or coarse sand + 10% compost | In-ground beds on clay-heavy soils | Work this through the top 30–40 cm of bed soil before planting |
A note on cocopeat: it is the best local substitute for horticultural peat and works excellently for poinsettias when mixed with a drainage amendment. Agro‑industrial residues as potting media: physicochemical characters and influence on plant growth (review, PMC) reports coconut coir and processed rice‑hull/biochar blends are viable peat replacements in tropical production when mixed to match porosity and water‑holding characteristics. Always rinse raw cocopeat before use if it smells strongly of tannins or if the label does not say it has been buffered, high initial EC from unprocessed coir can burn roots. Perlite is available in most gardening shops in Metro Manila, Cebu, and major cities. Pumice, if you can find it, is even better for long-term structure because it does not compact over time the way perlite can. Avoid regular beach sand (too fine, tends to compact) and use only coarse, washed sand if substituting.
Watering and humidity: the line between moist and waterlogged
Poinsettias want consistently moist but never waterlogged roots. In the Philippine climate, especially during the habagat (southwest monsoon) season from June through September, the risk is almost always too much water rather than too little. I water my container poinsettias when the top 2 to 3 cm of the mix feels dry to the touch. In the cooler, drier months from October to February that might mean watering every two to three days. During the wet season or after a typhoon, I sometimes skip watering entirely for four to five days if the soil still feels damp at depth.
When you do water, water thoroughly, pour until water runs freely from the drainage holes, then stop. Never let pots sit in saucers of standing water. The milky latex sap in poinsettia stems is an efficient indicator of stress: a plant that wilts even when the soil is moist is almost certainly suffering from root rot caused by overwatering, not underwatering. Conversely, a plant that wilts and has bone-dry soil needs water immediately.
Reading your plant: signs of watering problems
| Symptom | Likely Cause | Action |
|---|---|---|
| Yellowing lower leaves, mushy stem base | Overwatering / root rot | Reduce watering, check drainage, repot if roots are brown and mushy |
| Wilting with dry soil | Underwatering | Water thoroughly; improve soil water retention with more coir |
| Wilting despite moist soil | Root rot (overwatering damage) | Unpot, remove dead roots, repot in fresh dry mix, withhold water for a few days |
| Leaf drop during blackout period | Cold draft, inconsistent watering, or light leak stress | Check for drafts and light leaks; normalize watering routine |
| Crispy leaf edges | Low humidity, salt buildup, or wind exposure | Flush soil with clean water, move to sheltered spot, mist foliage lightly in the morning |
Philippine humidity is generally high enough that you do not need to mist foliage for humidity's sake, unlike gardeners in drier climates. In fact, overhead watering or misting in the evening can encourage fungal disease. Water at the base of the plant in the morning so foliage dries before nightfall.
Fertilizing: feeding for growth, then shifting for bloom
Poinsettia feeding has two distinct phases: a vegetative (growth) phase from after pruning through late August, and a finishing (bract development) phase from the start of blackout treatment through bract color. Getting the fertilizer shift right between these phases makes a real difference to bract quality.
Vegetative phase: pushing growth (January to mid-August)
During the growth phase, use a balanced or slightly nitrogen-dominant fertilizer to build a strong, bushy plant. A water-soluble formulation with an N-P-K of around 20-10-20 or 15-15-15, applied every 10 to 14 days at half the recommended label rate, works well. Slow-release granular fertilizers (14-14-14 or similar) can be incorporated into the potting mix at planting for a steady baseline feed. The goal is lush green foliage and strong branching, not huge size. Pinch back (see pruning section) to keep the plant compact while feeding generously.
Finishing phase: supporting bract development (September to December)
Once blackout treatment begins, shift to a low-nitrogen, higher-phosphorus and potassium formulation. Something in the range of 10-30-20 or 9-45-15 encourages the plant to redirect energy from leaf production toward bract and flower development. Feed every two weeks at a dilute rate. Avoid high-nitrogen fertilizers during this phase, they push green vegetative growth at the expense of bract color. Stop fertilizing about two weeks before you expect the plant to be fully colored and on display, as salts in the root zone can cause bract edge burn if they accumulate.
| Phase | Timing (Philippines) | Recommended N-P-K Range | Frequency | Method |
|---|---|---|---|---|
| Vegetative growth | January to mid-August | 15-15-15 or 20-10-20 | Every 10–14 days | Water-soluble foliar/soil drench or slow-release granules |
| Pre-blackout transition | Late August to September 15 | Reduce N; move toward 12-20-20 | Every 14 days | Water-soluble drench |
| Finishing/bract development | September 17 to late November | 10-30-20 or 9-45-15 | Every 14 days at low dose | Water-soluble drench at base |
| Display/holiday period | December onward | None or very light balanced | Monthly if holding plant over | Light foliar if needed |
One practical note: if you are using cocopeat-dominant mixes, be aware that coir has a naturally low nutrient content, so do not rely on the growing medium to feed the plant at all. Start a fertilizer routine from the first week after potting or planting. Also, calcium and magnesium deficiencies can show up as interveinal chlorosis (yellowing between leaf veins while veins stay green) in fast-growing poinsettias on coir mixes. A monthly dose of a cal-mag supplement or a dilute epsom salt solution (2 g per liter of water) during the vegetative phase prevents this effectively.
Light control and the blackout treatment: doing it right every time
This is the most critical skill for growing poinsettias in the Philippines, and it is the step most beginners either skip or do imperfectly. Bract initiation requires 12 to 14 hours of complete, uninterrupted darkness each night. Even a few seconds of light exposure during the dark period, such as a flashlight passing over the plant, a security light flicking on, or a gap in the blackout cloth admitting streetlight glow, can reset the plant's internal clock and delay flowering. I learned this the hard way after wondering why one of my plants stayed green while four others colored up beautifully. I found a tiny gap in the cloth right where a streetlight beam entered.
- Starting September 17 to 20, cover all plants (or move them to a completely dark room or black-cloth enclosure) by 5:00 to 5:30 PM every day
- Uncover or move plants back into full light no later than 7: 30 to 8:00 AM the following morning
- Check the blackout cover in daylight from the inside: if you can see any light at all coming through, seal the gaps with tape or an extra layer of cloth
- Do not open the enclosure for any reason during the dark period, even briefly
- Maintain this schedule every single day for a minimum of 8 weeks (10 weeks is safer)
- After 8 to 10 weeks, stop the blackout treatment and keep plants in normal daylight: bracts will continue developing and intensifying in color over the following 2 to 4 weeks
Propagating from cuttings: building your own stock
Poinsettias propagate easily from stem cuttings taken in late January through April, after the holiday display has ended and the plant has been cut back. Take tip cuttings 8 to 12 cm long with two to three leaf nodes, using a clean, sharp knife or scissors. Let the cut end dry and the milky latex seal for about 30 to 60 minutes before sticking cuttings into a propagation medium. The latex will block uptake of rooting hormone if you apply hormone powder or gel immediately while the sap is still flowing, so waiting for it to dry first improves rooting rates.
Use a propagation mix of 50 percent cocopeat and 50 percent coarse perlite, kept moist but not soggy. Cover with a clear plastic bag or propagation dome to maintain humidity, and keep cuttings in bright indirect light (not direct sun) at temperatures of 22 to 28°C. Roots typically develop within 3 to 4 weeks in Philippine conditions. Once new leaves begin growing actively, the cutting is rooted and can be potted into the regular growing mix. If you are starting from commercially purchased plugs rather than cuttings you have taken yourself, the same principles apply: pot up gently, establish in indirect light for a week before moving to full sun, and begin feeding after two weeks. If you purchased plugs, see how to grow poinsettias from plugs for potting-up and establishing them successfully.
Pruning and pinching: getting a bushy, well-branched plant
Left unpruned, a poinsettia in the Philippines will grow tall and leggy with only a few large bracts at the tips of long bare stems. Pruning and pinching solve this and give you a fuller, more floriferous plant. There are two key moments in the annual cycle.
The first is the post-Christmas hard cutback, done in January or February once the bracts fade. Cut the entire plant back to 30 to 45 cm from the base, leaving three to five strong stems with at least two leaf nodes each. This sounds drastic but the plant pushes back vigorously in our warm climate. The second pruning moment is pinching: from March through mid-August, whenever a new shoot reaches about 15 to 20 cm long, pinch out the growing tip between your thumb and fingernail. This forces two to three new side shoots from the nodes below the pinch point. Do your last pinch no later than August 20 to 25, if you pinch too close to the blackout start date, the new growth will not have time to mature and set bracts before Christmas.
Pests, diseases, and how to handle them
In the Philippine climate, the most common problems I encounter with poinsettias are root rot (fungal, caused by overwatering), fungus gnats (whose larvae attack roots in overly moist media), whiteflies, and occasional mealybug infestations. Gray mold (Botrytis) can appear on bracts during the cool, humid December weather if plants are crowded and airflow is poor.
| Problem | Symptoms | Treatment |
|---|---|---|
| Root rot (Pythium/Phytophthora) | Wilting despite wet soil, brown mushy roots, yellowing lower leaves | Improve drainage immediately; drench with a fungicide (metalaxyl-based); repot in fresh dry mix |
| Whitefly | Tiny white insects on leaf undersides, sticky honeydew on leaves, sooty mold | Spray with insecticidal soap or neem oil solution in the early morning; repeat every 5–7 days for 3 applications |
| Mealybug | White cottony masses in leaf axils and stem joints | Remove manually with a cotton swab dipped in 70% isopropyl alcohol; follow with neem oil spray |
| Fungus gnats | Tiny flies hovering at soil surface; larvae damage roots in wet media | Let soil surface dry out between waterings; apply a soil drench of Bacillus thuringiensis israelensis (Bti) or diatomaceous earth surface layer |
| Gray mold (Botrytis) | Brown spots and fuzzy gray growth on bracts and leaves in cool humid weather | Improve airflow; remove affected plant parts; apply a copper-based or chlorothalonil fungicide as preventive |
| Poinsettia scab (Sphaceloma) | Raised, cork-like lesions on stems and leaf veins, especially in very humid conditions | Prune affected parts, improve air circulation, apply a copper fungicide spray |
Prevention is much easier than treatment here. A clean, well-aerated growing environment, properly draining soil, and good airflow around the plants will keep almost all of these problems at bay. Inspect plants weekly, especially around the leaf axils where pests hide, and deal with any infestation when it is small.
Temperature and the heat challenge for lowland growers
The ideal finishing temperature for poinsettias is a daytime range of 21 to 24°C with nights at 15 to 18°C. For a temperate comparison and strategies used in cooler climates, see our guide on how to grow poinsettias in Florida. Sustained temperatures above 27 to 30°C during the bract development period can slow color development, reduce bract size, and cause early bract drop. In Metro Manila, Cebu, and Davao, October and November nights regularly sit at 24 to 27°C or warmer, which is outside that ideal window. For a contrasting guide focused on cooler, temperate techniques and greenhouse finishing, see how to grow poinsettia in Australia which addresses lower night temperatures and different cultural practices suited to that climate.
There is no way to fully fix this without air conditioning, but you can minimize the impact. Position plants where they get maximum airflow at night. Use shade cloth (50 percent) over the growing area during the afternoon to reduce heat accumulation. Water early in the morning so the evaporation helps cool the root zone. For highland growers in Baguio, Benguet, or similar elevations above 800 meters, temperatures will naturally fall into or near the ideal range during November and December, which is a genuine advantage worth exploiting, your poinsettias will likely produce larger, more vivid bracts than any lowland plant grown under the same care regimen.
What to do with poinsettias after Christmas
Many Philippine gardeners discard their poinsettias in January, which is a shame because the plant is a perennial that will perform again next Christmas with proper care. Once the holiday display is over and bracts begin to fade (usually by late January to February), cut the plant back hard to 30 to 45 cm, reduce watering slightly for two to three weeks while the plant adjusts, and then begin a regular watering and fertilizing routine to push new growth. By March the plant will be flushing vigorously again. For step-by-step guidance on reviving and maintaining plants after the holidays, see how to grow poinsettia after Christmas. Follow the pruning and pinching schedule through the year, and by September 17 you will have a fuller, more established plant going into its second blackout treatment, typically with even better bract coverage than the first year.
After-Christmas care is also the best time to take cuttings if you want to propagate more plants or share them with fellow gardeners. The fresh new growth that emerges after the hard cutback makes ideal propagation material. If you want to explore keeping mature plants going year after year, or growing them in the ground as permanent landscape shrubs, the approach is essentially the same, just at a larger scale and with the same annual blackout ritual each September.
Troubleshooting: why your poinsettia did not color up
If you go through the whole blackout process and your poinsettia arrives at December without red (or pink or white) bracts, one of a handful of things went wrong. Light leaks are the most common cause by far. Even a single accidental light exposure during one night of the treatment window can delay the process by several days. Other common causes include starting the blackout treatment too late (after October 7), using a cultivar with a particularly long response time, heat stress above 30°C during the finishing period, and erratic watering or fertilizer salt stress during the dark period.
- Green bracts by mid-December: almost always a light leak or late blackout start — check the cloth and extend treatment by one to two weeks if still early enough
- Bracts showing color but dropping leaves: inconsistent watering, cold draft, or root damage — normalize care and protect from wind
- Small or pale bracts: heat stress during finishing, or a nitrogen-heavy fertilizer used during blackout period — review fertilizer regime and improve ventilation
- No bract development at all despite correct blackout: check cultivar response time; some cultivars need 10 to 12 weeks rather than 8; extend treatment next season
- Bracts developing unevenly across the plant: some branches may have been exposed to light while others were not — improve the blackout cover uniformity
FAQ
How can I time colorful poinsettia bracts for Christmas in the Philippines?
Poinsettias are short‑day plants and need a strict long‑night treatment to initiate bracts. For a Dec 25 peak, start blackout 8–10 weeks beforehand (about Oct 1 for 8 weeks, Sept 17 for 10 weeks). Provide 12–14 hours of uninterrupted darkness nightly under complete blackout cloth or a sealed dark room; any light leak can prevent initiation. During the finish period, maintain moderate daytime temperatures and avoid prolonged heat to prevent delays.
What blackout method works best at home (pots, in‑ground, greenhouse)?
Use light‑blocking (blackout) cloth or a sealed dark room. For individual pots, cover plants with opaque buckets or boxes each evening and remove each morning—ensure no light enters during the dark period. In greenhouses, install professional blackout curtains or tightly overlapped cloth with no gaps. For in‑ground plants, a small portable blackout shelter or moving potted plants under a blackout structure is easier and more reliable than trying to cover a garden bed.
What daily light/dark schedule should I follow for reliable initiation?
Provide 12–14 hours of continuous darkness each night (many growers use ~14 hours). Start the dark period early evening so plants receive sufficient dark hours overnight, and remove covers at natural dawn. Keep daylight natural or provide 10–12 hours of quality light during the day; avoid light exposure during the dark period.
Which cultivars or types perform better in tropical/heat conditions?
Heat‑tolerant, compact hybrids (e.g., interspecific series like Princettia® and modern breeder releases) perform better in warm climates. Select compact, branching selections and ask suppliers for varieties recommended for warm/landscape use. Cultivar response to daylength varies, so use the recommended blackout timing from the supplier when available.
What temperatures should I aim for during finishing and general growth in the Philippines?
Target daytime 21–24 °C and nighttime 15–18 °C during the finishing period if possible. Tropical ambient temperatures often exceed this; mitigate heat with shading, ventilation, evaporative cooling, or moving containers to cooler microclimates. Sustained temps above ~27–30 °C can delay bract development and reduce quality.
What soil or potting mix should I use in the Philippines?
Use a well‑draining, aerated soilless mix: roughly 60–70% peat or coconut coir (cocopeat) + 10–30% coarse porosity amendment (perlite, pumice, or washed sand) + 10–30% coarse bark or compost. Aim for root‑zone pH ~5.5–6.5 and EC <2 dS·m⁻¹. Coconut coir is a suitable peat substitute when blended with perlite/pumice and bark to match porosity and moisture retention.
Next Article
How to Grow Poinsettias in the Ground for Home Gardeners
How to grow poinsettias in the ground: step-by-step planting, care, bloom timing, winter protection, and pests.