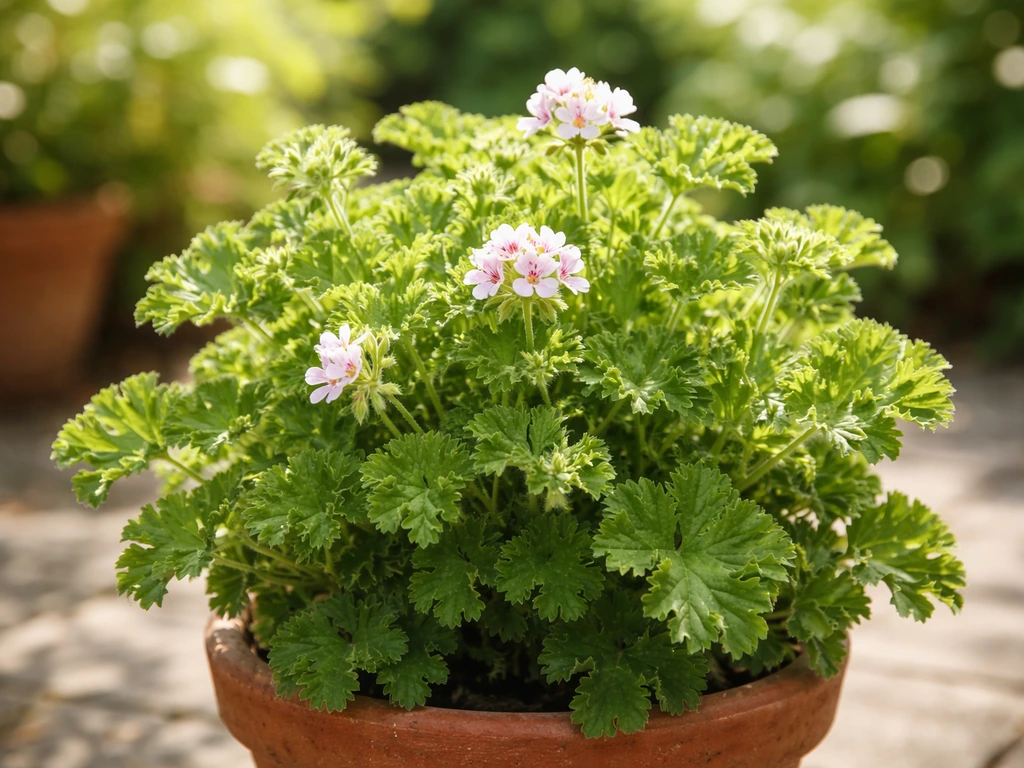
Scented pelargoniums are among the most rewarding fragrant plants you can grow at home. Scented pelargoniums, The Guardian (horticultural feature citing RHS/AGM cultivars) notes that Pelargonium capitatum 'Attar of Roses' is a historically important rose‑scented cultivar (used commercially for geranium oil) and is widely listed among notable rose‑scented pelargoniums (appears in RHS/AGM lists and horticultural references) Scented pelargoniums — The Guardian (horticultural feature citing RHS/AGM cultivars). Give them a well-draining pot, a sunny windowsill or a warm, sheltered border, and they will reward you with aromatic foliage you can brush past every single day. They are frost-sensitive tender perennials (reliably hardy outdoors only in USDA zones 9–11), but in cooler climates they thrive in containers that move indoors for winter, making them surprisingly versatile for most home gardeners. Whether you are starting from seed or rooting a cutting passed on by a friend, this guide walks you through every practical step from propagation to first fragrant bloom.
How to Grow Scented Pelargoniums: Seed to Fragrant Blooms

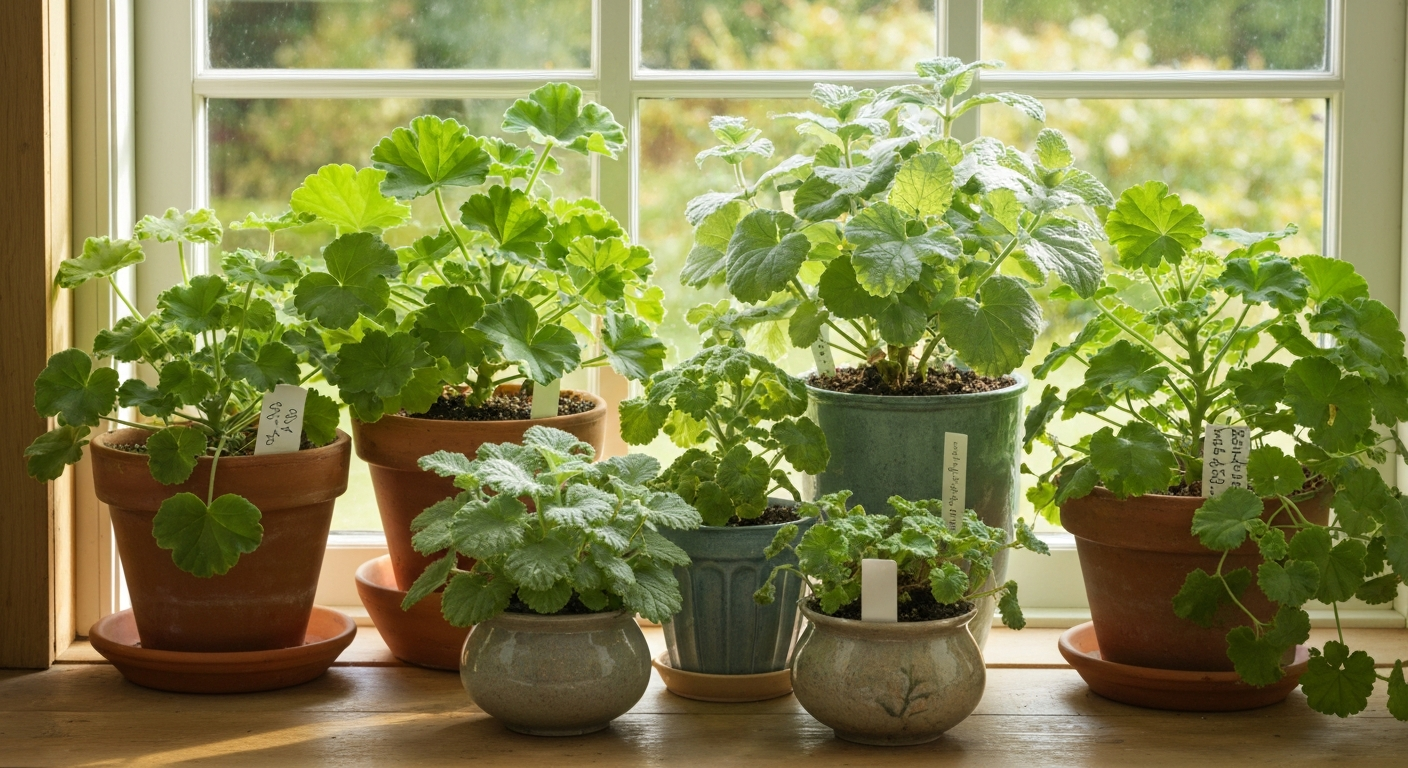
What are scented pelargoniums (and who this guide is for)
Scented pelargoniums belong to Pelargonium, a genus of roughly 250 species in the family Geraniaceae, originating mainly from South Africa. The plants you see sold as 'scented geraniums' in nurseries are usually species or hybrids within the subgenus Pelargonium, including Pelargonium graveolens, P. capitatum, P. tomentosum, P. crispum and P. odoratissimum, among many others. They are not true geraniums (which are hardy perennials), but the common name has stuck. The defining characteristic is aromatic foliage: glands in the leaves release volatile terpenoid compounds when the leaf is touched or brushed, producing everything from a sharp lemon hit to a deep, warm rose scent.
This guide is for home gardeners at any level: enthusiastic beginners who just bought their first scented pelargonium at a farmers market, and more experienced growers who want to raise a wider collection from seed or cuttings. I cover identification, variety choice, propagation, potting mixes, feeding, pruning, overwintering, pest management and how to actually use those fragrant leaves once you have them. For a dedicated, step-by-step primer on how to grow geranium plant, see the linked guide. Where scented pelargoniums share ground with climbing geraniums or the standard zonal geranium types, I will point out the differences so you know when separate care advice applies.
How to identify scented pelargoniums: leaves, flowers and scent families
Scented pelargoniums do not look like one thing. Foliage ranges from deeply lobed, velvety grey-green leaves on P. tomentosum (peppermint type) to small, crinkled, almost crispy leaves on P. crispum (lemon type). What they share is texture: most have hairy or glandular surfaces that trap and release volatile oils. Flowers are generally smaller and less showy than zonal or regal pelargoniums, often in pale pink, white, lavender or mauve, with five petals and the characteristic pelargonium symmetry (two upper petals slightly different in size or patterning from the three lower ones). If you are comparing them with the bold, rounded flower heads of zonal geraniums, scented types look delicate and understated by contrast.
The scent comes from glandular trichomes in the leaf tissue. Research using GC-MS analysis has confirmed that most garden-recognized scent families map to specific terpenoid compounds: citronellol and geraniol dominate rose-scented types like P. graveolens (often 20–35% beta-citronellol and 10–25% geraniol), menthone and isomenthone dominate the peppermint types like P. tomentosum, and high citronellol combined with isomenthone and nerol components produces the apple-fruity note in P. odoratissimum. Understanding the chemistry is useful only in that it explains why scent can vary between cuttings of the same named cultivar grown under different conditions.
The main scent families and their representative species
| Scent family | Key species / cultivars | Dominant aroma compounds | Notes |
|---|---|---|---|
| Rose | P. graveolens, P. capitatum 'Attar of Roses' | Beta-citronellol, geraniol, linalool | Most widely grown; P. capitatum 'Attar of Roses' is historically important for essential oil production |
| Lemon / Citrus | P. crispum, P. × citrosum types | Citronellal, limonene-related | Crisp, clean lemon; small crinkled leaves; good for indoor pots |
| Peppermint / Mint | P. tomentosum | Menthone, isomenthone | Large, velvety, silver-grey leaves; spreading habit; needs space |
| Apple / Fruity | P. odoratissimum | Citronellol, isomenthone, nerol | Low, trailing habit; small white flowers; delicate apple scent |
| Nutmeg / Spice / Balsam | P. × fragrans, P. 'Clorinda' | Eugenol-related, balsamic terpenoids | Warm, spicy notes; good for potpourri |
| Chocolate / Mint | P. 'Chocolate Peppermint' | Menthone + darker aromatic notes | Novelty cultivar; dark leaf markings; popular with children |
| Coconut | P. grossularioides | Distinct lactone/coconut-type volatiles | Trailing habit; less common but worth seeking out |
Choosing the right variety for your garden
The most useful thing I can tell you about variety selection is this: think about where the plant will live before you decide what scent you want. A gorgeous spreading peppermint type like P. tomentosum can reach 60–90 cm across and will outgrow a small windowsill pot in a single season. A compact lemon crispum cultivar, on the other hand, is perfectly suited to a 15 cm pot on a south-facing sill. Match the growth habit and hardiness to your actual situation.
Variety recommendations by situation
| Situation | Recommended varieties / species | Why it works |
|---|---|---|
| Containers on a sunny patio (zones 5–8, bring in for winter) | P. graveolens, P. crispum 'Prince of Orange', P. capitatum 'Attar of Roses' | Compact to medium habit; easy to pot up and move; strong fragrance reward |
| Indoor fragrance (windowsill or conservatory) | P. crispum (lemon), P. 'Chocolate Peppermint' | Compact size; scent released with minimal touch; tolerates lower winter light indoors |
| Warm sheltered border (zones 9–11, frost-free) | P. tomentosum, P. graveolens, P. odoratissimum | Can spread freely; large clumps develop over multiple years |
| Cottage garden / mixed borders (zones 9–11) | P. 'Attar of Roses', P. 'Lady Plymouth' (variegated rose scent) | Attractive foliage adds texture; flowers complement border plants |
| Culinary / herbal use | P. graveolens, P. crispum, P. odoratissimum (apple) | Food-safe leaf use is well established for these species; see harvesting section |
| Partial shade (dappled sun) | P. tomentosum, P. odoratissimum | Both tolerate lower light better than most pelargoniums; still need some brightness |
A note on climate: scented pelargoniums are tender perennials that will not survive frost outdoors. In USDA zones 9–11 (parts of California, the Gulf Coast, Hawaii, similar UK coastal spots) you can leave them in the ground year-round. Everywhere else, containers are the practical answer because you can overwinter them indoors. In the UK, they are treated similarly to frost-tender summer bedding with the option to keep plants going for many years indoors. I have grown P. graveolens in a 25 cm terracotta pot on a London south-facing sill for four years running, bringing it in before the first frost each autumn.
Where to buy plants, seeds and cuttings
Garden centres carry a limited range of scented pelargoniums, usually a few P. graveolens types and occasionally P. tomentosum. For variety, specialist nurseries are far better: look for nurseries that list their plants by species name rather than just marketing names like 'fragrant geranium.' The RHS Plant Finder database (UK) is useful for tracking down specific cultivars from verified suppliers. In the US, several mail-order herb and pelargonium specialists carry 50 or more named varieties as rooted cuttings or young plants, which is the fastest route to a good collection.
When buying at a nursery, look for stocky, compact growth rather than tall, leggy stems. Leggy plants usually indicate poor light during propagation and take longer to establish well after transplanting. Check the underside of leaves for whitefly, which is a common nursery pest on pelargoniums. Scratch a leaf gently and smell it: if the scent is faint or off, that particular plant may be mislabeled or under stress. Seeds of common species like P. graveolens and P. crispum are available from specialist seed companies; these give you many plants for lower cost but require more patience (see the seed section below).
Seed vs. cuttings: which propagation method suits you
Both methods work, but they suit different situations. Cuttings give you a genetically identical plant to the parent (important if you want a specific named cultivar's scent), they root relatively quickly, and the resulting plant flowers sooner. Seed is cheaper per plant, gives you large numbers, and is the only practical option if you do not have access to a parent plant. The trade-off is time: seed-grown plants of scented pelargoniums typically take 13–16 weeks from sowing to first flower under reasonable conditions, while a rooted cutting from a healthy parent can flower in as little as 8–12 weeks after taking.
| Factor | Seed | Cuttings |
|---|---|---|
| Cost | Low (seeds are inexpensive) | Low if you have a parent plant; slightly higher if buying rooted cuttings |
| Plants per effort | Many plants from one packet | One plant per cutting taken |
| Genetic fidelity | Variable; hybrids may not come true | Identical to parent plant |
| Time to first flower | ~13–16 weeks from sowing | ~8–12 weeks after rooting |
| Skill level | Beginner-friendly once you have warm conditions | Slightly more hands-on but still accessible for beginners |
| Best use case | Large numbers of a species; species not available as plants | Specific named cultivar; quicker results; preserving a favourite plant |
Growing scented pelargoniums from seed
When to sow
In the northern hemisphere, sow indoors from late January through to April. Earlier sowings (January to February) need supplemental lighting in most regions to avoid leggy seedlings. March is the sweet spot for most home growers: natural light is increasing, temperatures indoors are manageable, and seedlings have time to develop before being moved outside after the last frost. In warmer climates (zones 9–11) you can sow outdoors in early spring when soil temperatures are consistently above 18°C (65°F).
Step-by-step sowing instructions
- Fill a small seed tray or 9 cm pot with fresh, sterile seed compost. Press it down lightly to remove air pockets but do not compact it.
- Water the compost thoroughly before sowing, then let it drain for 30 minutes so it is evenly moist but not waterlogged.
- Sow seeds individually on the surface, spacing them about 2–3 cm apart. Pelargonium seeds do not need darkness to germinate, so cover them with just a very thin layer (2–3 mm) of vermiculite or fine compost rather than burying them deeply.
- Mist the surface gently so seeds are in contact with the growing medium.
- Cover the tray loosely with a propagator lid or clear polythene bag to maintain humidity. Leave a small gap for air circulation to prevent mould.
- Place in a warm spot: substrate temperature of 20–24°C (68–75°F) is ideal. A heated propagator mat is helpful; a warm kitchen windowsill can work if temperatures stay consistent.
- Check daily. Bedding-type pelargonium seeds often germinate in 4–10 days at around 21–23°C; scented species may take closer to 2–3 weeks at 20°C, so do not give up if nothing has appeared by day 10.
- As soon as the majority of seedlings have emerged, remove the cover and move them to bright light to prevent stretching. A south-facing windowsill or grow light set 10–15 cm above the seedlings works well.
- When seedlings have two true leaves and are large enough to handle by their seed leaves (cotyledons, not the stem), prick them out individually into 7–9 cm pots of a well-draining seedling mix.
- Grow on at 16–18°C, feeding with a quarter-strength balanced liquid fertilizer once a week after the third week.
Realistic timeline from seed to flower
Expect germination in 1–3 weeks depending on species and temperature consistency. From germination to a plant large enough to pot on takes another 3–4 weeks. From that point to first flower is typically 10–12 more weeks under good light and warmth. In total, budget 13–16 weeks from sowing to first bloom under home conditions, and up to 18–20 weeks if winter light is poor or temperatures are inconsistent. This is not a plant you sow on a Monday and flower by the weekend, but seeing a fragrant seedling you grew from scratch is genuinely satisfying.
Propagating scented pelargoniums from cuttings
Taking cuttings is the method most experienced pelargonium growers prefer for named varieties. It is faster, preserves the exact scent of the parent, and is a good way to create backup plants before overwintering. Spring and late summer are the best times: the parent plant is actively growing, cuttings root quickly in the warmth, and the resulting young plant can establish well before autumn.
Step-by-step cutting propagation
- Choose a healthy, non-flowering shoot tip on the parent plant. Aim for a cutting 7–12 cm (about 3–5 inches) long, with at least two to three leaf nodes.
- Cut cleanly just below a node using a clean, sharp knife or blade. Avoid scissors, which can crush the stem. Wipe your blade with rubbing alcohol between plants to prevent spreading disease.
- Remove all but the top two or three leaves. Also remove any flower buds or open flowers: you want the cutting's energy going into roots, not blooms.
- Allow the cut end to sit in open air for 1–3 hours so the cut surface forms a dry callus. This simple step significantly reduces the risk of rot at the base.
- Optionally, dip the base 1–2 cm of the cutting into a rooting hormone product. IBA (indole-3-butyric acid) improves adventitious rooting in Pelargonium: a talc-based rooting powder or a quick dip in a liquid product at 500–1000 ppm IBA are both effective. Tap off any excess powder before inserting.
- Insert the cutting about 2–3 cm deep into a sterile, free-draining rooting medium. A 50:50 mix of perlite and peat (or peat-free coir) is reliable. Pre-moisten the medium before inserting cuttings.
- Place the pot in bright, indirect light. Avoid direct strong sun, which wilts unrooted cuttings quickly. A temperature of 18–24°C (65–75°F) is ideal.
- Maintain moderate humidity: loosely enclose the pot in a clear plastic bag or use a small propagator lid. Leave a small gap for air exchange. Mist lightly if leaves look wilted, but do not saturate the medium.
- Begin reducing humidity gradually after 10–14 days as the callus develops and early root formation begins. Excess moisture at this stage is a primary cause of basal rot (caused by Botrytis, Pythium and related pathogens).
- Roots typically become visible at the drainage holes or when you gently tug the cutting and feel resistance, usually 10–28 days after insertion. Once rooted (two to four weeks under good conditions), pot the cutting on into a standard pelargonium potting mix.
A note on disease during propagation: Oregon State University's PNW Plant Disease Handbook identifies Botrytis, Pythium, Fusarium and Rhizoctonia as the main culprits in cutting rot. The practical preventions are straightforward: start with healthy parent material, use only sterile media (never garden soil), keep air moving and reduce moisture as roots form. For practical, evidence‑based home propagation protocols (cutting length, rooting media, IBA use, temperatures and timelines), see UC ANR / extension propagation resources (general home propagation practices). I lost several batches of P. tomentosum cuttings to basal rot before I started letting the cut end callus for a few hours before inserting. That one change made a noticeable difference.
Potting mixes and soil recipes
Drainage is the single most important thing to get right with scented pelargoniums. They originate from areas with dry, well-drained soils and are highly susceptible to root rot in waterlogged conditions. A heavy, moisture-retentive compost is probably the most common reason home-grown pelargoniums fail. The goal is a mix that holds just enough moisture to sustain the plant between waterings while draining freely after each one.
Container potting mix
For most container-grown scented pelargoniums I use this basic recipe, which you can mix at home:
- 3 parts good-quality peat-based or peat-free multipurpose compost
- 2 parts perlite (improves drainage and aeration)
- 1 part coarse horticultural grit or fine gravel (adds weight and further drainage)
- A small amount of slow-release granular fertilizer at the rate recommended on the packet (typically around 3–5 g per litre of mix for a standard product)
This gives a light, free-draining mix that still holds enough moisture and nutrients for active growth. For very large containers or where weight is not a concern, you can substitute one part of the perlite with coarse sand. Always use containers with drainage holes: never pot pelargoniums into decorative pots without drainage, or at least use them as outer sleeves with a drainage pot inside.
Ground bed preparation
If you are planting scented pelargoniums in a border (in frost-free climates or as a summer annual), work the bed to improve drainage before planting. On heavy clay, incorporate plenty of coarse grit or fine gravel: roughly a 5–8 cm layer dug in to a spade's depth helps significantly. On sandy soils, drainage is usually fine but moisture retention may need a light hand with garden compost to support summer growth. Raise beds if your soil stays waterlogged after rain.
Soil pH targets
Scented pelargoniums prefer a slightly acid to neutral soil pH: the target range is 6.0–7.0, with 6.5 being close to ideal. Most standard multipurpose composts fall within this range. If you are planting in garden soil, a simple pH test kit (widely available and cheap) is worth using. Highly acidic soils (below pH 5.5) should be amended with garden lime; highly alkaline soils (above pH 7.5) can be adjusted with sulphur chips or acidifying fertilizers, though pelargoniums are somewhat tolerant of mildly alkaline conditions if drainage is good.
Amendments worth adding
- Perlite: the most useful single amendment for improving drainage in any pelargonium mix; add up to 30–40% by volume in containers
- Coarse horticultural grit: useful in ground beds and heavy containers; improves long-term drainage structure
- Slow-release fertilizer granules: a balanced 14-14-14 or similar NPK granule mixed into the potting mix at planting saves you from needing to feed heavily in the first 6–8 weeks
- Lime or ground chalk: use only if pH testing shows soil below 5.5; add at manufacturer's recommended rate
- Garden compost: useful in ground beds to improve moisture retention on sandy soils; use sparingly in containers as it tends to compact over time
Light, temperature and position
Scented pelargoniums are sun-lovers. Outdoors, they perform best in full sun (at least 6 hours of direct sunlight daily) or at minimum a bright, partially shaded spot. In lower light, plants become leggy and produce less fragrant foliage because the glandular trichomes responsible for scent develop better under high light intensity. Indoors, a south-facing windowsill is ideal in the northern hemisphere; east or west-facing works in summer but will limit growth through winter.
Temperature-wise, most scented pelargoniums grow best between 16–25°C (60–77°F). They can tolerate brief dips to around 4°C (40°F) but will not recover from a hard frost. Indoors over winter, a cool, bright room at 8–12°C (46–54°F) keeps them alive in semi-dormancy with minimal water. Avoid placing pots in heated rooms directly beside radiators: the dry heat stresses the plants and encourages spider mites.
Watering, feeding and fertilizing
Water scented pelargoniums thoroughly, then let the top 2–3 cm of compost dry out before watering again. The 'soak and dry' approach works much better than frequent small amounts of water, which encourages shallow roots and can keep the lower root zone permanently damp. In summer, containers may need watering every 2–3 days in warm, sunny conditions; in winter, indoor overwintered plants may only need watering once every 10–14 days or even less.
For feeding, I use a balanced liquid fertilizer (roughly equal NPK) at half the recommended rate once a week during the main growing season (spring through early autumn). Once plants are flowering well, I switch to a fertilizer with a higher potassium (K) content, such as a tomato feed, every 7–10 days to support continued flowering. Avoid high-nitrogen feeds as the main diet for mature plants: they push leafy, sappy growth at the expense of flowers and can reduce the concentration of aromatic oils in the foliage. In winter, stop feeding entirely for plants in semi-dormancy.
Pruning, deadheading and shaping for maximum fragrance and flowers
Scented pelargoniums have a natural tendency to become leggy and woody at the base if left unpruned. Regular pinching and pruning keeps them bushy, maximizes the number of growing tips (which produce both flowers and the most aromatic young leaves), and extends the life of the plant considerably.
- Pinch out growing tips on young plants as soon as they have four to six leaves: this forces branching and creates a bushy shape from the start rather than a single tall stem
- Deadhead spent flowers promptly by removing the entire flower stem back to the nearest set of leaves; this redirects energy into new growth and prolongs the flowering period
- In early spring, cut back overwintered plants by one-third to one-half their height to remove woody, unproductive stem sections and encourage fresh, fragrant new growth
- After the main summer flowering flush, a light trim of straggly stems keeps the plant compact and often triggers a second flush of flowers in late summer or early autumn
- Remove any yellowing, damaged or diseased leaves as soon as you notice them to improve airflow and reduce the risk of fungal problems
Seasonal planting and care calendar
| Season | Key tasks | Zone notes |
|---|---|---|
| Late winter (Jan–Feb) | Sow seeds indoors under grow lights; check overwintered plants for rot; water sparingly | All zones: keep indoor plants above 8°C minimum |
| Early spring (Mar–Apr) | Main seed-sowing window; take first cuttings from overwintered parents; repot root-bound plants; begin light feeding | Zones 9–11: begin outdoor planting after last cold snap; zones 5–8: keep indoors |
| Late spring (May–Jun) | Harden off indoor-grown plants before moving outdoors; transplant seedlings; increase watering and feeding; pinch out tips on young plants | Zones 5–8: move containers outside after last frost date; zones 9–11: plants in full outdoor growth |
| Summer (Jul–Aug) | Water consistently; feed with high-K fertilizer; deadhead regularly; take late-summer cuttings for overwintering stock | All outdoor zones: watch for whitefly, aphids and spider mites in hot, dry spells |
| Early autumn (Sep–Oct) | Prepare overwintering plants; take final cuttings; reduce feeding; bring containers indoors before first frost | Zones 5–8: bring in before first frost; zones 9–11: plants can stay outdoors |
| Late autumn / winter (Nov–Dec) | Water overwintered plants very sparingly; keep in cool, bright room; remove dead leaves; do not feed | All zones outside 9–11: indoor cool rest period; watch for botrytis in damp, cold conditions |
Overwintering and indoor care in cooler climates
Overwintering scented pelargoniums is straightforward if you follow a few key principles. The goal is not to keep the plant in active growth through winter but to keep it alive, healthy and ready to burst into growth again in spring. Move containers indoors before the first frost (check your local last-frost date). Reduce watering to a minimum: the compost should be barely moist. If the plant drops a lot of leaves initially, do not panic; this is a normal response to lower light and temperature.
A cool, bright room at 8–12°C (46–54°F) is ideal. An unheated spare room with a south-facing window, a frost-free greenhouse, or a well-lit porch all work. Avoid rooms that are too warm (above 16°C in winter encourages weak, etiolated growth and more pest pressure) or too dark. Check plants every week or two: remove any dead or yellowing leaves promptly and watch for botrytis, which thrives in cold, damp, stagnant conditions. Good airflow is your best defence. In March or as natural light improves, increase watering gradually and give the plant a light trim to encourage fresh new growth before moving it back outside.
Troubleshooting common problems
Leggy, weak growth
Leggy growth with long internodes (wide gaps between leaf sets) is almost always a light problem. Move the plant to a brighter position and pinch out the growing tips to force branching. If the problem occurs in winter indoors, either accept reduced growth until spring or add a grow light. Over-feeding with high-nitrogen fertilizer can also push sappy, leggy growth even in good light, so check your feeding routine.
Yellowing leaves
A few yellowing leaves at the base of a healthy plant is normal and not cause for alarm. Widespread yellowing, especially accompanied by soft or mushy lower stems, points to overwatering and possible root rot: check the drainage, reduce watering immediately, and consider reporting into fresh, dry mix. Yellowing that starts at leaf edges while the veins remain green can indicate a nutrient deficiency (often iron or magnesium in acidic or very free-draining mixes), which a balanced liquid feed usually resolves. Yellow mottling across the leaf can sometimes indicate a viral issue, in which case it is best to remove and dispose of the affected plant to protect others.
Root rot
Root rot is the most serious common problem and is caused by overwatering combined with poor drainage. The classic signs are sudden wilting despite moist soil, brown or black soft roots when you unpot the plant, and a sour or musty smell from the compost. Prevention is far easier than cure: use a free-draining mix, pots with good drainage holes, and a soak-and-dry watering approach. If you catch it early, remove the plant from its pot, cut away all rotten root material with clean scissors, dust the cuts with powdered sulphur or cinnamon as a natural antifungal, let the root ball dry for a few hours, then repot in fresh dry mix. Recovery is possible but not guaranteed.
Pests: aphids, whiteflies and spider mites
Aphids cluster on soft new growth and flower buds. In small numbers, simply squash them or blast them off with water. For heavier infestations, insecticidal soap spray (diluted according to the product instructions) applied to the undersides of leaves is effective and low-impact. Whiteflies are persistent on pelargoniums, especially indoors. Yellow sticky traps catch adults; insecticidal soap or a neem oil solution disrupts the life cycle if applied consistently every 5–7 days for two to three weeks. Spider mites thrive in hot, dry conditions indoors in winter: irregular pale speckling on leaves and fine webbing under leaves are the diagnostic signs. Increase humidity (a pebble tray with water helps), improve airflow and use a neem oil or insecticidal soap spray at 5–7 day intervals.
Fungal problems (botrytis, powdery mildew)
Botrytis (grey mould) appears as fuzzy grey patches on leaves, stems or flowers, typically in cool, damp, poorly ventilated conditions. Remove affected material immediately, improve airflow, reduce humidity and water only at the base of the plant rather than over the foliage. Powdery mildew (white powdery coating on leaves) is more common in dry conditions with poor airflow: improve ventilation and avoid wetting leaves when temperatures drop in the evening. Both are largely preventable with good cultural practice rather than requiring chemical treatment.
Quick troubleshooting reference
| Symptom | Most likely cause | First action |
|---|---|---|
| Leggy, stretched stems | Insufficient light | Move to brighter position; pinch tips |
| Widespread yellowing leaves | Overwatering or root rot | Check drainage; reduce watering; unpot and inspect roots |
| Brown, mushy stems at base | Root rot (Pythium, Fusarium) | Remove rotten tissue; repot in fresh dry mix |
| White powdery coating on leaves | Powdery mildew | Improve airflow; avoid overhead watering late in day |
| Grey fuzzy growth on leaves or stems | Botrytis (grey mould) | Remove affected parts; improve ventilation; reduce moisture |
| Pale stippling on leaves, fine webbing underneath | Spider mites | Neem oil or insecticidal soap; increase humidity |
| Tiny white insects flying up when disturbed | Whitefly | Yellow sticky traps; insecticidal soap spray on leaf undersides |
| Clusters of soft insects on new growth | Aphids | Blast with water; insecticidal soap for heavy infestations |
| Faint or absent scent from foliage | Low light or under-stress plant | Increase light; check for nutrient deficiency; ensure healthy roots |
Harvesting and using scented leaves
One of the great pleasures of growing scented pelargoniums is that the harvest starts the moment the plant is big enough to spare a few leaves. You do not have to wait for flowers. Pick individual leaves in the morning when the essential oil content is at its peak, using clean scissors or by pinching cleanly at the leaf stem. Regular light harvesting actually benefits the plant by encouraging bushy growth.
Common uses for scented pelargonium leaves
- Potpourri and sachets: dried leaves of rose-scented types (P. graveolens, P. capitatum) hold their scent well; dry in a single layer in a warm, airy spot out of direct sun
- Culinary use: leaves of P. graveolens, P. crispum and P. odoratissimum are used to flavour cakes, custards and syrups (a classic technique is to line a cake tin with leaves before pouring in the batter); always use identified species from reliable sources and avoid decorative hybrids of unknown parentage for eating
- Herbal tea: fresh or dried leaves of P. graveolens and P. crispum can be used to make a light, aromatic infusion; use a small amount (3–4 leaves per cup) as a flavouring
- Linen and drawer sachets: dried leaves in small cloth bags impart a pleasant scent to stored linens; replace every few months as the scent fades
- Fragrant water / room spray: steep fresh leaves in just-boiled water for 10 minutes, strain and cool; use as a light linen or room spray within a day or two
On safe handling: most people can handle scented pelargonium leaves without issue, but the essential oils can occasionally cause contact dermatitis in sensitive individuals, particularly in high concentrations. If you have sensitive skin, wear gloves when doing heavy pruning or processing large quantities of leaves. For culinary use, established food-safe species like P. graveolens and P. crispum have a long history of kitchen use; however, if you are unsure of a cultivar's identity, it is sensible to keep it decorative rather than edible.
A practical checklist for growing scented pelargoniums
- Choose your variety based on habit and scent first, then aesthetics: match container or border space before choosing a cultivar
- Use a free-draining potting mix with at least 20–30% perlite in containers; never plant in heavy, water-retentive compost alone
- Ensure pots have adequate drainage holes: check them before planting
- Target soil pH 6.0–7.0; test if you are planting in garden beds
- Water using the soak-and-dry method: thoroughly, then wait until the top 2–3 cm of compost is dry before watering again
- Feed with a balanced liquid fertilizer weekly through the growing season; switch to high-potassium feed once in flower
- Provide full sun outdoors (6+ hours daily) or a south-facing windowsill indoors
- Pinch out growing tips on young plants to encourage bushy, fragrant growth
- Deadhead spent flowers promptly to extend the flowering season
- In zones cooler than 9, move containers indoors before the first frost; overwinter in a cool, bright room at 8–12°C
- Check regularly for whitefly, aphids, spider mites and botrytis, especially on indoor overwintered plants
- Take cuttings in spring or late summer to propagate named varieties and create backup plants
Related plants worth growing alongside scented pelargoniums
If you enjoy scented pelargoniums, you will likely want to explore other members of the broader pelargonium and geranium world. If you also enjoy sun‑loving perennials with bold flower heads, see how to grow geums for a complementary plant choice. If you also like bright, daisy-like bedding plants, see a short guide on how to grow gerbera plants for complementary ideas and care tips. Climbing geraniums (also known as ivy-leaved pelargoniums) share the same care fundamentals and make excellent companions in large containers or over walls in frost-free gardens. For detailed instructions on their care and training, see how to grow climbing geraniums. Standard zonal geraniums are worth understanding too, since their robust growing style makes them a useful reference point for the more specialist scented types. Beyond pelargoniums, gardeners who grow for fragrance and cut flowers often find that gerberas and gypsophila complement a collection well, both in the garden and in arrangements.
FAQ
What are scented pelargoniums and how do I identify common scent types?
Scented pelargoniums are Pelargonium species and hybrids grown for aromatic leaves rather than showy flowers. Common scent categories and their typical species/cultivars: rose (Pelargonium graveolens, P. capitatum; e.g., 'Attar of Roses'), lemon/citrus (P. crispum, P. citrosum-type), peppermint/mint (P. tomentosum), apple (P. odoratissimum), nutmeg/balsam (some Pelargonium × fragrans and old‑fashioned cultivars), coconut and chocolate scented cultivars (hybrids). Scent chemistry (terpenoids like citronellol, geraniol, menthone, linalool) explains why varieties smell different.
Which scented pelargonium varieties should I choose for my garden conditions?
Select by scent preference, hardiness and site: - Hot, full‑sun beds (USDA zones 9–11): P. graveolens and P. capitatum (rose types), P. × fragrans. - Cooler, bright containers and patios: many hybrids and smaller‑leaf types (easier to move indoors). - Shady or partly shady sites: lemon/citrus and apple types tolerate light shade better than intense sun. - Indoor/overwintering candidates: compact cultivars and those with strong leaf fragrance (they reward being brought inside). Choose disease‑resistant, compact cultivars if space or humidity is an issue.
Should I grow scented pelargoniums from seed or cuttings—which is easier and how long until first bloom?
Cuttings are faster, truer to type and easier for beginners—expect roots in 1–4 weeks and flowering within 2–4 months depending on maturity. Seed allows breeding/variation but may not reproduce cultivar scent exactly; seed germination occurs 4 days–3 weeks (typical warm temps 20–24°C), and seed‑to‑flower commonly takes ~12–16 weeks under good light/temperature. For reliable fragrance and predictable plants, use cuttings.
Step‑by‑step: how do I root pelargonium cuttings at home (materials, timing, timeline)?
Materials: healthy non‑flowering shoots, clean pruners, sterile soilless mix (50:50 peat or coir:perlite or perlite:vermiculite), optional IBA rooting powder (500–1000 ppm quick‑dip), small pots/trays, bottom heat or warm bright area (18–24°C). Steps: 1) Take 7–12 cm (3–5 in) terminal cuttings in spring–summer. 2) Remove lower leaves, leave 1–2 leaf nodes. 3) Let cut end dry/callus a few hours. 4) Optional: dip basal 5–10 mm in IBA powder or liquid. 5) Insert into moist sterile medium ~1–2 cm deep, firm gently. 6) Place in bright, indirect light with humidity (clear cover or misting) and avoid cold/damp. Timeline: roots often visible 10–28 days; then pot on to grow‑on mix and expect flowering in 8–12 more weeks depending on conditions.
How do I sow scented pelargonium seed (substrate, temps, depth, germination time)?
Substrate: sterile, well‑draining seed mix (50% fine peat or coco coir + 50% perlite or vermiculite). Sow shallow—surface or barely covered (light aids germination). Temperature: maintain 20–24°C (68–75°F); consistent warmth accelerates germination. Moisture: keep evenly moist but not waterlogged (cover with clear lid/film to retain humidity). Germination: many commercial types 4–10 days; some perennial/scented types up to 3 weeks. Thin or prick out seedlings when they have true leaves and are sturdy.
What potting mix recipes, pH and drainage do scented pelargoniums need?
Balanced recipes: - Standard container mix: 2 parts peat or coir + 1 part perlite + 1 part coarse compost or well‑aged bark. - Fast‑draining mix: 1 part peat/coir + 1 part perlite + 1 part pumice/grit. Soil pH: slightly acidic to neutral ~6.0–7.0. Drainage: excellent—use pots with drainage holes and avoid heavy garden soil in containers. Amend heavy beds with coarse sand, grit or compost to improve drainage.
How to Grow Scented Geraniums: Care, Propagation, and Troubleshooting
Step-by-step guide to grow fragrant geraniums from seed or cuttings with care tips, pruning, feeding, and fixes for comm