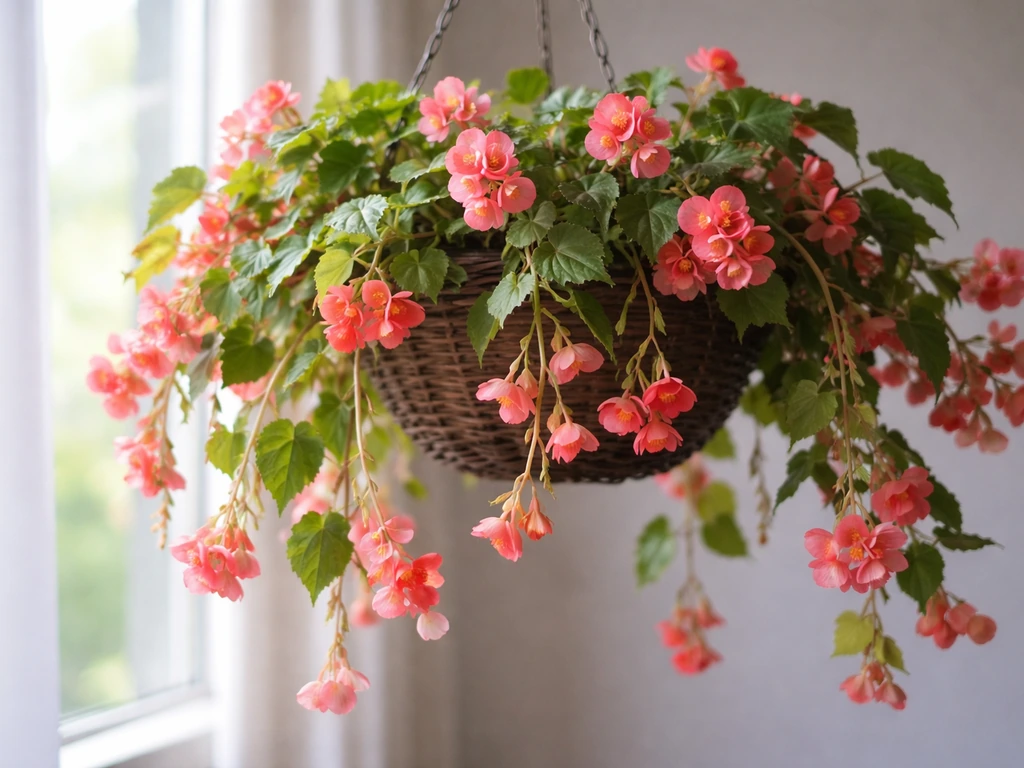
Cane begonias are some of the most rewarding flowering plants you can grow, whether you're working with a sunny windowsill, a shaded patio container, or an outdoor bed. Give them bright filtered light, a fast-draining potting mix, consistent moisture without waterlogging, and temperatures that stay above 50°F (10°C), and they'll reward you with arching canes, spotted or glossy leaves, and pendulous flower clusters from spring right through autumn. I've grown them in everything from 4-inch starter pots to large outdoor containers, and the learning curve is genuinely gentle once you understand their basic preferences.
How to Grow Cane Begonias: Complete Home Gardener Guide Tips

Harriet Whitmore
26 Jul 2026
What cane begonias actually are (and who this guide is for)
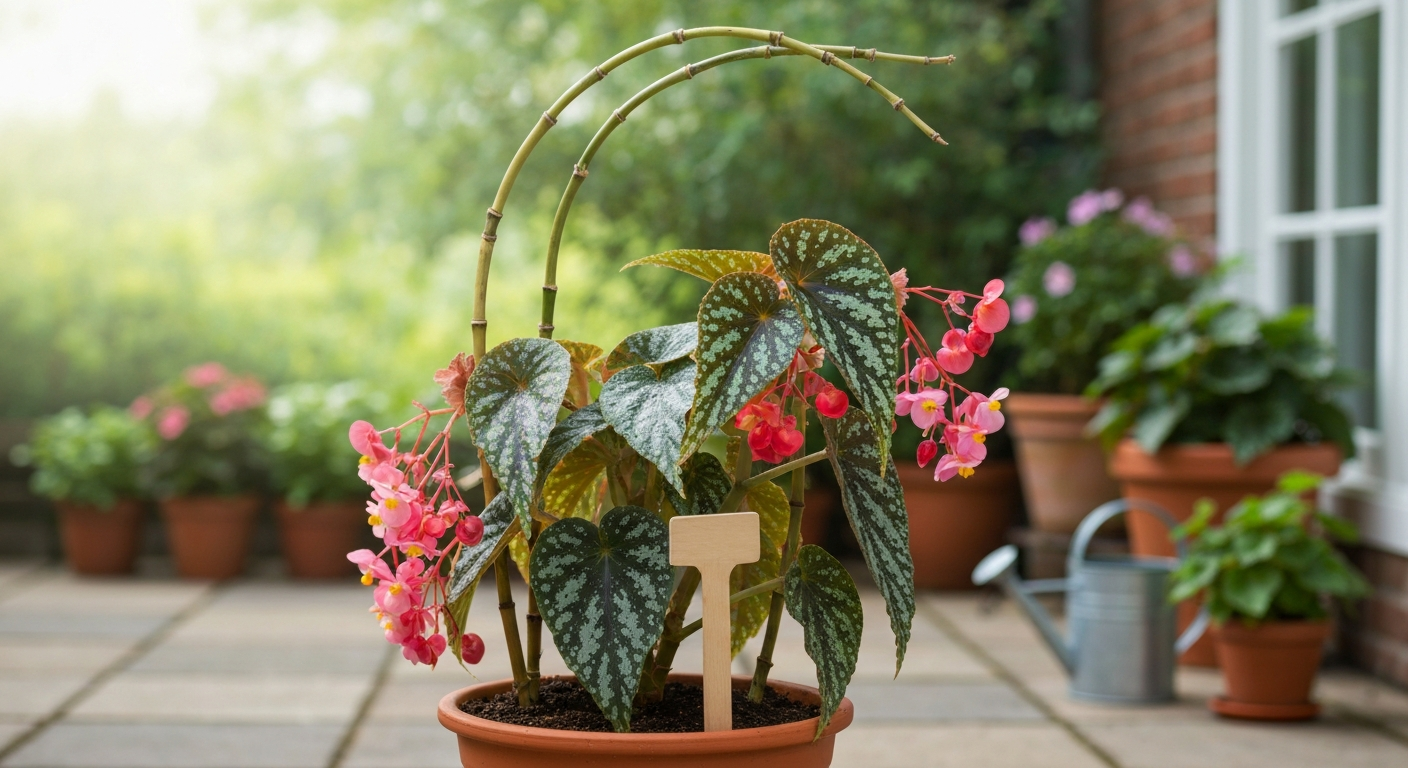
The American Begonia Society classifies around 81 species as cane-like, with nearly 2,000 cultivars in the group. The most familiar are the 'angel wing' types, named for their asymmetrical, wing-shaped leaves that are often spotted silver or bronze. Their stems grow in bamboo-like segments, which is where the 'cane' name comes from. They're different from bedding (wax) begonias, which are low, mounding and typically used for summer colour in beds; trailing and cascading types, which spill over container edges; Rieger begonias (Begonia elatior hybrids), which are bred for intense winter flowering indoors; and tuberous begonias, which grow from a fleshy corm. This guide covers cane types in depth and connects them to these related groups wherever the growing decisions overlap, so if you're trying to decide which begonia fits your situation, you'll find that here too.
Whether you're a first-time begonia grower who just picked up a pot at the garden centre, or an experienced gardener looking to propagate your own cuttings and overwinter stock plants, this guide is written for you. I'll give you specific measurements, mix recipes, and seasonal timing cues rather than vague 'water when dry' advice.
Varieties worth growing: a quick decision guide
Picking the right begonia type before you buy saves a lot of frustration. The table below maps the main groups to their best uses, so you can match a variety to your specific situation quickly.
| Begonia Type | Typical Height | Best Use | Light Preference | Notes |
|---|---|---|---|---|
| Cane / Angel Wing (e.g., 'Lucerna', 'Sophie Cecile', 'Dragon Wing') | 60–180 cm (2–6 ft) | Large containers, patio focal point, indoor specimen | Bright filtered light or morning sun | Long-lived; can be pruned to shape; nearly 2,000 cultivars available |
| Bedding / Wax (Begonia semperflorens) | 15–35 cm (6–14 in) | Outdoor beds, borders, low containers | Full sun to part shade | Easiest for beginners; treat as annual in frost-prone areas |
| Trailing / Cascading (e.g., Begonia boliviensis types) | 30–45 cm trailing | Hanging baskets, window boxes, tall containers | Bright indirect to morning sun | Needs good air circulation; drought-sensitive once flowering |
| Rieger / Elatior (Begonia elatior hybrids) | 25–40 cm (10–16 in) | Indoor pots, winter flowering | Bright indirect, no direct summer sun | Bred for short-day flowering; challenging to rebloom at home |
| Tuberous (upright and pendulous) | 30–60 cm (12–24 in) | Containers, hanging baskets, cool climates | Part shade, morning sun only | Tubers must be lifted in frost zones; suit cooler summers |
My personal go-to for beginners is 'Dragon Wing Red' or 'Dragon Wing Pink', both cane types that are more heat and sun tolerant than traditional angel wings, flower prolifically from late spring to frost, and adapt well to outdoor containers. If you want to grow begonias outdoors in beds, the bedding/wax types are the most reliable. For step-by-step guidance on how to grow begonias outdoors, see our how to grow begonias outdoors guide. For hanging baskets, the trailing Begonia boliviensis hybrids or pendulous tuberous types are hard to beat. Rieger begonias are a specialist indoor crop that I'd recommend saving until you've built some experience with the easier groups.
Outdoor beds, containers or hanging baskets: which is right for you
The setting you choose shapes almost every other decision, from soil mix to watering frequency. Here's how I think about each option.
Outdoor beds
Beds suit bedding begonias and low-growing cane types best. The main advantage is that ground soil buffers moisture and temperature better than a pot, so plants dry out more slowly on hot days. The downsides: drainage is harder to control, soil compaction is a risk, and in colder climates you're essentially committing to treating them as annuals. If you want to reuse a cane begonia stock plant the following year, a container gives you the option to bring it indoors.
Containers
Containers are the most flexible option for cane begonias. You control the soil mix completely, you can move plants to adjust light levels through the season, and you can bring them inside before the first frost. The trade-off is that pots dry out faster, especially in summer heat, so you'll water more often. Choosing the right pot size matters more than many gardeners realise: too large a pot holds excess moisture around the roots, which leads to rot.
Hanging baskets
Hanging baskets work brilliantly for trailing and cascading begonias, and some pendulous cane types handle them well too. For step-by-step tips on creating lush trailing displays, see our guide on how to grow cascading begonias. They dry out quickly, especially in open-weave moss-lined baskets, so daily watering is often needed in summer. They're also more exposed to wind, which cane begonias dislike because their stems are brittle and snap easily. A sheltered spot under an eave or pergola is ideal. For detailed, step-by-step instructions on how to grow begonias in hanging baskets, see our focused guide on how to grow begonias in hanging baskets.
- Choose beds if you want low-maintenance summer colour and are happy replacing plants each year
- Choose containers if you have cane or trailing types you want to overwinter or move around
- Choose hanging baskets for trailing/cascading types in a sheltered spot where you can water daily
- Avoid hanging baskets for large cane types: the top-heavy growth and brittle stems are a poor match
Light, temperature and where to actually put them
Getting light right is probably the single most important thing you can do for cane begonias. Too little and the stems get leggy and flowering drops off. Too much direct sun and the leaves scorch, developing bleached or brown patches within a few days.
Both Clemson Extension and NC State consistently recommend bright filtered light or morning sun with afternoon shade for most cane and flowering begonias. Research using supplemental LED lighting on wax begonias has tested canopy light levels (PPFD) from roughly 40 to 180 µmol/m²/s, with daily light integrals (DLI) spanning about 5 to 19 mol/m²/day. In practical terms for home gardeners: aim for a DLI of around 10 to 14 mol/m²/day for healthy flowering, which corresponds to a bright east-facing window indoors or dappled outdoor light under a tree canopy. If you're growing under grow lights, a PPFD of 80 to 120 µmol/m²/s for 12 to 14 hours delivers roughly that DLI.
Temperature is equally important. Cane begonias prefer 60 to 75°F (15 to 24°C) and will slow down below 55°F (13°C). They're frost-tender: even a light frost at 32°F (0°C) will damage or kill most cane types. The only begonia with meaningful cold hardiness is Begonia grandis (the hardy begonia), which the Missouri Botanical Garden documents as hardy to USDA zones 6 to 7, with some selections extending to zone 9. All other cane types should be treated as tender perennials and either grown as annuals or overwintered frost-free.
For regional timing, use your local NOAA/National Weather Service last-frost and first-frost dates as your anchors. In most of USDA zones 9 to 11, cane begonias can stay outdoors year-round. In zones 6 to 8, move them inside or take cuttings before your average first frost date in autumn, and don't put them back out until 2 weeks after your average last frost date in spring.
| USDA Zone | Outdoor Season | Overwintering Action |
|---|---|---|
| Zones 10–11 | Year-round outdoors | No action needed; manage for heat and dry conditions |
| Zone 9 | March to November (approx.) | Light frost risk; bring in if frost forecast |
| Zones 7–8 | Late April/May to October | Bring indoors before first frost; overwinter at 55–60°F |
| Zones 5–6 | Late May to September | Treat as annual or overwinter cuttings/stock plants indoors |
| Zone 6–7 (Begonia grandis only) | Perennial outdoors | Mulch crowns in autumn; dies back, regrows from tubers in spring |
Soil mixes and containers: what actually works
The number one killer of cane begonias in containers is a poorly draining mix. Their roots need consistent moisture but they sit in stagnant wet conditions very poorly, and root rot sets in fast. I've tested a few different mixes and keep coming back to a blend that UMass Extension and WSU propagation guidelines both support: 2 parts peat (or coir, which is a more sustainable substitute) to 1 part perlite to 1 part vermiculite. WSU Extension's Propagating Plants from Seed recommends peat‑based or soilless mixes and provides tested recipes such as 2 parts peat (or coir) : 1 part perlite : 1 part vermiculite for propagation media WSU Extension's Propagating Plants from Seed recommends peat‑based or soilless mixes and provides tested recipes such as 2 parts peat (or coir) : 1 part perlite : 1 part vermiculite for propagation media.. This balances water retention and air porosity well. For larger outdoor containers where I want a bit more structure, I'll add 10 to 15% fine pine bark to improve long-term drainage and reduce compaction.
Avoid using straight garden soil in containers: it compacts, drains poorly, and often introduces pests and disease. Standard multipurpose compost on its own holds too much water for cane begonias. Always start with a purpose-mixed soilless medium.
Pot types and sizing
Terracotta pots breathe well and help prevent overwatering, which makes them a good match for cane begonias. Plastic pots retain moisture longer, so you water less frequently but need to be more careful about letting the mix dry slightly between waterings. Avoid very deep pots for smaller plants: the lower portion of mix stays wet long after the surface dries.
Commercial production references (including Beekenkamp's Begonia elatior culture sheets) show that small begonia plugs finish well in 4 to 6-inch (10 to 15 cm) pots. For medium cane types in their second year, step up to a 6 to 8-inch (15 to 20 cm) pot. Large specimen cane begonias growing to 90 cm or more are comfortable in 10 to 12-inch (25 to 30 cm) containers. As a rule: choose a pot that's 2 to 3 inches (5 to 8 cm) wider than the current root ball, not dramatically larger.
| Plant Stage | Recommended Pot Size | Notes |
|---|---|---|
| Rooted cutting / liner plug | 4-inch (10 cm) | Use module trays or individual small pots |
| Established small plant (first season) | 6-inch (15 cm) | Step up once roots circle the base |
| Medium cane begonia (1–2 years old) | 8-inch (20 cm) | Good for patio containers |
| Large specimen cane begonia | 10–12-inch (25–30 cm) | Stake canes; ensure drainage holes are unobstructed |
| Hanging basket | 10–12-inch (25–30 cm) basket | Line with coir liner if using open wire basket; plant 3–5 trailing types per basket |
Preparing your planting material before it goes in the ground
Whatever you're starting with, a few minutes of inspection before planting will save you a lot of grief later. Problems that look minor at planting stage, like a yellowing lower leaf or a few sticky patches on a stem, can escalate quickly once a plant is under the stress of being moved.
Inspecting nursery plants
At the nursery or garden centre, turn the pot over and check the drainage holes. If roots are spiralling tightly out of the base, the plant is pot-bound and will need gentle root teasing before planting. Check the undersides of leaves for mealybugs (white, cottony deposits in leaf axils) and spider mites (fine webbing, stippled leaf surface). Check stems for soft, water-soaked sections that might indicate early botrytis or stem rot. Any of these are reasons to either choose a different plant or address the issue before planting.
Inspecting plugs
Plugs (small rooted liners, typically bought in module trays) should have a tight, white-to-cream root system that holds the plug together without being waterlogged or brown and slimy. The stem base should be firm. If plugs arrive by mail and look slightly wilted, give them a gentle watering and let them recover in a bright, sheltered spot for 24 to 48 hours before potting on. Don't plant stressed, wilted plugs directly into larger containers: they're more vulnerable to root rot until they perk up.
Preparing cuttings
If you're starting from cuttings (your own or from a friend's plant), cut stems that are healthy, firm, and show no signs of disease. Remove any flower buds: you want the cutting's energy going into roots, not blooms. Let the cut end callous for 30 to 60 minutes in a shaded spot before dipping or sticking, which helps reduce disease entry at the wound. Propagation studies and industry guidance report successful rooting using foliar or dip applications of auxin (IBA or K‑IBA), with typical K‑IBA rates of about 80–200 ppm for annual/bedding begonias and up to a few thousand ppm for more difficult-to-root crops blank" rel="noopener noreferrer">typical K‑IBA rates (80–200 ppm for annual/bedding begonias; up to a few thousand ppm for difficult crops).
Planting step by step
The method varies slightly depending on whether you're planting from a plug, a nursery pot, or a bare-root cutting, so I'll walk through each.
Planting from plugs
- Fill a 4-inch pot with your prepared mix (2 parts coir/peat: 1 part perlite : 1 part vermiculite) to about 1 inch (2.5 cm) from the rim.
- Make a small hole in the centre with a pencil or dibber, wide enough to take the plug without compressing the root ball.
- Set the plug so the top of the root ball sits level with the surrounding mix surface. Do not bury the stem base deeper than it was in the plug tray.
- Firm gently around the base to eliminate large air pockets, but don't compact the mix.
- Water lightly from above, then allow excess to drain freely. Do not let the pot sit in standing water.
- Place in bright filtered light (not direct afternoon sun) for the first week while the plant adjusts.
- Begin a dilute liquid feed (quarter-strength balanced fertiliser) after 2 weeks, once the roots have started to establish.
Planting from nursery pots
- Water the nursery plant thoroughly 1 to 2 hours before transplanting: moist root balls hold together better than dry ones.
- Prepare the new container with fresh mix and create a planting hole slightly wider than the root ball.
- Remove the plant from its nursery pot, gently tease apart any tightly circling roots at the base.
- Set the root ball so its top surface sits level with the surrounding mix. Planting too deep buries the stem base and encourages rot.
- Backfill around the root ball, firm gently, and water in thoroughly.
- For outdoor bed planting, space cane begonias 45 to 60 cm (18 to 24 in) apart to allow air circulation.
Staging tips for hanging baskets
For a full-looking hanging basket from early summer, plant trailing begonias in late April to early May under cover (in a greenhouse or bright indoor space), then stage them outside after your last frost date. Use 3 to 5 plants per 12-inch (30 cm) basket. Position plants at slightly different angles around the basket rim so stems trail outward and downward naturally. This gives a cascading effect within a few weeks of the stems growing out.
Propagate your own or buy plugs: a realistic comparison
This is a decision I genuinely go back and forth on every season, so let me be straight with you about the trade-offs.
Buying plugs
Buying plugs from a reputable nursery or mail-order supplier is the lower-risk, lower-effort option. You get plants that are already past the vulnerable early germination stage, typically disease-free, and ready to pot on. Plug trays arrive in late winter to spring (usually February to April in the UK and northern US zones), which aligns well with getting plants established for a May or June outdoor display. The cost per plant is higher than propagating your own, but the time saved and reliability are worth it for many gardeners, especially beginners.
Propagating from stem cuttings
NC State and UF/IFAS both recommend stem cuttings 2 to 4 inches (5 to 10 cm) long for cane and angel wing types. The protocol is well established and home gardeners can achieve good results with a little care. Expected rooting time is 2 to 4 weeks under warm (70 to 75°F / 21 to 24°C), humid conditions. Here's the step-by-step:
- Take a cutting 2 to 4 inches (5 to 10 cm) long just below a leaf node, using a clean, sharp blade.
- Remove the lower leaves, leaving 1 to 2 leaves at the tip.
- Allow the cut end to dry for 30 to 60 minutes.
- Optional but helpful: dip the cut end in a rooting hormone powder or solution. Research on begonia cuttings supports using IBA (indole-3-butyric acid) at around 80 to 200 ppm (in K-IBA solution) for soft annual and bedding begonia types, which translates to a light powder dip or a low-concentration liquid dip at these concentrations. Standard off-the-shelf rooting powders (typically labelled for softwood cuttings) fall in this range and work well.
- Insert the cutting 1 to 1.5 inches (2.5 to 4 cm) deep into a moist propagation mix (equal parts perlite and peat/coir works well).
- Cover with a clear humidity dome or plastic bag to maintain high humidity (80 to 90%).
- Place in bright filtered light at 70 to 75°F (21 to 24°C). Bottom heat from a propagation mat speeds rooting.
- Check after 2 weeks for resistance when gently tugged: resistance means roots have formed. Most cuttings root fully within 3 to 4 weeks.
- Once rooted, harden off by gradually increasing ventilation over 3 to 5 days before potting on.
Which option makes more sense for you
If you already have a healthy stock plant to take cuttings from (perhaps a cane begonia you overwintered), propagating your own is cost-effective and satisfying. If you're starting from scratch, buying plugs in late winter gives you a head start. The main risk with home propagation is botrytis (grey mould) in the high-humidity environment: good air circulation in the propagation dome and not overwatering the mix are your main defences.
| Factor | Buy Plugs | Propagate from Cuttings |
|---|---|---|
| Cost per plant | Higher (£0.50–£2+ per plug) | Lower (near zero if you have stock) |
| Time investment | Low: pot on and grow | Moderate: 4–6 weeks from cutting to rooted liner |
| Reliability | High: professionally propagated | Moderate: depends on humidity and temperature control |
| Timing flexibility | Fixed by supplier delivery windows | Flexible: take cuttings when stock plant is ready |
| Risk of disease introduction | Low if from reputable source | Low if cutting is taken from healthy plant |
| Best for | Beginners, large quantities, first season | Experienced gardeners, overwintered stock plants, cost saving |
Watering, feeding and humidity through the growing season
Cane begonias want consistently moist (not wet) soil during active growth. The standard advice of 'water when the top inch of soil is dry' is a reasonable rule of thumb, but I'd refine it: in summer heat, check containers daily. The mix should feel damp an inch below the surface but not soggy. In autumn and winter, when growth slows down, reduce watering significantly, allowing the top 2 inches (5 cm) to dry between waterings.
Humidity matters too. Cane begonias prefer relative humidity of 50% or above. In dry indoor environments (especially in winter with central heating), low humidity causes leaf edge browning and increases spider mite pressure. Grouping plants together, placing pots on a pebble tray with a little water, or running a small humidifier nearby all help. Avoid misting directly onto the leaves: wet foliage in still air is an invitation for botrytis.
For feeding, I use a balanced liquid fertiliser (such as a 20-20-20 or equivalent NPK) at half the label rate every 2 weeks during the growing season (April to August). From September, I switch to a low-nitrogen, higher-potassium feed (such as a tomato fertiliser) once a month to harden growth before autumn. I stop feeding entirely through winter for plants that are resting. Overfeeding, especially with high nitrogen, pushes lush soft growth that's more susceptible to disease and less floriferous.
Pruning and training cane begonias
Left unpruned, cane begonias get leggy: long, bare canes with foliage only at the tips. Pruning keeps them compact, encourages branching, and triggers new flowering growth. The best time to prune is late winter or early spring (February to March in most temperate zones) just before growth resumes, or immediately after a flush of flowers.
Cut stems back by up to one third to one half of their length, always cutting just above a leaf node (the slightly raised point where a leaf joins the stem). Use a clean, sharp blade and make cuts at a slight angle to discourage water sitting on the cut surface. You can take even more aggressive action on an old stock plant: cutting back to 15 to 20 cm (6 to 8 inches) from the base will often regenerate a much bushier plant from the base within 4 to 6 weeks.
For tall cane types growing as indoor or patio specimens, add a bamboo cane or two to support the main stems and tie loosely with soft plant ties. This prevents the most common mechanical damage: stems snapping at the base in wind or when the plant is knocked.
Overwintering: bring indoors, cut back, or start fresh
In USDA zones 9 to 11, cane begonias are essentially perennial and need no special winter treatment beyond slightly reduced watering. In zones 6 to 8, you have three practical options: bring the whole plant indoors, overwinter a stock plant with a hard cutback, or take cuttings in late summer and discard the parent.
Bringing the whole plant indoors works well if the plant is a manageable size. Move it before night temperatures consistently drop below 50°F (10°C), typically 2 to 4 weeks before your average first frost date. Check thoroughly for pests before it comes inside (especially mealybugs and spider mites) and quarantine it for 1 to 2 weeks away from other houseplants. Reduce watering and stop feeding. Place it in your brightest window. Expect some leaf drop as it adjusts to lower indoor light, which is normal.
If the plant is too large to bring in conveniently, the late-summer cutting option works very well. Take 3 to 5 cuttings in August, root them using the method above, and overwinter the small rooted plants on a windowsill. This also gives you a fresh, vigorous start in spring without carrying a large, potentially tired stock plant through winter.
Diagnosing and fixing common problems
Most problems with cane begonias trace back to one of three root causes: too much water, wrong light, or pests introduced on new plants. Here's how to identify and address the most common issues.
Powdery mildew
White, powdery patches on the upper surface of leaves, usually starting on older leaves. Caused by poor air circulation and low humidity (counterintuitively, powdery mildew thrives in dry air with poor ventilation, not wet conditions). Action: improve air circulation around plants, remove affected leaves, and apply a dilute solution of potassium bicarbonate or a sulphur-based fungicide. Avoid overhead watering. Some cane cultivars are more susceptible than others, which is worth noting when choosing varieties.
Botrytis (grey mould)
Grey, fuzzy mould on stems, flowers, or leaves, often following periods of high humidity and cool temperatures. Most common in autumn and in propagation setups. Action: remove all affected material immediately, improve ventilation, reduce humidity slightly, and avoid wetting foliage. A copper-based fungicide can help in severe cases, but good cultural practice is more effective long-term.
Root rot
Soft, brown or black roots, wilting even when the soil is wet, and a sour smell from the potting mix. Almost always caused by overwatering and/or poor drainage. Action: unpot the plant, remove all rotted roots with clean scissors, dust cuts with sulphur powder or cinnamon, repot into fresh dry mix, and hold off watering for several days. Prevent by using a fast-draining mix and pots with large drainage holes.
Mealybugs
White, cottony clusters in leaf axils and along stems. These sap-sucking insects weaken plants and excrete honeydew, which leads to sooty mould. Action: dab individual colonies with a cotton bud dipped in 70% isopropyl alcohol, or spray the whole plant with insecticidal soap. Repeat every 5 to 7 days for 3 to 4 treatments. Mealybugs spread easily to other houseplants, so isolate affected plants immediately.
Spider mites
Fine webbing on the undersides of leaves, stippled or bronzed leaf surfaces, and rapid leaf drop in severe infestations. Spider mites thrive in hot, dry conditions, which is why good humidity is a preventive as much as a growing requirement. Action: wash plants thoroughly with a strong stream of water, increase humidity, and apply insecticidal soap or neem oil spray to the undersides of leaves. Repeat every 5 to 7 days. In dry indoor winter conditions, a small humidifier near the plants is one of the best preventive measures.
| Problem | Key Symptom | Likely Cause | First Action |
|---|---|---|---|
| Powdery mildew | White powder on leaf surfaces | Poor air circulation, dry air | Improve ventilation; apply potassium bicarbonate |
| Botrytis | Grey fuzzy mould on stems/flowers | High humidity, cool temps, wet foliage | Remove affected parts; improve airflow |
| Root rot | Wilting despite wet soil; sour smell | Overwatering, poor drainage | Unpot, trim roots, repot in fresh mix |
| Mealybugs | White cottony deposits in leaf axils | New plant introduction; warm indoor air | Isolate; treat with alcohol or insecticidal soap |
| Spider mites | Fine webbing; stippled bronze leaves | Hot, dry conditions | Water wash; increase humidity; neem oil spray |
| Leaf scorch (bleached patches) | Pale or brown patches on leaf surface | Too much direct sun | Move to brighter indirect location |
| Leggy, sparse growth | Long bare stems, few leaves at tips | Insufficient light or lack of pruning | Increase light; prune back by one third |
Seasonal timeline at a glance
Timing varies by zone, but this gives you a practical framework. Adjust forward or back by 2 to 4 weeks based on your NOAA last-frost and first-frost dates.
| Month (Temperate Zone 7–8) | Task |
|---|---|
| January–February | Take cuttings from overwintered stock plants; order plugs |
| March | Pot on rooted cuttings; start plugs in 4-inch pots under cover |
| April | Step up to 6-inch pots; begin half-strength feeding |
| May (after last frost) | Move outdoor plants outside; plant up hanging baskets and beds |
| June–August | Full feeding schedule (every 2 weeks); water daily in heat; deadhead spent blooms |
| September | Switch to low-nitrogen feed; take late cuttings for overwintering stock |
| October (before first frost) | Move container plants indoors; stop feeding; reduce watering |
| November–December | Overwinter stock plants in minimal light at 55–60°F (13–15°C); water sparingly |
A note on related begonia types
If cane begonias have sparked your interest in the wider group, there are a few closely related growing challenges worth exploring separately. Growing bedding begonias outdoors involves a different soil preparation and spacing approach to cane types. Trailing begonias in hanging baskets have their own watering demands that differ from pot-grown cane types. For specific guidance on trailing varieties and hanging-basket care, see how to grow trailing begonias (resource ID 0f429f13-fa0b-4bdf-b895-6d1ead6bdc81). And if you're interested in indoor winter colour, Rieger begonias operate on a short-day flowering cycle that calls for specific light management quite different from what works for cane types. For specific light and cultural details, see our guide on how to grow Rieger begonias. Each of those has enough specific nuance to justify its own deep dive. For a practical beginner's walkthrough, see how do I grow begonias.
FAQ
What categories of authoritative sources are essential for a practical, step-by-step cane begonia guide?
Use a mix of: (1) botanic/registry authorities for cultivar names and classification (American Begonia Society, RHS Plant Finder); (2) university extension publications for culture, propagation, pest/disease management, and regional timing (UF/IFAS, NC State, WSU, Clemson, UMass); (3) government climate/hardiness data for frost and overwintering decisions (USDA Plant Hardiness Zone Map, NOAA/NWS frost climatology); (4) peer‑reviewed or industry studies for measurable production parameters (light/PPFD/DLI, rooting times, auxin efficacy); (5) commercial grower/seed‑plug tech sheets for practical crop schedules, pot sizes and plug‑to‑finish timelines; (6) integrated pest management (IPM) and pesticide label sources for safe, legal treatment options (extension IPM pages, EPA label databases); and (7) reputable botanic garden/species pages for species‑level hardiness and performance (Missouri Botanical Garden, Brooklyn Botanic Garden).
What specific datasets and numeric references should be included to make schedules and decisions actionable?
Include: (1) USDA hardiness zones and zone‑by‑zone overwinter recommendations for key species (e.g., Begonia grandis tolerance ranges); (2) local last‑frost / first‑frost date tables (NOAA/NWS averages or USDA climate normals) to convert calendar schedules into regional transplant windows; (3) rooting timelines (typical 2–4 weeks under warm/humid conditions) and expected weeks‑to‑finish from plug sizes (from grower tech sheets); (4) light targets expressed as PPFD and DLI ranges for habitat types (e.g., bright indirect ~50–150 µmol·m⁻²·s⁻¹, DLI ~5–15 mol·m⁻²·day⁻¹ where research allows); (5) recommended IBA/K‑IBA concentration ranges (report ppm ranges from propagation literature, e.g., ~80–200 ppm for bedding/annual begonias, higher for difficult crops) and application methods; (6) container sizing rules (finish pot sizes: 4–6" for single bedding begonias, larger for cane/hanging baskets with recommended plug counts); and (7) sample fertilizer rates/schedules (N‑P‑K concentrations, frequency for liquid feeds vs slow‑release, from extension and tech sheets). Cite original sources for each numeric value.
Which peer‑reviewed or experimental studies are important, and why?
Prioritize studies that quantify plant responses or propagation outcomes: (1) light/LED supplementation trials that report PPFD/DLI effects on flowering and foliage (to translate into indoor/greenhouse light targets); (2) propagation/rooting trials evaluating auxin (IBA) concentrations and methods (to give safe ppm ranges and expected rooting success rates); (3) substrate/soilless media studies comparing water retention and aeration (to support specific mix recipes); and (4) pest/disease pathology articles detailing biology and environmental drivers (e.g., powdery mildew, botrytis, root rot) to underpin diagnosis and cultural controls. Use these to provide evidence‑based, quantitative recommendations rather than only qualitative advice.
What extension and grower technical sheets are needed for stepwise culture, container, and plug schedules?
Collect extension crop pages and commercial tech sheets that include: (1) plug size → weeks‑to‑finish charts and recommended plug counts per pot (Beekenkamp/InBlume tech sheets, commercial breeder guides); (2) potting‑mix recipes tested by extension programs (UMass, WSU, UFL); (3) planting depth and transplant handling guidelines for plugs, cuttings and tubers (extension/nursery tech sheets); (4) fertilization and irrigation schedules (university and commercial production guides); and (5) recommended container sizes and hanging basket set‑ups with media volumes and drainage requirements. These are required to produce exact, stepwise planting and finishing protocols for home gardeners.
What pest, disease, and IPM references must be cited for troubleshooting and treatments?
Use university extension pest pages, peer‑reviewed pathology overviews, and official pesticide labels: (1) extension fact sheets for diagnosis and non‑chemical controls (NC State, UF/IFAS, Clemson); (2) IPM guides describing thresholds, monitoring and biological controls (state IPM programs); (3) pesticide product labels and EPA registrations for recommended active ingredients and safe use rates (always quote label as legal authority); and (4) peer‑reviewed sources on pathogen lifecycles (Botrytis, powdery mildew, Phytophthora/Pythium) to support cultural prevention steps (airflow, watering practices, sanitation). Emphasize cultural and non‑toxic options first, then label‑approved chemical or biological treatments.
What climatology and phenology resources are required to produce regional, seasonal timelines?
Include: (1) NOAA/NWS frost & freeze climatologies and local forecast pages for average last/first frost dates and freeze risk; (2) USDA hardiness zone maps (2023 update) for minimum temperature guidance; (3) state extension planting calendars and local growing‑degree‑day (GDD) recommendations where available; and (4) phenology resources or regional extension notes that indicate local cues (soil temperature thresholds for transplanting, e.g., soil consistently >55°F for warm‑season begonias). Use these to convert a generic calendar into zone‑ or climate‑specific timelines for planting, pruning and overwintering actions.
Next Article
How to Grow Cascading Begonias: Step-by-Step Care Guide
Step-by-step care for cascading begonias, from correct ID and light to watering, training, pest control, and overwinteri