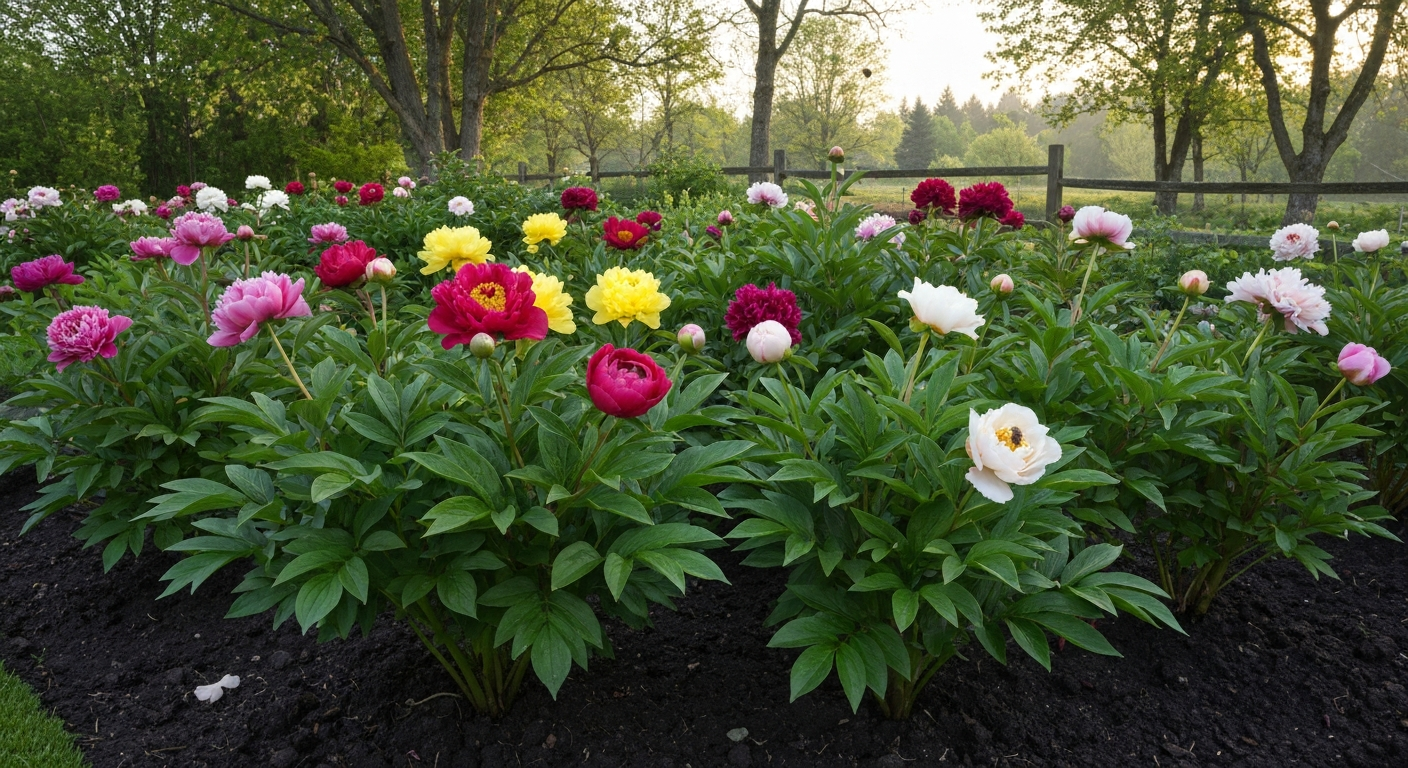
Peonies absolutely can grow in Australia and New Zealand, but they need one thing most of our climate doesn't hand us for free: winter cold. Get that sorted, through smart site selection, the right cultivar choice, or a little pre-chilling assistance, and you can grow fat, fragrant blooms that rival anything you'd see in an English cottage garden. This guide walks you through every step, from picking the right spot to harvesting stems for the vase, with timing and measurements calibrated specifically to southern hemisphere conditions.
How to Grow Peonies in Australia: Regional Guide & Care

Harriet Whitmore
18 Jul 2026
Who this guide is for
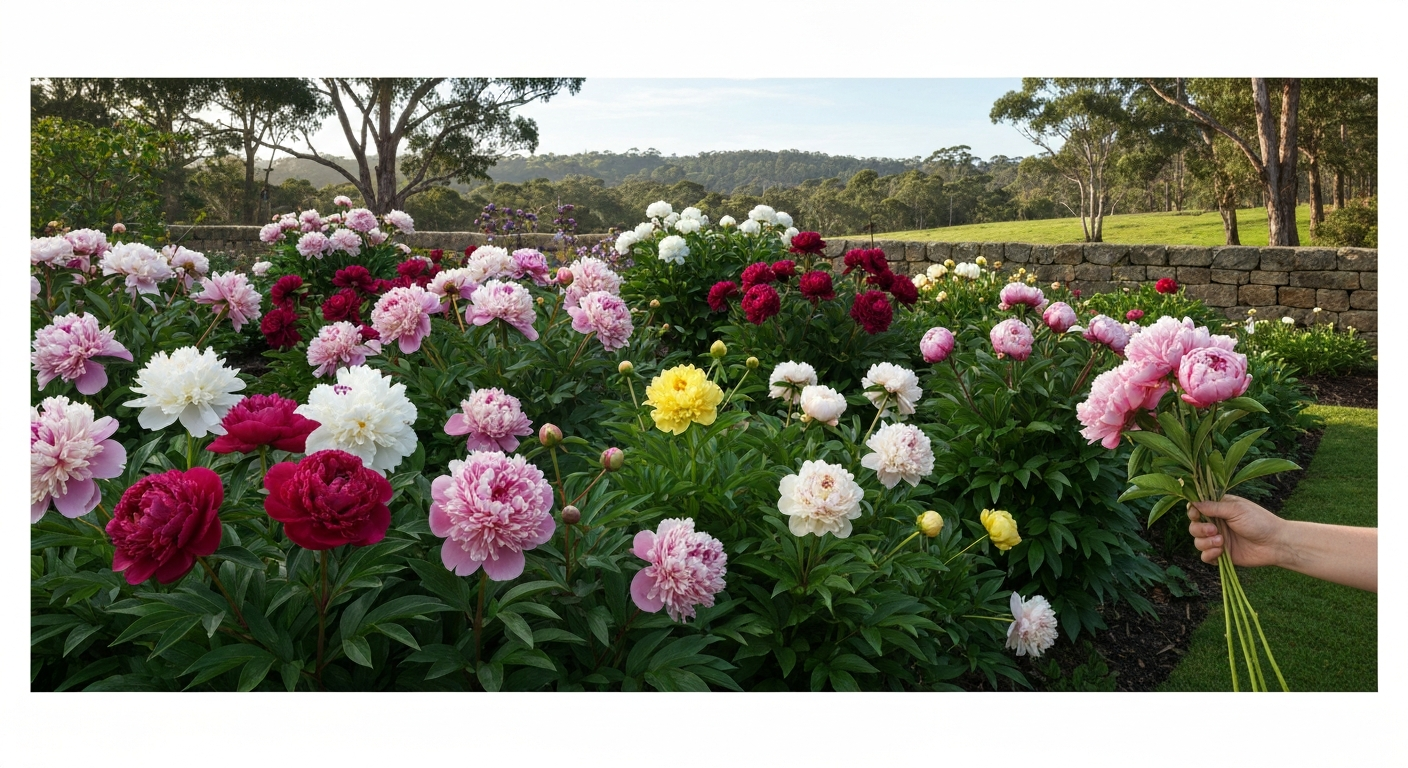
Whether you're in cool, frost-reliable Tasmania, the temperate hills of Victoria or South Australia, the South Island of New Zealand, or somewhere warmer where you're not sure peonies will perform, this guide is written for you. I've tailored every planting date, soil tip and cultivar recommendation to AU/NZ conditions, not the northern hemisphere calendars that dominate most peony content online. If you've tried peonies before and been disappointed by a plant that sat there for three years and never flowered, the chances are high that a chill problem, a planting-depth mistake or a drainage issue was the culprit. We'll fix all of that here.
Will peonies grow where you live?
The honest answer is: it depends almost entirely on how cold your winters get, and for how long. For gardeners in very cold or very different chill regimes, see our guide on how to grow peonies in Alaska for techniques adaptable to extreme or non-standard winters. Peonies need a period of dormancy triggered by cold temperatures, a concept measured as 'chill hours' (the number of hours below about 7°C accumulated over winter). Research on Paeonia lactiflora cultivars puts the minimum threshold for reliable flowering at roughly 500–670 chill hours, with optimal performance around 672 chill hours (approximately 856 Chill Units in the Utah model). That's a specific number, not a vague 'they need cold winters' statement, and it matters when you're working out whether your garden makes the cut.
In practice, the regions of Australia and New Zealand that accumulate enough chill hours for peonies to flower reliably without intervention are: Tasmania (almost all of it), alpine and tablelands areas of Victoria and NSW, the Adelaide Hills and southern Mount Lofty Ranges, the Stirling Range and southern parts of WA, and New Zealand's South Island plus elevated parts of the North Island such as the Central Plateau, Hawke's Bay hills and Wairarapa. The Bureau of Meteorology's frost day maps confirm that areas in these zones regularly experience the cold winter nights peonies need. New Zealand national climate projections provide high-resolution modeled data (including frost days and temperature normals) usable to estimate chill accumulation and last/first frost dates: New Zealand Climate Projections Dataset – Climate Projections Data. Coastal Sydney, Brisbane, Perth's Swan Coastal Plain and most of subtropical Queensland and northern Australia simply don't accumulate enough chill, at least not without significant intervention.
| Region | Typical chill hours | Peony viability | Notes |
|---|---|---|---|
| Tasmania (most areas) | 700–1000+ | Excellent | Most reliable region in Australia |
| Victoria highlands / ACT / southern tablelands NSW | 500–800 | Good to excellent | Frost reliable; ideal for herbaceous and Itoh types |
| Adelaide Hills / Mt Lofty Ranges | 400–650 | Good | Choose lower-chill cultivars; avoid coastal plains |
| Southern WA (Stirling Range, Great Southern) | 350–550 | Moderate to good | Select lower-chill cultivars |
| NZ South Island (Canterbury Plains, Otago, Southland) | 700–1000+ | Excellent | Some of the best peony-growing conditions in Australasia |
| NZ North Island highlands (Central Plateau, Hawke's Bay hills) | 400–600 | Good | Monitor chill accumulation; use lower-chill cultivars |
| Coastal Sydney / Melbourne bayside | 200–350 | Poor | Pre-chilling required; results inconsistent |
| Brisbane / subtropical and tropical regions | < 200 | Very poor | Not recommended without refrigerated pre-chilling |
Types of peonies, which one suits your garden?
There are three main types to choose from, and they behave quite differently in AU/NZ gardens. Understanding the differences will save you from expensive mistakes.
Herbaceous peonies (Paeonia lactiflora and hybrids)
These are the classic garden peonies: they die back completely to the ground each winter, then shoot up fresh foliage and blooms in spring. They're the most widely available type in AU/NZ nurseries, generally the most cold-hardy, and the easiest to grow in cool-climate gardens. Most commercial cultivars sold in Australia and New Zealand are herbaceous types. They're also the ones most likely to disappoint in warmer gardens because they have firm chill requirements.
Tree peonies (Paeonia suffruticosa and related species)
Tree peonies are woody shrubs that retain their stems year-round, growing to around 1–2 m tall over time. They flower earlier in spring than herbaceous types and can be more tolerant of slightly milder winters, which makes them an interesting option for gardeners in the warmer end of the suitable range. They're slower growing, more expensive, and need a few years to establish properly, but the blooms are extraordinary. They do best with some afternoon shade in Australian summers.
Itoh (intersectional) peonies
Itoh peonies are hybrids between herbaceous and tree peonies. They behave like herbaceous types (dying back in winter) but produce multiple stems of large blooms per plant, often with better heat tolerance than straight lactiflora cultivars. In AU/NZ gardens, Itohs are worth seeking out if you're in a region with marginal chill accumulation, as some cultivars cope with warmer winters better than most lactifloras. They're pricier and less common in local nurseries, but increasingly available through specialist growers.
Cultivar recommendations for southern Australia, Tasmania and New Zealand
Not all cultivars need the same amount of cold. Research has confirmed that some cultivars, particularly certain Chinese lactiflora varieties, have measurably lower chill requirements and can flower well in sites that would leave standard cultivars sulking. Here are reliable choices I'd recommend for AU/NZ gardens, grouped by climate suitability.
| Cultivar | Type | Climate suitability | Notes |
|---|---|---|---|
| Sarah Bernhardt | Herbaceous | Cool-climate (Tasmania, NZ South Island, Victorian highlands) | Classic pink, highly fragrant; performs best with reliable chill |
| Bowl of Beauty | Herbaceous | Cool to moderate | Anemone form, soft pink with cream centre; widely available in AU/NZ |
| Karl Rosenfield | Herbaceous | Cool-climate | Deep red, strong stems; good cut flower; needs solid chill accumulation |
| Festiva Maxima | Herbaceous | Cool-climate | White with crimson flecks; one of the most frost-tolerant cultivars |
| Hang Baishao | Herbaceous (lactiflora) | Moderate chill (lower-chill option) | Documented lower chilling requirement (~504–672 chill hours); good for marginal sites |
| Paula Fay | Herbaceous hybrid | Cool to moderate | Single pink blooms; earlier-flowering; good in southern Australian gardens |
| Bartzella | Itoh (intersectional) | Moderate to cool | Yellow blooms; better heat tolerance than most lactifloras; excellent for NZ North Island hills |
| Cora Louise | Itoh (intersectional) | Moderate to cool | White with lavender flares; strong grower; suitable for Adelaide Hills and NZ |
| Shima Nishiki | Tree peony | Moderate chill tolerance | Red-and-white striped; woody; suits warmer end of the suitable range |
| High Noon | Tree peony | Moderate chill tolerance | Yellow semi-double; one of the more heat-tolerant tree peonies |
For the best results in Tasmania and the NZ South Island, almost any well-regarded herbaceous cultivar will work. In Adelaide Hills, southern WA or the NZ North Island highlands, prioritise lower-chill cultivars like Hang Baishao, Itoh types and early-blooming hybrids. Avoid planting standard lactifloras in warm coastal gardens unless you're willing to pre-chill the roots before planting.
Choosing the right site in your garden
Peonies want at least 6 hours of direct sun per day, ideally morning sun with some protection from harsh afternoon heat in summer. In Australia's hotter inland areas, a position with dappled afternoon shade can genuinely extend bloom time and reduce heat stress on the flowers. Avoid planting under or near large trees, the root competition and reduced light will frustrate your peonies indefinitely. I've made that mistake once, and watched a perfectly healthy-looking plant refuse to flower for four years before I moved it.
Wind matters more than most gardeners expect. Peony blooms are large, heavy and fragile, and a strong spring gust can snap stems or shred petals in minutes. A position sheltered from the prevailing wind, a fence, a hedgerow or a building to windward, makes a real difference. In cooler areas, a north-facing or north-east-facing slope (in the southern hemisphere) maximises sun exposure and can help marginally chill-limited sites by slightly reducing summer temperatures at the root zone through better air drainage.
Frost pockets, low-lying areas where cold air pools on still nights, can actually be an advantage in marginal chill zones, as they accumulate more hours below 7°C than surrounding garden areas. Just avoid positions where late spring frosts might catch emerging shoots; a light fleece frost cloth is insurance if you're in a climate with unpredictable late frosts.
Soil preparation and drainage fixes
Peonies are deep-rooted perennials that will live in the same spot for decades if conditions are right. That means your soil preparation before planting is one of the most important investments you'll make. The single non-negotiable is drainage: peonies grown in waterlogged or poorly draining soil will develop root rot, full stop. Free-draining, moderately fertile soil with a pH between 6.5 and 7.0 is the target.
For heavy clay soils, which are common in much of southern Australia and parts of New Zealand, dig the planting hole at least 50–60 cm deep and 50 cm wide. Incorporate a generous volume of coarse grit, perlite or coarse river sand (at least one-quarter of the backfill volume), plus composted organic matter. Do not add fine sand to clay without also adding grit, fine sand and clay can form a concrete-like mixture. If drainage is genuinely poor across your whole garden bed, consider building a raised bed to 30–40 cm above existing soil level, or constructing a simple French drain along the lower edge of the bed. In NZ's heavier volcanic and alluvial soils, the same raised-bed approach applies. I've had the best results using a mix of two parts existing soil, one part coarse grit and one part well-aged compost for backfilling peony planting holes in clay-heavy sites.
- Dig the planting hole at least 50 cm deep and 50 cm wide before adding amendments
- Target soil pH 6.5–7.0; test before planting and adjust with lime (to raise) or sulfur (to lower) as needed
- Incorporate coarse grit or perlite into heavy clay — at least 25% of total backfill volume
- Add well-aged compost (not fresh manure) at roughly 20–25% of backfill volume for organic matter
- For very poorly drained sites, raise beds 30–40 cm above native soil level
- Avoid planting where water pools after heavy rain — even briefly
- Do not add high-nitrogen fertiliser at planting; it promotes leafy growth at the expense of roots and blooms
Planting calendar by region
All dates are in southern hemisphere months. The golden rule is to plant dormant bare-root crowns when the plant is asleep and temperatures are cool enough to promote root establishment before growth begins. Bare-root stock from reputable AU/NZ nurseries and suppliers (including NZ-based peony growers who supply dormant tubers) is typically available from late March to late July.
| Region | Best planting window (bare root) | Notes |
|---|---|---|
| Tasmania | April – June | Earliest planting often most successful; soil still workable before deep frosts |
| Victoria (highlands, Dandenongs, Otways) | April – June | Aim for April–May for best root establishment before coldest months |
| Victoria (coastal and lower elevations) | April – June | Ensure chill accumulation at your specific site before committing to planting |
| Southern South Australia (Adelaide Hills, Fleurieu) | April – June | Choose lower-chill cultivars; plant no later than end of June |
| Southern Western Australia (Great Southern, Stirling Range) | April – June | As above; verify chill hours for your site |
| ACT and southern NSW tablelands | April – June | Frost reliable; plant April–May |
| NZ South Island (Canterbury, Otago, Southland, Nelson) | April – July | NZ commercial growers advise April–July; South Island suits most of this window |
| NZ North Island (elevated: Central Plateau, Hawke's Bay hills, Wairarapa) | April – June | Plant earlier in the window to allow establishment before warmth returns |
| NZ North Island (coastal / lower North Island) | April – May | Marginal; use lower-chill cultivars; consider pre-chilling |
Planting checklist: exact measurements and tools
- Planting hole: minimum 50 cm deep x 50 cm wide
- Planting depth for bare-root crowns: the topmost bud (eye) should sit no more than 2–5 cm below the final soil surface — this is critical; planting too deep is the number one reason peonies fail to flower
- Spacing between plants: 80–100 cm for herbaceous types; 100–150 cm for tree peonies and large Itoh varieties
- Container size for potted peonies: minimum 40–45 cm diameter and at least 40 cm deep (a 40–50 litre pot is appropriate for a single herbaceous peony)
- Soil pH target: 6.5–7.0
- Soil amendment ratio: roughly 2 parts existing soil, 1 part coarse grit, 1 part aged compost
- Fertiliser at planting: a small handful (50–70 g) of low-nitrogen, slow-release fertiliser (e.g., bone meal or a balanced slow-release pellet) mixed into the backfill — do not apply high-N fertiliser
- Tools needed: spade, garden fork, pH meter or test kit, tape measure, coarse grit/perlite, aged compost, watering can or hose, gloves, optional: raised bed timber for drainage-challenged sites
Step-by-step planting: bare-root crowns
Bare-root peony crowns are the most common form sold in Australia and New Zealand. They arrive as a knobby clump of roots with one or more pinkish-red buds (eyes) on top. Handle them gently, those buds are next year's flowers. Commercial bare‑root guidance recommends planting crowns with the buds (eyes) about 2–5 cm below the soil surface and spacing herbaceous peonies roughly 0.8–1.0 m apart, see Paeonia ‘Paula Fay’ Bare Root – planting instructions (Avon Bulbs commercial nursery guidance).
- Soak bare-root crowns in water for 2–4 hours before planting to rehydrate them if they've been in dry storage
- Dig the planting hole 50 cm deep and 50 cm wide; mix your amended backfill as described above
- Mound the prepared backfill at the bottom of the hole to create a firm base for the crown to sit on; this prevents the crown from settling too deep
- Place the crown on the mound with the eyes pointing upward; position it so the topmost eye sits 2–5 cm below the intended soil surface — measure this, don't eyeball it
- Orient the crown so roots spread naturally outward and downward; trim off any broken or mushy root ends cleanly with a sterilised knife
- Backfill gently in stages, firming the soil lightly around the roots to eliminate air pockets — do not compact heavily over the crown
- Water in thoroughly to settle the soil; the crown should end up with 2–5 cm of soil above the highest eye
- Mark the position clearly — dormant peonies are invisible and easily damaged by accidental digging
- Mulch lightly around (not over) the crown with straw or bark; keep mulch 5–10 cm away from the buds to prevent rot
Planting from divisions, containers and seed
Planting divisions
Divisions taken from established plants are planted at the same depth and spacing as bare-root crowns. Aim for divisions with at least 3–5 healthy eyes each; smaller divisions can take longer to establish and may not flower for 2–3 years. The best time to divide and replant in AU/NZ is late autumn (April–May), when the plant has died back but the soil is still workable. I'll go into more detail on dividing older clumps in the rejuvenation section below.
Potting on container-grown plants
Container-grown peonies (as opposed to bare root) can be planted out during the growing season as long as you don't disturb the root ball too much, but autumn planting is still preferable. Use a large pot, 40–50 litres minimum for a single herbaceous peony, filled with a well-draining mix of quality potting mix, extra perlite and a small amount of slow-release fertiliser. Keep the crown at the same depth it was in the nursery pot. More on containers below.
Growing peonies from seed
Seed-grown peonies are a genuinely interesting project, but it requires patience and some careful handling of dormancy. Most Paeonia species have what botanists call morphophysiological (double) dormancy: the seed needs a warm stratification period first (several weeks at around 15–25°C) so the embryo can develop, then a cold stratification period (typically 8–12 weeks at 0–5°C) before the shoot will emerge. Research documents that without correct stratification, seeds may not germinate for multiple years or may fail entirely. Even with correct treatment, seed-grown peonies take 4–7 years to bloom for the first time, and most hybrid cultivars won't come true from seed. Growing from seed is primarily worth it for species peonies, breeding projects, or simply the joy of the process. For a garden peony that blooms in a reasonable timeframe, stick with bare-root crowns or divisions.
Propagation options and timeline to first bloom
| Method | Best timing (AU/NZ) | Difficulty | Expected first bloom | Notes |
|---|---|---|---|---|
| Bare-root crown (established cultivar) | April–June | Easy | 1–3 years after planting | Most reliable; best for beginners; year 3 typically produces full flowering |
| Division of established clump | April–May | Moderate | 2–3 years after planting | 3–5 eyes per division recommended for quicker establishment |
| Container-grown plant | April–June (preferred) or spring | Easy | 1–3 years | Same as bare root but more forgiving of off-season planting |
| Seed (warm + cold stratification) | Sow late summer/autumn | Difficult | 4–7 years | Double dormancy; warm then cold stratification required; cultivars don't come true |
12-month care schedule (southern hemisphere)
| Month | Key tasks |
|---|---|
| January | Midsummer: water deeply every 7–10 days if dry; deadhead spent blooms; watch for heat stress on foliage; keep mulch in place |
| February | Late summer: reduce fertilising; continue watering; foliage may begin to look tired — this is normal |
| March | Early autumn: foliage yellowing and dying back; cease fertilising; reduce watering; prepare any new planting holes |
| April | Mid-autumn: main planting window opens; plant bare-root crowns; divide and replant established clumps; apply a low-nitrogen fertiliser around existing plants as they go dormant |
| May | Mid-autumn to early winter: planting continues; top-dress beds with compost; apply light mulch layer (not over crown); protect pots from sustained waterlogging |
| June | Mid-winter: dormant period; minimal care; check mulch hasn't buried crowns; no watering needed unless extremely dry |
| July | Mid-to-late winter: last chance to plant bare root in most regions; chill hours accumulating; no action required in established beds |
| August | Late winter: first pink shoots may emerge in warmer locations; inspect for Botrytis as growth appears; remove any dead stems from previous season |
| September | Early spring: shoots growing rapidly; apply balanced fertiliser (low-N or slow-release) around plants; stake herbaceous types early while stems are short; water as needed |
| October | Mid-spring: flower buds forming; continue watering and light feeding; watch for aphids on buds; support stems if needed; Botrytis risk peaks in wet weather |
| November | Late spring / main flowering season for most of AU/NZ: harvest blooms; deadhead promptly; continue watering; enjoy — this is what it's all for |
| December | Early-to-mid summer: deadhead any remaining flowers; apply light mulch to retain moisture; reduce fertiliser; water consistently in hot, dry weather |
Seasonal care in detail
Watering
Peonies are drought-tolerant once established (after 2–3 years in the ground), but they need consistent moisture during the growing season, especially as buds are forming in September–October. Deep, infrequent watering is far better than frequent shallow irrigation, aim to wet the soil to 25–30 cm depth, then let the surface dry slightly before watering again. Avoid overhead irrigation: wet foliage and flowers invite Botrytis (grey mould), which is the most common and damaging peony disease in AU/NZ gardens. Drip irrigation or hand-watering at the base is ideal.
Fertilising
Peonies are not heavy feeders, and over-fertilising with nitrogen is one of the fastest ways to get lush foliage and zero flowers. The approach I use: a light application of balanced slow-release fertiliser (or bone meal) in early spring as shoots emerge, and a light potassium-rich feed (like a tomato fertiliser or sulfate of potash) as buds are forming to support flowering. That's it, two modest feeds per year. Stop all feeding by late summer.
Mulching
A 5–7 cm layer of organic mulch (straw, sugarcane mulch or bark) keeps soil moisture stable and moderates temperature, but keep it pulled back from the crown itself. Mulch piled over the crown can prevent enough cold air from reaching the buds during winter, a particular issue in already-marginal chill zones, and it increases the risk of fungal problems at the crown. Apply mulch in early summer to protect roots from summer heat, and in autumn to insulate against freeze-thaw cycles in colder areas.
Staking
Herbaceous peonies produce top-heavy blooms on stems that were not designed for the size of modern cultivars. Stake early, when stems are about 20–30 cm tall in September, rather than trying to rescue flopping plants in November when buds are almost open. Grow-through hoops placed over the emerging clump work best and become invisible as the foliage grows up through them. Individual bamboo stakes tied loosely with soft twine also work well.
Pruning and deadheading
For herbaceous peonies, deadhead spent flowers promptly after blooming (removing them prevents seed energy waste and reduces Botrytis risk). In autumn, once the foliage has yellowed and died back, cut the stems right down to just above the soil level, 5–10 cm maximum. Remove all the cut material from the garden and dispose of it, don't compost it, as it may harbour Botrytis spores. For tree peonies, only remove dead wood; don't cut back healthy woody stems as you would with herbaceous types.
Container and small-garden growing
Peonies can absolutely be grown in large containers, and this option is genuinely useful for gardeners in warm-climate areas who want to control the plant's winter environment more precisely. The key word is large: a minimum 40–45 cm diameter, 40 cm deep pot is the starting point for one herbaceous peony, and bigger is always better. Terracotta pots look beautiful but dry out quickly and can crack in frost; thick-walled plastic or fibreglass containers work well and insulate roots better.
Use a premium potting mix blended with 20–30% perlite or coarse grit for drainage. Container peonies need more frequent watering than in-ground plants during the growing season (check daily in hot weather), and they benefit from monthly liquid feeds with a low-nitrogen fertiliser during the growing season. In winter, move containers to a cool but frost-protected area if you're in a region with severe frosts that could freeze the pot solid; in warmer regions, move them to the coldest spot in the garden to maximise chill accumulation. This is a practical low-chill strategy: you can pre-chill bare-root crowns in a refrigerator at 2–4°C for 6–8 weeks before potting them up and bringing them into a cool position, mimicking a proper dormancy period. Commercial growers in subtropical Australia have demonstrated that refrigerated pre-chilling can successfully trigger dormancy break and flowering in regions with insufficient natural chill.
Troubleshooting pests and diseases
The good news is that peonies don't have a long list of serious pests and diseases in AU/NZ gardens. The bad news is that the one disease they do get, Botrytis, can be devastating if you're not paying attention. Here's what to look for and how to respond.
Botrytis (grey mould)
Botrytis cinerea is the most serious peony disease worldwide, and it's common in Australian and New Zealand gardens during wet spring conditions. It presents as wilting, blackened stems at or near soil level in spring (often killing emerging shoots), or as fuzzy grey mould on buds and petals later in the season. Handbook of Florists' Crops Diseases (chapter: Diseases of Peonies) notes Botrytis is one of the most important peony pathogens worldwide and recommends sanitation, reducing leaf wetness (avoid overhead irrigation, improve spacing) and targeted fungicide programs (examples: chlorothalonil; boscalid+pyraclostrobin; cyprodinil+fludioxonil; fenhexamid). The stems may have brown lesions and topple over. It thrives in humid, still conditions with poor air circulation.
- Prevention: space plants 80–100 cm apart to allow air movement; avoid overhead watering; remove and dispose of all spent foliage in autumn (do not compost)
- Cultural control: remove and destroy any infected tissue immediately; sanitise cutting tools between plants
- Chemical control: fungicides based on active ingredients such as boscalid, pyraclostrobin, cyprodinil+fludioxonil, or azoxystrobin have been used effectively against Botrytis in ornamentals — check with the Australian Pesticides and Veterinary Medicines Authority (APVMA) for currently registered products in Australia, or consult your local garden centre in NZ; always follow label directions and observe withholding periods
- Note: local pesticide registration status changes over time; always verify that any chemical control is currently registered for use on ornamentals in your state or territory before applying
Root rot (Phytophthora and other pathogens)
Root rot is almost always a drainage problem first and a disease problem second. Plants that are sitting in waterlogged soil will develop crown rot, with yellowing foliage, wilting despite wet soil, and a soft, dark crown at or below soil level. There's limited recovery once root rot is established, remove the plant, improve drainage substantially, and replant with fresh stock in a different spot (or a raised bed). Prevention through good drainage setup before planting is everything here.
Aphids
Aphids are common on peony buds and new growth in spring. They cluster on stems and buds, sucking sap and sometimes distorting growth. A strong jet of water will dislodge most infestations. Insecticidal soap sprays are effective and low-impact. Heavy infestations (uncommon on healthy plants) can be treated with a registered insecticide, but note that peonies attract ants that 'farm' the aphids, and the ants themselves don't harm the plant.
Thrips
Thrips are tiny insects that feed inside peony buds and on petals, causing silvery streaking, distortion and browning of flowers. They're more of an issue in warm, dry seasons. Removing and disposing of affected blooms reduces populations. Registered insecticides containing spinosad or other active ingredients registered for thrips control in ornamentals can be used if infestations are severe, again, check current APVMA registration status in Australia or relevant NZ guidelines before applying any chemical.
Coping with limited winter chill and hot summers
If you're in a region on the warm edge of peony-suitable climates, coastal Victoria, lower North Island NZ, the warmer parts of the Adelaide Plains, there are practical strategies beyond simply giving up or hoping for a cold year. For gardeners in cool temperate regions elsewhere (such as Oregon), see a practical guide on how to grow peonies in Oregon for comparable chill-management tips and cultivar recommendations. For gardeners in warmer, continental or marginal-chill areas, see our practical guide on how to grow peonies in Oklahoma for additional strategies on managing chill requirements and summer heat. For contrasting guidance tailored to northern‑hemisphere conditions, see how to grow peonies in Ohio. If you're looking for guidance tailored to northern hemisphere climates with cold winters, see our companion piece on how to grow peonies in Michigan for region-specific timing and cultivar advice. For additional strategies on managing cold winters and maximizing chill accumulation, see our guide on how to grow peonies in Canada. For techniques adapted to warmer US climates, see the guide how to grow peonies in Alabama.
Strategies for low-chill sites
- Choose lower-chill cultivars: varieties like Hang Baishao (documented chilling requirement of approximately 504–672 chill hours), Itoh hybrids and some early-blooming hybrid peonies perform better in marginal chill zones
- Pre-chill bare-root crowns: refrigerate crowns at 2–4°C for 6–8 weeks before the planting window; wrap loosely in slightly damp newspaper or breathable material and check regularly for moisture
- Maximise natural chill: plant in the coldest microclimate in your garden (south-facing slope, frost-pocket area, or a position away from heat-retaining structures like brick walls)
- Grow in containers: pots can be moved to cool areas in winter and even briefly into a cool room or unheated garage on warm winter nights
- Remove mulch from crowns during winter: allowing cold air to reach the crown directly slightly increases chill accumulation
- Manage expectations: even with all these strategies, marginal sites will often produce fewer blooms per plant and less consistent performance year-to-year
Strategies for hot summers
- Plant on the east or south-east side of a structure or tall shrub to provide afternoon shade during the hottest months
- Apply a generous summer mulch layer to keep root-zone temperatures cooler
- Water deeply once or twice a week during heatwaves rather than lightly every day
- Accept that foliage may look tatty by late summer — this is normal, not a disease problem; the plant is preparing for dormancy
- Avoid planting near heat-radiating surfaces such as brick walls, concrete paths or dark fences
Rejuvenating and dividing older clumps
Herbaceous peonies can grow happily in the same spot for 20–30 years or more without any intervention. However, if you notice reduced flowering, overcrowding or simply want to propagate new plants, dividing every 10–15 years is beneficial. The best time in Australia and New Zealand is April–May, as the plant enters dormancy after the foliage dies back.
- Wait until the foliage has fully died back and cut stems down to ground level
- Use a sharp spade to cut a circle about 30 cm from the crown, then lever the whole clump out of the ground carefully
- Wash the roots gently with water so you can clearly see the eyes (buds) on the crown
- Use a sharp, sterilised knife or pruning saw to cut the crown into sections; each division should have at least 3–5 healthy eyes and a good portion of root
- Dust cut surfaces with sulfur powder or a fungicide dust to reduce infection risk
- Replant divisions immediately at the correct depth (2–5 cm over the highest eye) in prepared, well-draining soil; water in thoroughly
- Expect divisions to take 2–3 years to reach full flowering; do not be discouraged if the first year after division produces only foliage
Harvesting blooms and getting the most from cut peonies
Peonies are extraordinary cut flowers, and with the right harvesting technique you can enjoy them in the vase for 7–10 days. Cut stems in the morning when temperatures are cool, choosing buds that are just beginning to open, what's called 'marshmallow stage,' where the bud is soft and squishy when gently squeezed but not yet fully open. Avoid cutting more than one-third of the stems from any one plant in its first 3 years; the foliage left on the plant is essential for building next year's energy reserves.
- Cut stems at a 45-degree angle with sharp, clean secateurs, choosing stems with at least 2–3 leaves below the bud
- Place stems immediately in a bucket of cool water; recut the stems under water if possible
- Remove all foliage that would sit below the waterline in the vase
- Change vase water every 2 days and recut stems by 1–2 cm each time
- Keep the vase away from direct sun, heaters and fruit bowls (ethylene from ripening fruit shortens vase life)
- For prolonged storage (up to 4–6 weeks), wrap cut stems loosely in newspaper and store horizontally in a refrigerator at 1–4°C before conditioning in water — a technique used by commercial growers that works well at home too
Quick reference: planting checklist, regional calendar and propagation timeline
Condensed planting checklist
- Plant bare-root crowns April–June (most AU/NZ regions); April–July in NZ
- Planting depth: topmost eye 2–5 cm below final soil surface — no deeper
- Spacing: 80–100 cm for herbaceous; 100–150 cm for tree peonies and large Itohs
- Minimum pot size for containers: 40–45 cm diameter, 40 cm deep (40–50 L)
- Soil pH: 6.5–7.0
- Drainage: must be free-draining; fix clay or raised-bed before planting
- Sun: minimum 6 hours direct sun daily; afternoon shade helpful in hot inland areas
- Fertilise lightly in early spring and at bud formation; low nitrogen only
- Water at the base; avoid wetting foliage
- Stake while stems are 20–30 cm tall (September in most regions)
- Cut back foliage completely to ground level in autumn; dispose of all cuttings
Regional planting calendar at a glance
| Region | Plant bare root | Shoots emerge | Flowers | Cut back foliage |
|---|---|---|---|---|
| Tasmania | April–June | August–September | October–November | March–April |
| Victoria highlands / ACT | April–June | August–September | October–November | March–April |
| Adelaide Hills / southern SA | April–June | September | November | March–April |
| Southern WA (Great Southern) | April–June | September | October–November | March–April |
| NZ South Island | April–July | August–September | October–November | March–April |
| NZ North Island (elevated) | April–June | September | November | March–April |
Propagation timeline summary
| Method | First significant bloom expected |
|---|---|
| Established bare-root crown (3+ eyes) | Year 2–3 after planting |
| Division (3–5 eyes) | Year 2–3 after replanting |
| Small division (1–2 eyes) | Year 3–4 after replanting |
| Seed (correct stratification) | Year 4–7 from germination |
Growing peonies in Australia and New Zealand is genuinely achievable, but it rewards preparation more than most flowering perennials. Get the planting depth right, sort your drainage before you plant, choose cultivars suited to your region's chill reality, and you'll have one of the most spectacular flowers in the garden producing reliably for decades. The first time you cut an armful of fragrant, dinner-plate blooms from your own garden, you'll understand why peony growers the world over say the wait is completely worth it.
FAQ
What climate and chill data are required to build region-specific planting calendars for Australia and New Zealand?
High-resolution local climate normals (monthly temps, frost days, chill accumulation) from BOM (Australia) and NIWA (New Zealand); climate-zone maps/classifications from BOM; historical frost/last-frost and first-frost dates; gridded or station data to calculate chill models (UT or other validated models). Use these data to map where sufficient winter chill exists for target cultivars and to time planting windows and protective measures.
Which chill‑requirement models and cultivar chill data should be used to assess peony suitability?
Use an evidence-backed chill model validated for Paeonia at low latitudes (the Utah/UT model is supported by peer-reviewed trials). Compile cultivar‑specific chilling requirement (CR) numbers from peer‑reviewed studies (e.g., 'Hang Baishao', 'Meiju') and experimental reports. Apply defined start/end dates for chill accumulation and report both Chill Hours and Chill Units where possible.
What authoritative sources provide cultivar recommendations and low‑chill cultivar evidence?
Peer‑reviewed studies (Scientia Horticulturae; MDPI; PubMed records) reporting CR measurements, commercial nursery trial reports (NZ/AUS growers), and extension resources. Cite specific cultivar CRs from the literature (e.g., 'Hang Baishao' CR ~504–672 CH / ~856 CU; 'Meiju' validated low‑CR data) and corroborate with local trial results or nursery experience.
What exact planting timing, depth and spacing data are required for a practical planting checklist?
Dormant planting window by region (southern Australia/Tasmania/NZ: typically April–July). Depth: position eyes/buds no more than 2–5 cm (commonly 2–5 cm) below soil surface; container crown depth adjusted to same crown level. Spacing: herbaceous peonies 80–100 cm apart; tree peonies wider (1.2–1.5 m). Include soil pit dimensions, backfill composition (topsoil + compost + coarse sand/gravel for drainage) and final planting elevations relative to finished soil surface.
What soil preparation and drainage fixes must be included for AU/NZ conditions?
Soil testing (pH, structure, organic matter, drainage). Amend heavy clay with gypsum where indicated, incorporate sharp sand/washed coarse sand or pumice and well‑rotted compost to improve drainage and structure, and build raised beds (15–30 cm) or mounds for wet sites. For very poor drainage, install subsoil drains or plant in containers/raised beds to prevent root rot.
Which step‑by‑step propagation protocols and timelines are essential (bare‑root, division, seed, containers)?
Bare‑root/tubers: plant dormant crowns Apr–Jul, eyes 2–5 cm below soil, expect first blooms 1–2 years if established crowns. Division: divide dormant crowns in autumn/winter into pieces with 2–4 eyes for fastest return to bloom (flowering within 1–2 seasons). Seed: follow morphophysiological dormancy protocols—warm stratification (weeks–months at ~15–25°C) then cold stratification (~0–5°C for ~8–12 weeks); expect 2–4 years to first bloom from seed. Containers: use large containers (≥30–40 L), same planting depth, ensure excellent drainage and summer protection; flowering timeline similar to in-ground plants depending on crown size.
Next Article
How to Grow Peonies in Oregon: Regional Guide & Care Steps
How to grow peonies in Oregon: region-specific planting, care, troubleshooting, and best varieties for zones 4–9.